If you are shopping for a new hardwood floor for your home, you have probably noticed the options to either “float” or glue down your hardwood flooring.

But how can you tell which one is better for your space? It depends on several factors which we will cover in this guide.

Below you will find a few of the most important advantages and disadvantages for floating vs glue-down wood flooring. At the end of the article, you can find some of the parameters to help you decide which wood floor method is best for you so you can pick the right product.

Floating Wood Flooring

Traditional wood floors are fastened to the subfloor with nails or glue, but a floating wood floor is made up of planks that lock together like a big puzzle using a tongue-and-groove system.

The flooring “floats” because it isn’t attached to the subfloor, but rather uses its own weight and friction to stay in place.

Installing a floating floor consists of preparing the subfloor, laying down a paper-like moisture barrier layer, and locking together the flooring itself.

Since there are little or no fasteners involved, installation is faster and requires a little less technical skill. So floating hardwood flooring lends itself somewhat to DIY or cheaper professional installation.

Advantages of Floating Wood Floors

  • Easy to Install – The click-together system makes installing a floating floor quicker and much easier than a glue-down floor. You won’t have to worry about selecting and applying glue or other fasteners, which can be difficult, especially if you want to DIY the floor. Even if your floating flooring requires a little glue on the tongue of each plank, this is faster and easier than gluing the floor down.
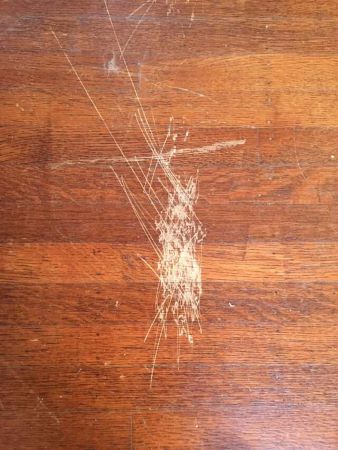
  • Durable – Hardwood flooring that is designed to float in the room is almost always an engineered material. This means it’s made up of several layers of compressed wood that provide upgraded strength over natural hardwood, especially on the finish.
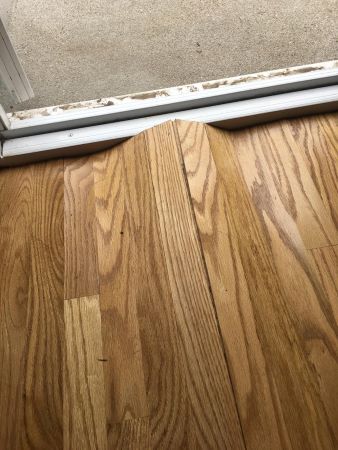
  • Good for Varied Environments – A floating floor leaves a small gap around the edges of the room (which is hidden below the trim). This gap allows the flooring to expand and contract with changing humidity and temperature without causing any problems. If you know you have wide-ranging conditions in your home, floating is a good option.
  • Easy to Remove – If you remodel often or are putting flooring in a rental where you think there may be frequent damage, a floating floor can be nice because you can remove a few planks for repairs or remove the entire floor pretty easily. It’s just a matter of unhooking the locking tongues of the boards.

Disadvantages of Floating Wood Floors

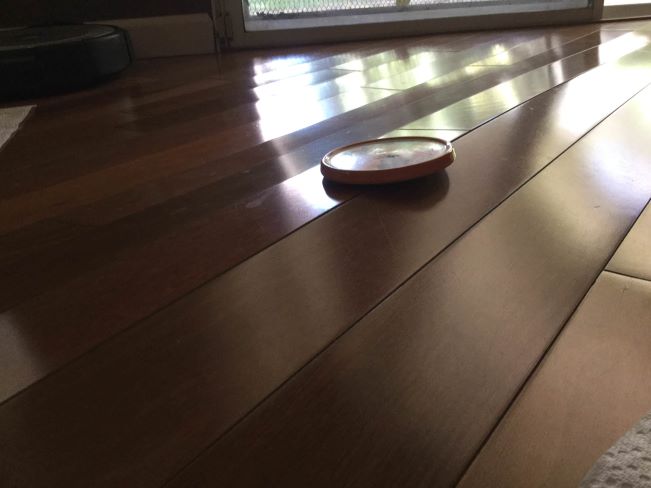
  • Not as Solid as Glue-Down – There is usually a chance for a slightly soft or hollow feel when you walk on a floating wood floor. This happens because the wide puzzle of interlocked boards can flex slightly underfoot. This is mostly a matter of preference. You might notice light pieces of furniture shift slightly over time, especially if you have kids or dogs running around them every day.
  • Not as Stable Under Appliances – Because the floating floor uses its own weight and friction to stay in place, it can cause problems in rooms with heavy appliances (kitchens and laundry rooms). Pushing appliances around could shift the flooring, and the extreme weight could break the locking tongues apart at the edges.
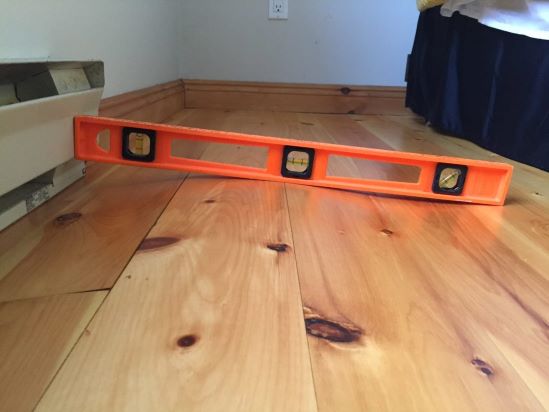
  • Needs a Flat Subfloor – If you are putting hardwood flooring in a room with a slope or where the floor is uneven within the room, you might not be able to float the floor. The floating system relies on a flat surface so the flooring doesn’t slide around. Concrete subfloors that are sloped like a ramp or wooden subfloors that have significant high or low spots will cause a problem.

Glue-Down Wood Flooring

A glue-down floor is actually attached to the subfloor. You can think of it as a more permanent option than a floating floor.

These boards will usually still use a tongue-and-groove system, but the boards won’t actually lock together. This system is just to aid in installation and make the floor more stable.

You might spend a little more money on adhesive for this style of hardwood floor than you would spend on the vapor-barrier paper under a floating floor. Installing a glue-down floor definitely requires more technical skill and more time than an equivalent floating floor.

If you want the ultimate stability and strength from your hardwood flooring, a glue-down model is good for you.

Advantages of Glue-Down Wood Floors

  • Solid Feeling Underfoot – If you’re concerned about the possibility of a hollow or squishy feeling of a floating hardwood floor, you will probably prefer glued flooring. There will be no room for vibration or shifting between the flooring and the subfloor. Every step will feel solid.
  • Good for Uneven or Sloped Rooms – If your home has a hallway that slopes up from one level to another, or if you have a wooden subfloor that has some high or low spots, you need a flooring that will secure directly to the concrete or wood below. This will ensure that the wood does not shift around the room at all.
  • Stays In Place – Glue-Down hardwood floors are a good choice for laundry rooms, kitchens, or other rooms where you will be storing heavy objects like appliances. Since every plank is fastened to the subfloor, no amount of weight on top will shift or damage the hardwood.

Disadvantages of Glue-Down Wood Floors

  • Difficult to Remove – Because every plank will be glued to the floor with a strong flooring adhesive, removing a glue-down wood floor is difficult. After prying and popping up the boards, you will have to spend hours removing the residue from the subfloor. Do not lay a glue-down hardwood floor that you ever plan to remove.
  • Bad for Variable Climates – A hardwood floor that’s fastened with glue will have very limited room to expand and contract when the temperature or humidity vary. Although the glue acts like a moisture barrier to limit these factors, you need to bear in mind that if your house has an extremely unreliable climate, a glue-down floor might not adjust as easily as a floating floor.
  • More Difficult to Install – Glue-down floors require an even coat of the right type of flooring adhesive. It takes some skill to apply it properly, and if you make a mistake it is not a very forgiving process. You should probably not attempt a glue-down wood floor DIY project unless you have some experience with troweled adhesives and flooring.

Should I Float or Glue a Wood Floor?

If you are trying to decide which method to choose for your new hardwood floor, you may find the following parameters helpful. They show the advantages and disadvantages from above in action to help you decide which type of flooring is best for your home.

How Level is the Subfloor?

If you have a concrete subfloor that is uneven or sloped, you likely need to install glue-down flooring so that the wood does not slide around or flex under foot. If you have an uneven subfloor that is made of wood, you can install a floating floor only if you first lay down a layer of thin plywood underlayment to correct the subfloor. This can be an expensive extra step.

Are Variable Temperatures and Humidity a Problem?

Floating hardwood floors can expand and contract as one big piece of wood, and the small gap you leave around the walls when you install them will give the flooring somewhere to go when it expands. Glue-down floors, on the other hand, can only handle very slight variations in climate that will cause the wood to expand or contract.

If you know your house has frequent (major) swings in humidity or temperature, choose a floating floor to accommodate this.

Do You Want to DIY?

Floating flooring is quite a bit simpler to install yourself, even if you don’t have flooring experience. You need fewer tools and technical skills than you do to install a glue-down floor.

Which Floor is the Cheapest?

It can be hard to say which option is cheaper. If the conditions are just right for a floating floor (flat and even subfloor), you will probably save money on labor hours and materials since you don’t need to buy glue. However, if your room is going to require a layer of leveling underlayment plywood, the cost of a floating floor may exceed the glue-down option.

If you own a home with a basement, chances are you’ve thought of putting it to better use. That ping-pong table stopped keeping the kids busy a long time ago and now, all it does is hold up a bunch of boxes. What’s stored inside them is anyone’s guess anymore. 

If the space is truly a basement, there is probably some sort of opening besides the door at the top of the stairs. A transom style window or two. Possibly several of these. If your house is built into a hill, your basement might even have an exit door. Cellars don’t have this. 

As long as there’s some form of egress and it stays dry even during the rainy season, then you’re in luck. Your basement could be an excellent candidate for use as a functional living space. Think home office or maybe a rental unit. 

In this article, we’ll discuss what makes engineered hardwood a good choice for installation over concrete. We’ll also discuss the DIY installation of engineered hardwood and preventive measures to ensure its durability and longevity. 

What is Engineered Hardwood? 

Engineered hardwood planks are constructed in layers. The surface is made of the same wood as a regular wood plank. The surface layer is bonded to a core that’s made of several thin layers of plywood pieces that are crisscrossed and bonded together. There are as many types of engineered wood as there are species of trees. This makes for a wide selection of species and colors.

Is Concrete a Suitable Substrate for Engineered Wood Floors? 

Honestly, it has nothing to do with any kind of fear of commitment; but there’s simply no way to answer “yes” or “no” to this question. So, the answer is; “It depends”. 

It depends largely on the moisture content of the concrete that will be supporting your engineered hardwood floor. You’ll need a concrete moisture meter. Testing is something you can do on your own. Follow your flooring manufacturer’s recommendations to determine if your concrete floor requires a moisture barrier between it and your new floor. 

Also, if you intend to glue your floor, it might help to know that some types of adhesives are also intended as moisture barriers. Because these two-in-one products are still new, they’re in short supply and retailers don’t seem to be able to keep many units of them in stock.  

More importantly, you should know that lack of defense against moisture isn’t merely a  cause of a failed installation. Lack of proactive protection in accordance with the flooring manufacturer’s recommendations is also a cause for a voided warranty.  

Is Engineered Wood Suitable for Installation in a Basement?

The layered construction of its core makes engineered wood especially durable and less prone to expansion and shifting caused by environmental changes. It’s this type of construction that makes engineered hardwood so well suited to challenging environments like bathrooms & basements.

Choosing Between Installation Types For Engineered Wood Floor on Concrete

Most concrete floors require a barrier to protect the installed floor from the moisture they release. Trapped moisture can lead to mold, mildew, loss of adhesion. 

Moisture can also cause a wood floor to warp and it can cause the layers of engineered wood to separate and lift or curl upward. 

Nailed Engineered Wood Floor

To nail floorboards in place, the substrate must be made of wood. This means you’ll need to lay plywood, oriented strand board, or particleboard over the concrete. Again, to protect the wood from moisture contained in the concrete, an underlayment between the concrete and wood subfloor may be required.

Glued Engineered Wood Floor

Unless you intend to use a two-in-one adhesive, that is to say, an adhesive that’s also a moisture barrier, you’ll probably need to pass on this option. Gluing floorboards to the underlayment that sits on the concrete is not recommended. 

Floated Engineered Hardwood Floor

Most engineered wood floors manufactured today are the tongue and groove kind. The boards interlock with one another so that neither glue nor nails are required to keep them in place. By virtue of this interlocking, the boards become a single, large sheet. This sheet sits on top of an underlayment to protect it from moisture that might come up from underneath it. Thus, the floor “floats”.

Between the interlocking capability and the way engineered wood is made, this is the type of installation most recommended for engineered wood over concrete in basements especially. 

It’s also important to consider that a protective underlayment is also an excellent way to muffle sound. This can be a godsend when it comes to basements where sounds tend to echo, amplify, and bounce around. 

Preparing To Install an Engineered Wood Floor on Concrete

Environmental Conditions

Concrete isn’t the only place where moisture can be a challenge. The intended environment of the engineered wood floor should always be paid equal attention. EMC (Environmental moisture content) should be evaluated using an EMC reader.  

If the EMC is higher than recommended by your floor’s manufacturer, measures must be taken to reduce it and to keep it reduced. A dehumidifier is a good way to do this. 

There is also the matter of ambient air temperature. It should be reasonably consistent and it should always measure between 60F and 80F. 

Acclimation

It’s extremely important to put the boxes that contain your new floor inside the room where you plan to install them to allow the boards to acclimate to their intended environment. Some manufacturers suggest removing the boards from the packaging. None advise against it. Depending on the manufacturer’s instructions, the acclimation period is usually two to seven days

Racking

Racking is a term defined as the laying out of the floorboards in advance of the actual installation. Doing this allows for staggered color variations and lengths whereas they might be grouped in one place if installed as they’re pulled from the box. Racking a floor also allows for any defective pieces to be withheld for return to the manufacturer. 

Patching and Leveling

For your concrete slab to function as a subfloor, holes, cracks, and low spots need to be patched. The subfloor also needs to be level for your engineered wood floor to be level. A deviation of 3/16” over a 10’ span is the usual maximum allowable. 

Before taking on the tasks of patching and leveling, the subfloor must be clean and free of loose debris. Nothing dramatic, but if there are any large, greasy, or oily stains, these could cause loss of adhesion. Use a degreasing, grill, or oven cleaning type of solution to eliminate them.  

For holes and large chips in your concrete subfloor, use a self-leveling concrete patching compound. Very carefully follow the instructions on the back of the package. Allow the patching compound to cure completely. 

Once the patching compound has cured, use a level to determine if the floor is level. If any area of the floor is off-level by more than ⅜” over a span of 10’, this will need to be corrected by the leveling process.  

In some cases, the concrete might have several low areas. If you’ve ever wet mopped your concrete floor, these areas evidenced themselves by puddling or being the last to dry. There might even be a white ring around them. These areas are also part of the focus of the leveling process. 

Use a primer and leveling compound to level your concrete floor. As the term suggests, the primer should be applied first as this will ensure adhesion of the leveling compound to the existing concrete. 

Applied with a smooth trowel and a floor squeegee, the leveling compound will also serve to fill small cracks and spalls or chips. 

Again, the importance of following the instructions on the back of the products’ packaging to the letter, can’t be overemphasized. 

Underlayment/Moisture Barrier

If your moisture readings call for it, you’ll need to apply an underlayment with moisture or vapor protection over your now level concrete substrate. These underlayments are available in sheets or rolls, and in thicknesses from 2mm to 6mm. 

Quite candidly, less than 3mm thick won’t affect the moisture blocking aspect, but it won’t have much effect on the noise aspect either. 

Laying The Boards

You’ll Need: 

Determining Gap

The instructions that are packed with your engineered hardwood indicate the size of the gap between your floors and walls. In most cases,  ½” is recommended. 

For some reason, some contractors will tell you to leave a gap between two perpendicular or intersecting walls in a room only. This is incorrect.  

It’s also very foolish. 

If you think about it, wood doesn’t simply decide to expand ½” to the east and north sides of a room only. It expands in all directions. If the floor isn’t gapped on all sides, the side that isn’t gapped will push against the abutting wall and shift the floor toward the gapped side. This makes the floor liable to fold or buckle next to the east and north sides of obstacles such as posts, islands, and doorways. Gapping is why baseboards (skirting) were invented and yes, even if you have cinder block walls, they can be attached. So go ahead and gap your floors on all sides. You’ll be okay. Honest. 

Cutting the Boards

Since you’ve already racked your floors in a way that the end seams are staggered, then you should already know which pieces need to be cut. You’ll also have a pretty good idea of how long the boards should be at each end. 

However, because it isn’t terribly likely that the room isn’t perfectly square, cutting end pieces in advance should be avoided. 

Assuming you’ve decided to float your engineered hardwood floor, it’s best to start fitting the pieces together according to your racking layout. Start from the center of the room and make each of your cuts when it’s time. 

When you’ve determined the precise center point of the room, snap a chalk line in either direction. The lines should intersect forming 90-degree angles. You’ll be using these lines for reference to keep your floorboards aligned. If it appears the pieces that run along either wall will need to be cut to a more narrow width than the instructions allow, you’ll need to remove a board shift and nudge the rest to make things work. Remember, you’re also cutting to allow for a gap. 

By the way, the shifting and nudging thing is part of a floating floor’s charm!

Finishing Your Engineered Wood Floor

Another part of a floating floor’s charm is that now that you’ve snapped in the last board, you don’t need to wait for glue or lacquer to cure and dry. While you were doing your research and shopping for your new floor, you probably discovered that most engineered wood floors are pre-finished. You can walk on your new floor right away. You can also move furniture right away. 

This means you can set up that bar along with the ice bucket and libations. Pull up a stool and raise your glass to yourself for a job well done. 

Aftercare, Maintenance, and Monitoring of Your Engineered Wood Floor

To keep your engineered wood floors look their best:

  • Clean spills immediately
  • Keep your new floor free of dust and debris as these can scratch your floor’s finish
  • Use a good floor vacuum or your vacuum’s floor accessory tool. 
  • Damp mop only using an appropriate cleaning solution
  • Exchange shoes for house slippers upon entering
  • Place throw rugs in high traffic areas
  • Keep furniture from slipping by using furniture cups
  • Place felt pads under chair and barstool feet
  • Lift storage boxes instead of dragging
  • Keep pets’ nails trimmed 
  • Keep potted plants in stands or furniture
  • Monitor the EMC and continue dehumidifying

As you can see, keeping your new engineered wood floors in good condition is more about what to avoid and what not to allow. Upkeep is relatively simple and takes very little time. No one would guess that a floor that looks so good could require so little effort. 

Besides the way it looks, the best thing about your engineered wood floor is the money you saved installing it yourself. Enjoy!

One summer afternoon you come down to lunch and you suddenly notice something is not quite right. When your sports magazine slips from your grasp and you bend to pick it up from the floor, you discover what it is. The smooth glossy hardwood surface seems somewhat uneven, dipping slightly in places. What is it and what could have caused it? Can it be fixed and how?

In this article, we shall be answering all these questions in detail and learning how to fix cupping in hardwood floors to enable you to resolve the problem as efficiently as possible and restore your floors to their initial state.

What Is Cupping in Hardwood Floors?

Cupping in hardwood floors refers to a condition that causes individual planks to rise at the sides. It may be considered to be the opposite of crowning where the center of a plank rises higher than the edges.

In both cases, your floor will lose its even smoothness resulting in its surface becoming irregular. However, in the case of cupping, its planks will take on a concave or cup-like shape hence the name of the condition.

Cupping in wood floors

Causes of Hardwood Floor Cupping

The main cause of cupping in hardwood floors is the presence of excess moisture in the immediate vicinity.

The material from which hardwood floors are made is especially susceptible to moisture due to the tendency of wood to absorb it, particularly when it is present in large quantities to adjust its own moisture levels to match those of its surroundings.

Cupping affects both engineered and solid hardwood and can occur under the following conditions:

  • Spills: If water spills are not cleaned instantly or properly, the fluid will seep into the wood resulting in its swelling and the alteration of its form.
  • Leaks: Because leaks often take a while to detect, they can be especially damaging to hardwood floors due to the prolonged exposure to moisture they cause.
  • Excess subfloor moisture: If your basement or crawl space happens to be affected by dampness, it may cause cupping in the floorboards in the room above.
  • Changes in weather conditions: Certain climates experience rather warm and humid summers and the season can result in elevated levels of moisture and with it the risk of cupping.
  • Improper installation of flooring: Hardwood flooring must be given time to adjust to surrounding moisture levels by means of a process known as acclimating or conditioning, before it is installed. Failure to take this step could result in cupping in a matter of months.

How to Fix Cupping in Hardwood Floors 

It is possible to fix cupping in hardwood floors by taking the following steps:

Ascertaining Moisture Levels

This should be the first step you take before attempting to repair or replace all or part of your flooring or before seeking professional assistance.

This can be done by using a wood moisture meter to check moisture levels in every part of your home.

Conducting due diligence in this regard will enable you to determine moisture levels and their source, and play a key role in enabling you to determine the next step.

Address the Source of the Moisture

Common causes of excess moisture in your home include:

  • Leaking pipes: If the cause of the problem happens to be leaking pipes, you will need to have them repaired.
  • A leaking dishwasher: In the case of this appliance you may need to take a look at its float switch, its gasket, the hoses, the valves, or the door latch. It may even be a matter of using the correct dishwasher detergent or simply ensuring it sits level.
  • A leaking fridge: This may be due to the blockage of the defrost drain or the uneven placing of the appliance. However, if neither of these issues happen to be the cause, professional assistance may be required to resolve the leakages.
  • A damp crawl space:  This may be resolved by placing a vapor barrier to prevent moisture from filling your crawl space. However, you may need to call on the services of a water mitigation professional.

Regulate the Moisture Content of Your Home

This step can be especially effective if the cause of cupping is due to seasonal changes at different times of the year.

You will simply need to use a dehumidifier to eliminate the excess moisture in the air and restore conditions to optimal levels.  Depending on the level of moisture damage in this case and the promptness with which action is taken, you may see your floorboards return to normal.

Related Reading: How To Repair Water-Damaged Hardwood Floors

If the cupping is not reversed once you have taken this step, you may need to proceed to replacing your floor or sanding it.

In either case, you will have the option of relying on professional assistance or replacing or sanding your floor yourself.

Will Cupped Hardwood Floors Flatten Out Over Time?

Depending on the extent of the damage, and the promptness with which the exposure to the excess moisture is stopped, your cupped hardwood floors may flatten eventually.  

It is worth noting that they can take a considerable length of time to do so and as noted above, repairs or sanding should only be carried out once you are certain that cupping is permanent.

Hardwood floors are known for being durable and resilient, but they have one big weakness: water.

Wood flooring can stand up to years of heavy use, but a little water over time can ruin the beautiful hardwood.

Maybe you moved into a house with a damaged wood floor or maybe you have had a flood from the kitchen or bathroom plumbing. If you are noticing stained or warped wood or big gaps between boards, you have water damage.

There are some ways that you can repair water damage you find on your hardwood floors, but sometimes you will need to replace the flooring altogether.

This guide will help you identify the type of damage, find out how to repair water-damaged hardwood floors, and teach you how to prevent future water damage.

How Can I Tell If I Have Water Damage on My Hardwood Floor?

If you recently had a small flood or water leak, you probably know that your wood floor has some water damage.

But if you’re not sure, you can inspect the floor visually for some of the signs of water-damaged flooring.

Wood Floor Staining

Water stains on a wood floor take the shape of an uneven ring that ripples across the wood from the water source. The stains can be either light or dark. Stains with a white outline are easier to repair at home than darker stains, which indicate a complete soaking of the hardwood floor.

Wood Floor Cupping

Cupping is one of the ways that hardwood flooring can warp out of shape when wet. You can identify cupping on your hardwood floor when the edges of the individual boards bend upward and are no longer even with the center part of the boards. It gets its name from the cup or bowl shape each plank takes when the edges rise up. Cupping can also make the gaps between floorboards expand, leaving uncomfortable cracks.

If you want to learn what to do about cupping on your hardwood floor, check out our article on cupping in hardwood floors.

Wood floor crowning

Wood Floor Crowning

Crowning occurs in a similar way to cupping, except the boards warp the opposite way. Crowning floorboards rise up in the middle, creating a bowed or bumpy appearance on each individual board. This is due to the floor pieces expanding and pressing into each other too much. Once the floor dries, it may leave large gaps between pieces.

Wood Floor Buckling

Buckling in wood floors

Buckling is the most extreme type of hardwood water damage. This is when the floor planks are pushed so tightly together that they actually detach from the subfloor. The extreme moisture in the wood causes each floorboard to expand. This can make a large hump in the floor or break the locking tongue-and-groove systems between boards.

Buckling is most likely if your hardwood flooring was installed poorly to begin with or in an extreme flood (such as gallons of water pouring in from a hurricane or a burst pipe).

If you suspect your water damage is so bad that the hardwood floor is buckling, check out our article specifically on buckling wood flooring.

Should You Fix or Replace Water-Damaged Wood Floors?

Once you have water damage on your wood floor, you might wonder if you can get away with fixing the floor instead of paying to replace it. This is especially tempting if your water damage is only a small area of the room.

It may not be safe to live with a water-damaged floor if it was wet enough for mold and other bacteria to grow.

In cases of severe floods or a leak of tainted water (like sewer water), you probably need to replace the whole floor to be safe. These molds or bacteria can be extremely dangerous to live with. Plus, severe leaks can weaken the subfloor and other structural pieces of your home.

If you are concerned that your wood floor may be growing mold, read our article about how to remove mold on a hardwood floor.

If your water damage came from clean water and you are able to dry the floor out completely, you can think about fixing the floor instead.

The problem with fixing hardwood floors is that it can be difficult to match the finish on a repaired section with the original finish.

If the water damage is in an out-of-the-way place or if you can throw a rug over it to hide the difference, repairing it may be a good option. Or, if the hardwood is only in one room of your house, you may be able to refinish the entire floor so it comes out an even color.

Your choice will depend on safety and whether you want to live with a repaired area that may look different than the rest of the floor.

You might consider replacing a section of the hardwood floor with a cheaper and more durable material, like ceramic tile. This is especially common in front of an entry door. You can remove the damaged section of hardwood and install tiles with a neat transition rather than having a section of hardwood that was obviously repaired.

Identifying the Source of the Water

If you find water damage on your hardwood floor that wasn’t there before, you need to be sure where the water came from. The source of the water makes a big difference in the decision of whether you should fix or replace your floors because some water sources may carry harmful bacteria.

What to Do When You Can’t Find The Leak

Sometimes the source of water damage is not obvious. You will want to fix problems before you fix the hardwood flooring so that you don’t have the same damage again on your newly repaired floor.

You can usually narrow water damage in a home down to two categories: external water sources and internal water sources.

External water sources dampen your home through the walls, roof, or foundation. Common external sources include:

  • Overwhelming amounts of water from a storm or flood
  • Overwatering a yard
  • Doors and windows with leaky seals, or that are left open
  • A leaking roof
  • A cracked foundation or inadequate or broken drainage system (sump pump)

Internal water sources come from inside the house. Some common leaks include:

  • Broken plumbing seals, such as radiator pipes or drains under a sink
  • Leaking pipes inside a wall or floor (especially if the pipes have frozen)
  • Failing hot water heaters
  • Soft hoses such as the water supply on a refrigerator or dishwasher (these often get pinched when moving appliances and should be replaced every few years)
  • Overflow from a sink or shower
  • A spilled mop bucket or mopping with too much water

These examples can probably help you find the source of the leak so it can be repaired. If you still have no idea where your water damage is coming from or you suspect it is coming from inside your walls, you probably need to call a plumber.

Is The Water Fresh or Dirty?

The water that stained your floor should fit into one of the following three groups:

  • Clean Water, such as rainwater from an open window, overflow from a sink or tub, or a leaking hot water heater. This water is mostly pure and will carry very few bacteria. Unless the area was wet for several days (enough for mold to grow), this kind of water damage is probably not dangerous.
  • Used or “Gray” Water, such as that from a drainpipe under a sink or shower, has been exposed to some dirt and other waste. If this kind of damage doesn’t dry quickly, it will grow bacteria and mold.
  • Dirty or “Black” Water is tainted water or sewage. This is from a leaking, overflowing, or backed-up septic line. This water is full of dangerous bacteria. You can try to sanitize the wood if it is only a minor leak (1 or 2 liters), but most of the time a black water leak will require replacing the floor. You should wear gloves and a filtering mask when you clean any area damaged by black water.

Identifying the source of the water damage will help you decide whether it’s safe to repair the floor. Of course, this is also the time to correct the problems that allowed water to get onto your floor such as by replacing window seals or calling a plumber to fix a pipe.

How to Fix Water-Damaged Wood Flooring

Depending on how much of the flooring was affected by water damage, you might need to call a professional to repair your water-damaged wood floors. They will be more experienced in sanding and staining the floor evenly. It can be a difficult process, but if you are confident in your DIY abilities, you should be able to pull it off.

After you get the floor completely dry and knock down the warped and water-damaged areas, the process is mostly the same as refinishing a worn-out floor. Feel free to read our other articles on that process, but we will include the steps here.

Step 1: Dry the Floor if it is Still Wet

If your water damage is new, you will need to dry the boards off before you can really assess the damage or make any repairs.

Standing water on the surface can be sucked up with a shop vacuum on wet mode. A squeegee can help push the water toward the vacuum hose.

Then the wood needs time to dry out internally. You can speed this process up by using fans and open windows to ventilate the room. You can also rent or buy a dehumidifier machine.

Be careful not to dry the floor too fast. Applying heat to a wet floor, for instance, can lead to more cupping or crowning. Hardwood needs to adjust gradually to temperature and humidity changes, so stick to natural airflow methods to dry the wood.

Step 2: Check for Extra Floorboards in Storage and Install Them

Usually, flooring installers will leave a few leftover pieces of wood at the house when they put in a floor. If the flooring in your house is decades old, you probably won’t have this luxury, but it doesn’t hurt to look.

A few pieces of flooring may be enough for a flooring installer to remove the damaged boards and replace them with new ones that will match perfectly. This is potentially the easiest way to repair your water-damaged floor, so look around.

Removing the old boards and laying new ones requires experience and the right tools. This is especially true if the wood floor is glued or nailed down. You most likely need a flooring expert to come to your house and replace the boards.

If the match on the finish is close after you install the new boards, this may be all you need to do. If the color difference is really bad, you will want to go on to the refinishing process.

Note that buffing and refinishing the floor will not only be more difficult, but more expensive. You will have to get the tools and supplies to refinish the floor.

Step 3: Sand the Floor

After you place new planks where the damaged ones were, or if you do not have any planks to weave into the floor, you are going to need to sand the flooring.

The right sander for the job is one that is specifically made for flooring. These have a large sanding wheel and a heavy head so that you can sand large areas quickly and evenly. You will probably need to rent it from a hardware store or flooring company.

Use a coarse grit sanding wheel first (around 60-80 grit) and follow with a fine sander (100-150 grit or a fine sanding screen).

You should sand the edges of the room by hand because it can be hard to maneuver the flooring sander into the edges and impossible to reach the corners. Use a fine sandpaper between 100 and 150 grit. Sand with the woodgrain.

If at all possible, you should sand the entire surface for the hardwood floor, or at least the entire room with water damage.

Move the sander across the entire surface of the floor, overlapping a few inches on each stroke. If you do not get the water-damaged sections flat on the first pass, you can try a second pass.

Do not sand the floor too many times unless you are sure that your planks are very thick. Taking too much thickness off the floor will cause problems.

Note: Wear a mask or respirator when using a flooring scuff sander. These machines will kick up a lot of dust as they sand the finish and wood.

Step 4: Clean the Sanded Hardwood Flooring

Use a vacuum to remove all of the sawdust you created by sanding the floor. Follow the vacuuming up with a dry microfiber cloth or dust mop. This will get the fine dust off of the floor.

This process will also remove other dirt and make the stain adhere better to the wood.

It’s good to do this not just after the sanding is complete, but every five minutes while you sand. 

You can also vacuum the sander wheel to remove the dust. If it clogs up too much, it won’t sand evenly. 

Step 5: Stain the Sanded Wood Floor

Following the directions on the can, apply the desired color of stain to the hardwood floor. Try to select a stain that is specifically made for hardwood floors.

Note that most wood stains will put off some strong fumes. You need to wear a respirator if possible, or at least ventilate the room by opening windows and using fans (not directly as they will dry out your stain too fast and blow dust around).

Start by applying a thin, even coat of stain to a small area (less than 1 square meter). Brush the edges and corners first to make sure you don’t miss them. Use a clean rag to wipe up all the excess wood stain.

You will have permanent lines in the finished coat if you let the leading edge of your stain dry. Try to work quickly and don’t leave any edge to dry for more than 10 or 15 minutes. Apply the stain evenly across the whole room.

Note: Make sure to have an exit strategy when you start staining. You don’t want to step across a wet stain to get out of a corner. Work from the deepest corners of the room toward the door.

Step 6: Apply Polyurethane

A coat of polyurethane on top of the stain will protect the floor from scuffs and create a water-resistant barrier.

You can roll polyurethane onto the floor like paint after the stain is completely dry.

The key to applying polyurethane is that you need a very thin, even coat to create a nice-looking finish. Choosing the right roller will help.

Don’t use a regular fuzzy paint roller or you will leave a coat that’s way too thick. Use a dense foam roller for a smooth finish. Also, use a long handle for the roller so you can see better while you work.

Cut in the edges of the room with a good quality paintbrush first and then use the roller to complete the center of the room.

Give the refinished floor a day to dry before moving furniture back into it and you will have a fully improved hardwood floor!

Preventing Water Damage to Your Hardwood Flooring

It’s always easier and cheaper to take care of problems before they become problems. Take care to avoid wood floor water damage in the first place.

Here are some ideas to prevent water damage to your hardwood flooring:

  • Keep doors and windows closed when you are away from home and repair small leaks as soon as you notice them.
  • Hire only licensed contractors to work on your plumbing.
  • Be especially careful of rubber or plastic hoses on washing machines, dishwashers, and refrigerators tha.t can break over time.
  • Invest in shower curtains, shoe mats, and other items to keep daily water off your floor.
  • When you clean your floor, do not bring a big bucket of mop water where it can spill on your hardwood floor and mop only with a small amount of water.
  • Clean up all spills immediately.
  • Keep your house warm enough to avoid freezing temperatures that can burst a pipe.

Whatever type of flooring you have in your home, you want your floor to look its best. To accomplish this, the floor has to be clean. 

Yet, different flooring types call for different cleaning methods. For most wood floors, you need only be concerned with cleaning the wood finish and not the wood itself. But what about unfinished wood floors? 

In this article, we’ll answer frequently asked questions about cleaning unfinished wood floors. We’ll also discuss practical cleaning solutions that will leave your unfinished wood floors looking as they should in no time. 

cleaning stained unfinished wood floors

How Do I Know If My Wood Floor is Finished Or Not?

Granted, different flooring types and colors have been on trend and off throughout the past decade or more. But during this time, for whatever reason, high gloss finish has been decidedly out of fashion. This can make it difficult to tell if a protective finish coat has been applied to the surface of your wood floor. 

However, there’s still an easy way to tell if your wood floor is finished. Put a few drops of water onto an inconspicuous area of your wood floor. 

Now, leave it there for a minute or two. 

If the water stays on the surface, your floor has a finish on it. Just be sure not to put the drops of water near any seams or you could mistakenly assume your floor is unfinished. 

Should I Leave My Wood Floor Unfinished?

If you prefer the natural, rustic look of unfinished floors, you’re not alone. But you should know that raw wood floors are more prone to stains, scratches, scuffs, and wood insects without the protection of a finish coat. 

Yet, the process for cleaning a raw wood floor isn’t terribly different from cleaning a finished one. Both scenarios call for very gentle treatment.    

Cleaning Unfinished Wood Floors — What Not To Do

Before going any further, It’s probably best to get what not to do out of the way and behind us. This list also includes:

What To Avoid And What Not To Bother With 

Water

Less is more. Avoid puddling, ponding, and allowing floors to air dry. 

String Mop And Bucket

This deluge cleaning method can do more harm than good. It’s also a lot of work. Most professional cleaning services tossed out their string mops and buckets years ago. They now use equipment and products that are less damaging, less unwieldy, and more effective.

Steam Mop

If water should be avoided, then it’s probably best to also avoid injecting wood floors with water heated to 212F

Steel Wool/Steel Brush

Microscopic fragments of steel wool tend to remain on the floor. When these particles rust, they’ll stain. 

Vinegar

Many product manufacturers invested vast amounts of human and financial resources to create low VOC content, low odor products that work. Mission accomplished. The products they’ve come up with are very effective. 

These products are safe for people, kids, pets, and the environment too. These products include cleaning solutions. Many of these solutions are safe for use on a variety of surface types and they don’t need to be rinsed. Some of these products have a very mild, but pleasant scent. 

So, what reasonable explanation could there possibly be for our nation’s incessant predilection with vinegar? Vinegar has the potential to stain an unfinished floor irremediably and it also smells like …like rotting fruit of all things. It’s one thing to leave the stuff in the pantry next to the olive oil. But wiping the floors with it? There’s no reason to make your home smell like that if you don’t have to. There are better options.  

Trisodium Phosphate (TSP)

Beginning July 1, 2010, the sale of TSP became limited or prohibited in the following states: Illinois, Indiana, Maryland, Massachusetts, Michigan, Minnesota, Montana, New Hampshire, Ohio, Oregon, Pennsylvania, Utah, Vermont, Virginia, Washington, Wisconsin, and New York. (source

California had restrictions in place prior to this time. 

The reason for the prohibition of trisodium phosphate is the phosphate aspect. Once applied, TSP is carried away in rinse water, also referred to as gray water. The gray water makes its way to ponds, lakes, streams, and rivers where the phosphates fertilize algae and mold. The algae and mold become so prolific that no other form of life can exist wherever they’re present. Ponds, lakes, streams, and rivers become gooey, foamy, and devoid of all flora and fauna. 

Of course, we could and probably will go on discussing the virtues of wood floors and singing their praises. But if cleaning a floor or ANY thing involves the use of something that creates a scenario as the one described, then how important can it be?

Fortunately, there are ways to clean your unfinished wood floors that don’t involve threatening our own survival by rubbing nature the wrong way. 

For General, Routine Cleaning of Unfinished Wood Floors

You’ll Need To Have and Apply the following As Appropriate :

  • Rubber Gloves: Rubber dishwashing gloves tend to be thicker and less prone to tearing than Latex.
  • Floor Vacuum Or Floor Accessory Vacuum Attachment: A floor vacuum’s row of short, soft bristles located in close proximity to your unfinished wood floor is an extremely effective way to remove dust and debris.
  • A Soft-Bristled Broom: Provided you don’t sweep abrasive debris across the floor instead of directly into a dustpan, this type of broom is also effective in the removal of dust and debris. 
  • Sweeping Compound: Sweeping compound is a sort of moisturized sawdust. Lightly toss small handfuls onto the floor and sweep it up with your soft-bristled broom. Dust and dirt are absorbed by the compound. This keeps them anchored where they might otherwise be disturbed and sent into the air only to settle on your floors again later.

Note: It’s called “sweeping” compound for a reason. You’ll risk frying your vacuum if you attempt to suck up the compound with it. 

The moisture contained in the sweeping compound is all the moisture that should be involved in the general, routine cleaning of an unfinished wood floor. 

How To Deep Clean Unfinished Wood Floors

In Addition to The General Cleaning Items Above, You’ll Need: 

  • Respirator 
  • Mop With Flat Microfiber Mop Head: The wider the mop head, the better. A wide mop head covers more floor in less time. 
  • Clean Terry Cloth or Microfiber Rags
  • 1 Quart Spray Bottle
  • 1 Quart Hot Water
  • Mineral Spirits: The fumes released by mineral spirits are very heavy and noxious. Be sure the room you’re working in is well ventilated. If the ventilation is insufficient, wear a respirator and protective gloves.
  • Borax: Borax (boron) is a mineral that’s used as an insecticide, an all-purpose cleaner,  and a flame retardant. It also eliminates and repels fungi, wood rot, termites, wood boring beetles, bark beetles, and carpenter ants.  Properly diluted, the cost of a borax liquid solution is about 0.02/oz. All this makes for an excellent wood floor cleaner.
  • Murphy’s Oil Soap: Instead of borax, you can use Murphy’s Oil Soap that’s sold in a spray bottle. 

Directions For Deep Cleaning Unfinished Wood Floors

  • Remove dust, dirt, and debris as explained in General Routine Cleaning, above
  • Dampen the mop with water
  • Dissolve  2 oz borax into 1-quart hot water. 
  • Transfer the borax solution into the spray bottle. Allow any undissolved granules to remain untransferred. This will keep them from clogging the sprayer. 
  • Working in sections of about 3’ x 3’, spray the borax solution or if you prefer, Murphy’s Oil Soap onto the floor. 
  • Mop the sprayed section. 
  • Use a terry cloth or microfiber rag to wipe the mopped section dry
  • Move onto the next section of the floor. Spray, mop, dry. 
  • Continue until the entire floor is clean.

How To Remove Stains From An Unfinished Wood Floor

If There Is A Stain That Cleaning Your Unfinished Wood Floor Didn’t Remove

  • Put a small amount of mineral spirits onto a clean rag. 
  • Dab the saturated part of the rag onto the stain, increasing pressure as necessary.
  • Add more mineral spirits onto a fresh section of the rag.  Continue to dab, don’t wipe the stain. 

Unless the stain is a deeply set water or urine stain, this process should ultimately remove it. 

If the stain is deep, you can try hydrogen peroxide to remove it or you can sand it, or both. Start with 80 grit, then 100, 120, and finally,150. 

If the stains on your unfinished wood floor are considerable in size or number, you might want to consider renting an orbital or drum sander to sand the entire floor. 

Although sanding a large area of wood floor is another project in itself, the information with respect to cleaning still applies as does the information contained in the rest of this article. 

How To Make An Unfinished Wood Floor Shine

Although it’s not as popular as it was during the 1940s, ’50s, and ’60s, the application of paste wax still gives as warm a luster to wood floors as ever. If you intend to wax your unfinished wood floor, you’ll need the following: 

  • Terry cloth towels or rags
  • Microfiber cloths
  • Sponge Mop
  • Respirator
  • Rubber Gloves
  • Paste wax. You can choose a clear paste wax or one with a wood stain. You can also use a liquid floor wax

Applying Paste Wax To An Unfinished Wood Floor

Before you start, you’ll need to be sure to take care of yourself. Although the fumes tend to dissipate reasonably quickly, waxes of this kind are nevertheless solvent-based. The work area must be well ventilated. Consider wearing a respirator. Protective gloves should also be worn.

Working in sections of 3’ x 3’, put a tablespoon of wax onto a clean cloth and coat the floor wiping in the direction of the grain. If you’re using liquid wax, put a tablespoon of it on the floor and use a mop to coat the floor. You will need to use a cloth to apply wax in corners and tight spots. 

Allow an hour for the wax to dry before applying the next coat. Liquid wax requires at least two coats whereas its solid counterpart requires not more than two coats. 

Buffing Unfinished Wood Floor

The buffing process additionally protects waxed wood floors by moving the wax further into the wood’s surface. 

Use a cloth to buff the wax into the floor. For liquid floor wax, use a terry cloth rag. 

Alternatively, you can rent a floor buffer for about $50 daily. This might be money well spent as this type of machine makes quick work of buffing and polishing. 

While it represents some effort on the owner’s part, the choice to leave a wood floor unfinished is becoming increasingly popular. The reason for this is the considerable savings realized by not having to restore the floor which involves hiring a professional. 

buckled hardwood floors

Buckling is the term that’s used when one or more areas of a floor swell or lift upwards.

In some cases, the floor might have only one swollen area whereas, in others, the floor might appear to be wavy or undulating as the floorboards can arch upward several inches.

As you can imagine, the sight of a buckled wood floor can be pretty jarring. Let’s face it; this isn’t something that can be obscured by tossing a throw rug over it. A throw rug also won’t do much to resolve the problem or keep anyone from stumbling over it. Something needs to be done.

If buckling wood floors is a concern, read on to learn about causes, how to fix buckling in hardwood floors, and ways to prevent this situation.

What Causes Wood Floors to Buckle?

Water

Hardwood floors can react to moisture in various ways. Buckling is a very significant reaction. So it’s natural to assume that a significant event preceded it such as a flood or an event that caused prolonged contact with water.

Humidity

There’s a reason gymnasiums have wood floors, but locker rooms do not. Locker rooms can be extremely damp and humid. If you live in a tropical climate, or in a region that tends to be very muggy during the summer months especially, your hardwood floors are at greater risk for buckling.

Lack of or Incomplete Acclimation

Before a wood floor is installed it must be acclimated to its immediate environs. To do this, the floorboards are placed in the room where they’re to be installed, and allowed to remain for at least two weeks before installation takes place. This allows the wood to “breathe” or draw in the moisture in the air so that it can expand as necessary.

This doesn’t mean the floorboards should be acclimated to greenhouse types of conditions or that the floors’ intended substrate shouldn’t have a limited moisture content. The moisture content of the substrate should be monitored using a moisture reader. Ambient air temperature should always be in the 60℉ to 80° range.

Installation Failure

It is only in very rare instances that a professional flooring installer will overlook or forget to do something crucial to a successful installation. 

On the other hand, laypersons are more likely to fail to appreciate critical steps when installing hardwood floors on their own. Overenthusiasm and assumption can play major roles as these can lead to failure to allow for long enough periods of acclimation and failure to leave enough room for their new hardwood floor to expand.

Another reason for buckling hardwood floors is the failure to install a moisture barrier between the substrate and the new floor itself. If a moisture meter wasn’t used prior to installation or the readings were ignored, the resulting lack of protection that a moisture membrane would have provided can cause trouble in the long run.

If you suspect installation failure has caused your hardwood floor to buckle, you’ll need to call your flooring installer right away.

Can You Repair Buckled Wood Floors?

On the other hand, if you and your flooring installer happen to be one and the same, you’ll need to look for ways to remedy the situation. If your wood floor hasn’t buckled too severely, there might be something you can try, but there’s no point in it until you do the following:

Identify The Source

warped hardwood floors

Firstly, it’s important to keep in mind that your hardwood wood floor has warped.

In most cases, the cause of a warped hardwood floor is moisture. So naturally, you’ll need to take measures to locate the culprit.

However, for every action, there is an equal and opposite reaction. Buckling is an extreme reaction. Such a reaction usually indicates that your hardwood floor has been directly exposed to more than mere moisture. Think!

The floor might have been underwater? BINGO!

A flood would certainly account for an extreme reaction.

But if your hardwood floor is no longer submerged for whatever reason (e.g., after being somehow roped into it yet again, while shopping for groceries with your mother, you were so thoroughly captivated by the dulcet tones of her delightful litany concerning the high price of produce, her bursitis, and her last husband, that you remembered you’d left the water running in the tub), then we can assume that the source is no longer an issue, 

However (there’s always a “however”!), because your floor can be directly exposed to water without you being aware of it, it’s time to bring your awareness up to date.

Assuming you don’t hear squishing sounds when you walk on your hardwood floor, you’ll need to look for other telltale signs of moisture.

Telltale Signs of Moisture That Can Cause Your Wood Floor to Buckle

Start by inspecting your walls. You’ll need to inspect your home’s interior and exterior walls. Look for walls that are:

  • Swollen
  • Mossy, moldy or mildewed
  • Bubbled or peeling
  • Water stained
  • Water Streaked
  • Seeping
  • Water, water, water…

These characteristics can be caused by

  • An improperly sealed window or door
  • A leaking pipe or condensation
  • A leaking faucet
  • An exposed sill plate.

A sill plate, also known as a sill, framing sill, or sill piece, is a piece of lumber usually a 2”x4”, that sits atop the length of a structure’s founding walls or footings of a structure. If your home’s foundation is made from poured concrete, a sill plate rests horizontally on top of the foundation and flush along the length of the foundation’s outer edges.

If you have no trouble locating part of your home’s sill plate, then it’s exposed to the elements. An exposed sill plate that’s soggy, swollen, water-stained, or rotting indicates that it is saturated or has been saturated at some point. A saturated sill plate is a potential troublemaker. 

  • A cable (Yes, a cable!)

If you have cable television service, satellite internet service, a low voltage security system, wired security cameras mounted on your home’s exterior walls, or anything that calls for a cable to pass through an exterior wall to some type of terminal inside, then the cable should first be looped before it’s fed into the exterior wall.

To prevent water from traveling along the part of the cable that runs past the exterior wall, this “drip loop” should be lower than the cable’s entry point. A cable that isn’t drip looped or isn’t properly looped can cause water damage.

This might not seem like a big deal, but in climates where there is heavy annual rainfall, the damage that can be caused by water that’s allowed to travel along a cable can become increasingly significant with each drenching.

Put The Cause of Your Buckled Wood Floors in Check

Once you’ve located the source of what’s causing your hardwood floor to buckle, it’s time to eliminate it. This will also help to stabilize your home’s humidity and moisture levels.

Until then, any effort to fix your buckled hardwood floor is likely to be wasted. 

How To Fix a Buckled Wood Floor

If your hardwood floors haven’t buckled too severely, your hardwood floor might right itself as it dries. You can also use a floor dryer to speed up the process. These are usually available for rent at your local home improvement center or you can buy one for under $60.

You can also help to straighten your hardwood floors by placing some weight on them as they dry. Just be sure to start with something light and continue to add weight a little at a time as the pressure helps the boards settle back into place.

If neither of these solutions does the trick, you’ll need to remove and replace the warped floorboards. You can use boards that were saved when your floors were initially installed. Because ten percent is added to the measurement of the planned installation area, there might be enough extra boards to complete the repair. 

If not, you’ll need to buy additional boards at your local home improvement center or flooring specialty store. Be careful to match the wood species and color. If the color of the existing and spare floorboards can’t be matched exactly, it’s best to choose a lighter color so that you can stain them darker to match and blend with the rest. 

buckling in wood floors

Instructions for Replacing Buckled Hardwood Floorboards 

Although the following instructions represent the simplest way to replace warped floorboards, an intermediate skill level is called for. While working outside your comfort zone is always a good way to expand your skillset, be sure to ask for help from a professional if you’re not confident in your skill level. These instructions apply to nailed or glued floors. Repairs to tongue and groove planks call for a more advanced skill level.  

In addition to the floorboards, you’ll need to have these items on hand: 

To replace buckled hardwood floorboards, follow the steps listed below:

  • Use the straightedge and chalk to draw two parallel lines along the length of the plank, about ½” inside the edge. 
  • Set the circular saw to the depth of the floorboard only. 
  • With the circular saw, cut along the chalk lines. 
  • Cut diagonally to form an ‘x’ between the parallel lines. 
  • Beginning at the center of the ‘x’, tap the chisel with your mallet to remove the floorboard piece by piece. 
  • Continue in this way to remove any old glue. Note: Do not attempt to sand the glue. Some older adhesives were manufactured with asbestos which becomes powerfully carcinogenic when sanded or ground. 
  • Uset your pry bar to remove rusted, loose, or protruding nails. 
  • Collect loosened debris with the whisk broom. 
  • Vacuum the area. It’s essential to keep your work area completely free of dust and debris. 
  • If you notice any sign of moisture, aim an electric fan or floor dryer at the affected area until it’s completely dry. 
  • Fit the new floorboard to the exact dimensions of the empty space. 
  • Nail or glue the replacement board (as appropriate) into place.  

Note for nailed or glued wood floors: If the empty space is surrounded by other boards, this final piece will need to be glued in place. 

  • Use weights to hold the glued board flush and firmly in place. 
  • With a water dampened towel, wipe up any excess glue as quickly as possible. Dried floor glue is difficult to remove and will require a different process. 
  • Allow the glued board(a) to set according to the adhesive/floor glue manufacturer’s recommendations. Two hours are usually necessary before removing the weights. 

If you’ve concluded that a moisture barrier might have prevented the source of the damage from having such a pronounced effect, you probably shouldn’t attempt to fix your buckled wood floor on your own. This is a time-consuming and often tricky process that’s best undertaken by an expert. 

Speaking of prevention…

How to Prevent Your Wood Floor from Buckling

It truly is as your mother (the person you can hardly wait to go grocery shopping with) always says. An ounce of prevention really is worth a pound of cure. So, it’s important to be sure not to allow your hardwood floor to be in prolonged or repeated contact with moisture. 

  • Be sure to clean water spills as soon as possible
  • Elevate potted plants
  • Don’t allow wet towels, boots, or shoes on your hardwood floor
  • Keep a rug or doormat outside of exterior doors
  • Keep your home well ventilated to prevent high levels of humidity
  • Refresh the seal. If your floors have a wax seal, this should be done annually. For floors with a polyurethane seal, this should be done every few years
  • Conduct routine inspections as above for leaks and/or excess moisture

Also, be on the lookout for changes as they might not be terribly obvious at first. 

Warning Signs of Buckling Hardwood Floor

A buckled hardwood floor doesn’t necessarily happen overnight. 

In fact, in cases where the buckling isn’t the result of an extreme event, there were probably warning signs that presented themselves on some level or in some way. These signs might be small, but they are clarion calls nevertheless. 

  • Clouding, White Stains: A floor or an area of a floor that appears cloudy or hazy. The appearance is distinctly different from the hazy effect of abrasion.  
  • Dark or Black Stains: Water or moisture that’s underneath the floor or has penetrated the surface can cause this type of stain. You can learn more about this specific issue in our article on removing black stains on hardwood floors.
  • Rust Stains: These usually form at the edges of individual floorboards that have been fastened with nails.
  • Cupping: This is the term for individual floorboards that lift at the sides. The effect is a U-shaped board. Cupping can happen to a single board or entire sections of boards. Learn more about this topic in our guide on hardwood floor cupping.
  • Crowning: A floor that’s crowned will have one or more “humps” in it. 
  • Lifting: As the term suggests, the floorboards lift at the ends.

All these things are evidence of damage from moisture. If the source is eliminated before the damage becomes profound, cupping, crowning, and lifting can resolve themselves. 

However, instead of waiting for these warnings to become more prominent, proactive measures should be taken to ensure the earliest possible intervention. The following items are vital components of such an effort. 

  • Moisture Tester: Klein Tools makes a very decent one that sells for under $40.  In addition to moisture reading of concrete to let you know if installation of a water barrier membrane is called for, you can also use this device to read the moisture content of wood, drywall, and masonry. So, it’s perfect for detecting leaks as well. For the price, you really can’t do much better.
  • Humidity Monitor: For under $20, you can buy a pair of these to alert your phone when the readings are outside of the range you preset by using the app that comes with it. These hygrometers display the temperature as well. Very cool.

The total cost of the three items, above, comes to around $200. Hence, the cost to prevent buckled hardwood flooring amounts to a tiny fraction of the cost to replace it. Prevention also saves a lot of hassle and headache.                        

While it might seem like investing in hardwood floors represents a lot of work, in reality, they’re no more difficult to maintain than any other type of flooring. The difference is that hardwood floors never go out of style and with proper care, yours can last a lifetime. 

The rich, natural beauty of hardwood floors adds elegance and warmth to almost any room. So much that it makes the appearance of a scratch, scrape, or gouge look especially out of place. 

Yet, as much as you try to avoid damaging your floor, it’s almost impossible to expect everyone else to be as diligent. Kids, dogs, guests, service technicians, and furniture movers can all leave wood floors looking pretty rough.  

In this article, we’ll discuss various solutions for repairing scratches in your hardwood floors as appropriate to the type and size of the scratch. You might not be able to keep accidents from happening, but in this article, we’ll also discuss ways to keep them from damaging your hardwood floors. 

Please note that as always, it’s best to test remedies and products in an inconspicuous area. Be sure to follow the product manufacturer’s directions and recommendations. 

Also, wear safety goggles and personal protection as appropriate including a respirator whenever working with solvents or solvent-based products. 

Identify and Assess The Damage

Major scratches in wood flooring

The depth and width of a scratch are important factors in determining how to proceed. If the scratch is superficial and doesn’t interfere with the wood underneath the seal, then only the seal needs to be repaired. 

If your wood floors are unsealed, or the scratch is deeper than the sealing layer, the treatment processes are different. These instructions assume your hardwood floor is finished with a water-based (lacquer) seal. 

Determine the extent of the damage. Are there several scratches? Scratches and gouges? 

Determine the extent of the work area. If a large area of your hardwood floor needs to be repaired, consider dividing it into smaller, manageable sections. 

Prepare The Work Area

This is arguably the most important step in the process of fixing scratches on wood floors. Any dirt or grime that isn’t removed will either affect adhesion or become part of the repair itself. Possibly both. 

  1. Use a damp, lint-free cloth to clean the affected area. The area must be completely free of dust and any other debris
  2. To clean the scratch itself, use an old toothbrush or non-ferrous scrub pad. You can also dab some mineral spirits onto the pad to clean out any grime. 
  3. Use a damp cloth to thoroughly remove the mineral spirits.
  4. With sandpaper that’s 150 grit or finer, gently sand the affected area following the direction of the wood grain. 
  5. Use a vacuum to remove dust and debris created from sanding. 
  6. Clean the surrounding area again with a damp, lint-free cloth. 
  7. Wipe dry. Use a fresh lint-free cloth if the one you’re using is too damp or has debris on both sides of it 
  8. If the scratch or gouge is damp, be sure to allow it to dry completely. Or you can aim a blow dryer at it on the cool setting for a few minutes. 

Fixing scratches on hardwood floors calls for sanding at various stages throughout the process. Be sure to clean and dry as described above (steps 6-8) after every sanding. The next step should not be started before this is done.   

Fixing Superficial Scratches on Hardwood Floors

For a Scratch That Hasn’t Penetrated Below The Seal, 

  1. Continue to sand the scratch with sandpaper until it’s smooth and level with the surrounding area.
  2. Apply sealant. Be sure to select a (water-based) sealant in a sheen type that’s the same as the existing one. Consider using a spray-on sealant. Spraying usually makes it easier to blend the new application with the existing one. 
  3. Allow the sealant to dry according to the manufacturer’s recommendations.
Minor scratches in wood flooring

Fixing Minor Scratches on Hardwood Floors

For Scratches That Have Penetrated The Surface 

  1. Use 150 grit or finer sandpaper to sand over the scratch. Sand in the direction of the grain using light strokes. You’ll be sanding to expose the raw wood with the least exposed wood being farthest from the scratch. 
  2. Place some wide Long Mask painter’s tape just outside the edges of the scratch. You’ll now be confining the work area to the space inside the tape.

    The tape you select must be appropriate for use on finished floors and veneers. The reason certain masking tapes are referred to as “long mask” has nothing to do with the length of the tape. The term refers to the length of time the tape can stay on a surface before removal becomes difficult. Depending on the selection, these tapes can remain on a surface for 14-60 days without damaging the surface they’re applied to. Regular masking tape doesn’t offer this benefit.

    If a masking tape is blue in color, it doesn’t necessarily mean that it’s a true long mask tape. Be sure to select carefully.

  1. Select a wood filler that matches the type of wood you’re repairing (e.g. beech, maple, pine, etc.). If the color dot on the package doesn’t match your wood, it’s okay to select a different species of wood. (Rule of thumb: Select a color that’s lighter than the field (background) color of the raw wood being repaired.) You can mix fillers of different colors (species) or you can add stain to the filler to create a match. Alternatively, you can reserve the sanding dust from this project and mix it with clear resin. But it’s doubtful the process will yield as much dust as necessary. 
  2. Apply the wood filler onto the scratch.
  3. Use a plastic putty knife to scrape away excess wood filler mixture. The mixture should be level with the surrounding floor. If it sits just slightly above level, that’s okay too.  
  4. Allow the filler to dry thoroughly according to the manufacturer’s recommendations. 
  5. Remove the painter’s tape. 
  6. Sand the filled scratch until the dried filler is level with the rest of the floor. Sand any area around the scratch that has filler on it. All residue around the scratch needs to be removed completely. If not, the repaired scratch will appear to have a very unheavenly halo around it when the project is complete. 
  7. If it wasn’t mixed in with the wood filler, apply a coat of stain. For a deeper color, apply another coat after allowing the first coat to dry. Remember to always select a lighter color when in doubt. You can mix another stain into it to create a match. 
  8. Apply the (finish) sealant and allow it to dry thoroughly. 
  9. To replicate the grain of your floorboard, or to make it appear continuing, see “How to Create the Look of Wood Grain On Wood Filler”, below.
  10. If you think another coat of seal is necessary, follow the manufacturer’s recommendations. Some call for a light sanding between coats. 

Fixing Deep Scratches and Gouges on Hardwood Floors

Major scratches & gouges in wood floors

Dogs tend to scratch repeatedly when they’re anxious to get past a closed door. This is especially true of puppies. Because of this, the area in front of entry doors can be extensively damaged. 

Of course, entryways are also the most likely places for deep scratches, gouges caused by improper handling of furniture and appliances. But even so, dogs seem to be the biggest offenders.  

If you’re sure your dog has stopped scratching for good, and you’re done moving heavy objects, then the steps for fixing minor scratches on hardwood floors are appropriate to take.

However, if :

  • The depth of the scratch or gouge on your hardwood floor so deep that the substrate is exposed or 
  • The length of a scratch or gouge is located within 1/4” from any edge of the floorboard or 
  • You’ve already repaired this particular area of a floorboard more than once 

Then, you should probably consider replacing the damaged floorboard(s). 

How To Prevent Scratches and Gouges on Your Hardwood Floors

  • Use a good floor vacuum. Small stones and other types of hard matter can scratch hardwood floors when trapped under a moving or sliding object (e.g. a mop head or chair foot). Keeping your hardwood floor as free of dust and debris as possible will help  prolong its life 
  • Apply felt pads to chair feet. Apply new pads before the old ones wear out. 
  • Apply castor cups to couch and bedframe casters. For more information, read our article on keeping furniture from sliding on wood floors.
  • Crate train your dog.
  • Keep your dog’s nails clipped.
  • Place rugs in strategic locations (e.g. Inside the front door, under the coffee table, and in the hall)
  • Switch out shoes with non-slip socks when entering from outside.
  • When moving appliances or heavy furniture, save your hardwood floors and your back by Investing in an Airsled.

For any homeowner, mold is one of the scariest household problems you can find. Unfortunately, it can grow easily with just a little moisture, organic material, and time. Hardwood flooring is one material that is prone to mold growth, especially in a bathroom or kitchen where water is present.

Mold can be extremely dangerous to people. For that reason, large mold problems require professional removal. If you discover mold that covers a large area or appears to be growing on studs, subfloor, or other structural elements of your home, call a professional.

If you just have a little mold on the surface, such as from a short-term leak or spill, you can go ahead and correct it yourself by following this guide. Protect yourself with the necessary gloves and a breathing mask.

After you remove the mold on your hardwood floors, you should always make sure to fix whatever allowed the mold to grow. Clean the area more often and fix any areas where water regularly leaks or pools.

Is Mold on Hardwood Floors Dangerous?

Not all types of mold are dangerous, but some definitely can be. Black mold can weaken neurological function and cause serious damage to the heart and lungs. Eventually, this can lead to death. 

Mold can get into your lungs over time if you do not clean it up or quickly if you disturb the mold without a protective mask.

If conditions are wet enough, the mold can also eat into the walls and subfloor, weakening the structure of your house.

For these reasons, you need to protect yourself by cleaning bathrooms, kitchens, and other “wet” areas of your home regularly and checking plumbing occasionally for leaks or other mold-growing problems.

If you have discovered mold on your hardwood floors, make sure not to walk on or touch the mold in any way. This will disturb the mold and release it into the air.

Leave the moldy area alone until you are prepared with a certified mask (such as an N-95) or a filtered respirator. You should also wear disposable gloves when you remove the mold and throw the gloves away when you are done.

Signs of Mold Under a Hardwood Floor

If your wood floor has just a little mold growing on top, you can clean it and keep using it. But if the mold has penetrated deep into the flooring and subflooring, you have a much bigger problem on your hands.

First, inspect the wood for serious warping. If there are larger-than-usual gaps between planks or if the boards are curling up at the edges (cupping), you have significant water damage.

You can find out how deep the mold goes by checking to see if the wood is still solid. Take a flat screwdriver and try to press it into a board in the moldy area. 

If you can’t press the screwdriver into the wood, it is probably still dry and clean below the surface. But if the wood is soft like a sponge and you can push the screwdriver deep into it, the wood is bad. Water and mold have penetrated deep into the floor.

If your floor fails the screwdriver test, you should call a flooring or cleanup professional to evaluate the leak and see how deep the moisture has spread.

Deep seeping moisture with mold will probably require that you completely replace the flooring in the area, and it may even be necessary to replace the subfloor materials.

How to Remove Mold on Hardwood Floors

Tools and Materials You Will Need

  • Disposable rags, sponges, or paper towels
  • Rubber gloves
  • An N-95 mask or another filtering mask (not just a simple cloth or surgical mask)
  • Water and a spray bottle
  • Dish soap
  • Bleach (optional)
  • Vacuum cleaner with a HEPA filter (optional)

Step 1: Personal Mold Safety

At all times when cleaning mold, wear a filtering mask and gloves. Do not touch the mold or moldy materials with your skin. The spores may be too small for you to see and can make you sick or spread to other areas.

Throw away any gloves, paper towels, or rags that you use to touch the mold. Do not wash and reuse them. You should only need one or two rags to remove a small spot of mold.

Bring a garbage can near the spot you are cleaning so you do not have to carry your used rags through the house.

Ventilate the area without making it too windy. Open windows in the room and place a fan nearby — just don’t point the fan directly at the moldy area because it will blow mold spores around the room. When you are cleaning the mold, you can use the fan to blow the room out.

Always wash your hands with soap and hot water after working near mold.

Step 2: Use Soap and Water to Remove the Mold

Mix up a solution of dish soap and hot water. Rather than using a huge bucket that could spill on the hardwood floor, mix it in a spray bottle. This will work better for cleaning the mold anyway.

Dish soap will not kill the mold, but it is a good first step because it can remove most of the mold and cannot damage the finish on your hardwood floor.

Spray the dish soap solution on the moldy area until it is covered. Let it sit for 1 minute and wipe it off with a rag. Press down firmly and try to wipe up all of the mold in one swipe.

Dispose of the rag with mold on it immediately. Repeat if necessary.

Step 3: Kill Mold With Bleach (optional)

Bleach has a powerful sanitizing ability and can kill mold in just a few minutes. However, it has some dangers:

  1. Bleach puts off harsh fumes, so you need good ventilation in the room
  2. Bleach can only kill the mold on the surface of the wood, not what is growing below
  3. Bleach can damage the finish on your hardwood floor

Because of these risks, you might want to avoid using bleach on your floor. It depends on the finish you have on your floor and how deep the mold appears to be growing. You can test an inconspicuous spot to see if it hurts your floor’s finish.

If you decide to use bleach, water it down in a spray bottle. Use only 1 part bleach to 10 parts water (you can also use a bleach-based cleaner such as Clorox spray – just read the bottle to see if it is safe for hardwood floors).

Spray the bleach to completely cover the mold. It will start killing the mold on contact, so you do not need to let it sit for long.

Leave the bleach on the mold for no more than 5 minutes (you can wipe it off instantly if you are worried about your hardwood floor’s finish). Swipe it up with a rag and throw it away.

Note: You may have read that white vinegar can also kill mold. Some people prefer vinegar because it is natural — but vinegar is bad for hardwood floors. Vinegar takes 60 minutes to kill mold, which is way too long to leave liquid sitting on hardwood floors. It can damage the finish and seep into the wood, causing bigger problems. Skip the vinegar for your hardwood floor and use a bleach solution that kills mold faster.

Step 4: Clean Up

Dry any spills you may have made while cleaning. Throw away any rags or paper towels that touched the mold. Take out the trash.

If you have a vacuum cleaner that is equipped with a HEPA filter, you can vacuum the room to remove any mold spores.

A regular vacuum filter will not catch the spores but rather spread them around the room. So, if you don’t have a HEPA vacuum, just mop the floor with a mild cleaning solution.

Throw away the gloves and mask you wore while cleaning and wash your hands thoroughly with soap.

Preventing Mold on Hardwood Floors

The two best ways to prevent mold are to clean regularly and to keep moisture from getting to the wood in your house.

Wood floors should be mopped with a light cleaning solution designed for hardwood. This can help to remove the first mold cells before they grow and eat into the hardwood floor.

Make sure to wring the mop out so you do not put too much water on the wood. It’s a good idea to dry the floor with a microfiber mop afterward.

Mopping every few weeks will go a long way to prevent mold growth.

There are several things you can do to keep moisture low on your hardwood floors:

  • Always dry up spills or excess mop water right away
  • Inspect plumbing occasionally and fix any leaks
  • Also inspect windows and doors and repair leaky seals
  • Control splashing in common areas with rugs, a shower curtain, etc.
  • Seal crawl spaces and sump pump basins that can humidify your house

Any large amount of water can cause mold. Even small amounts of moisture can let mold grow if the area is frequently wet. You can buy a wood moisture sensor if you are concerned about humidity affecting the wood in your house. This machine will give you a percentage of moisture content for the wood to show whether you are in danger of growing mold.

In terms of interior decor, hardwood floors have long been considered ideal for bestowing an ambiance of sophistication, or rustic appeal on homes, schools, or workspaces.

However, they also have very specific maintenance requirements such as waxing. This procedure is ideal for finished and unfinished hardwood floors and can restore their natural sheen. Waxing hardwood surfaces can also enhance their longevity and also protect them from getting stained frequently.

However, over time, the wax used tends to build up. When this happens, your floor will no longer display a smooth polished appearance making it necessary for the excess wax to be removed.

This article takes a close look at this issue and how to resolve it. We discuss how to remove wax buildup from hardwood floors, the best products for doing so, and what products you must avoid.

Why Should You Remove Wax Buildup on Wood Floors?

1. The Accumulation of Trapped Dirt and Blurriness

As wax accumulates, the use of indoor heaters can melt it and cause debris such as hair, pet fur, or dirt to sink into it. It can also result in scuff marks being made in it as well.

Wax buildup will make your floors look blurred and cloudy in addition to trapping particles.

2. The Presence of Scratches

Over time, your hardwood floor will get scratched, either by your pets or simply by grit that clings to the soles of feet, stockings, and footwear. To refinish it, you will need to get rid of the overlying layer of accumulated wax covering it.

3. Slight Water Damage

Occasionally, water damage may cause a whitish discoloration on certain parts of your floor. This is caused by the moisture penetrating the wax and part of the process of remedying the damage will involve removing any wax on the floor.

Checking for Wax Buildup

If you have noticed any stains, scratches, or even general dullness on your floor or simply wish to refinish it, you will need to find out if there is a layer of wax you need to get rid of first.

You can do so by using the following:

  • Sandpaper: Lightly pass sandpaper across the floor. If there is any wax present, it will ball up.
  • Mineral Spirits: Apply a small amount (no more than a few drops) of mineral spirits to a cloth. Next, wipe the floor with it. The presence of a brownish, yellowish, or even whitish smear means that there is wax on your floor.
  • Water: Simply place a drop of water on your floor and wait for a minute. The appearance of a white spot beneath the drop within that timeframe will indicate the presence of wax.

The Best Wood Floor Wax Removers 

Mineral Spirits

Also referred to as turpentine substitute, and white spirit, this petroleum-derived solvent is cheap, mild smelling, and low in VOCs (volatile organic compounds). It is also capable of dissolving the wax on your floor enabling you to remove it from the surface completely.

Although mineral spirits may affect certain surfaces adversely, it does not do so to wood and is therefore suitable for hardwood floors as a result. However, the solvent is unsuitable for no-wax surfaces since it will strip them of their gleaming finish, leaving them with a matte, dull appearance.

It is also flammable and should be handled with caution.

Sunnyside Corporation’s Mineral Spirits is an excellent example of mineral spirits which can be used for this purpose. This particular product has been produced by the Sunnyside brand which has been manufacturing potent solvents for over a century.

In addition to being low odor and suitable for use on wooden floors, it is also ideal for cleaning paint brushes, rollers and sprayers, and degreasing mechanical components.

Products Which Are Unsuitable for Removing Wax Buildup

  • Acetone: A colorless, flammable, and volatile fluid, acetone is also known to be a highly effective solvent. It is capable of dissolving grease and is also capable of stripping wax from hardwood floors. However, acetone is unsuitable for this purpose because it may not only damage the finish of your floors but will also discolor the wood as well.
  • Commercial Wax Removers: Special care must be taken when selecting products in this category since the wrong choice can turn out to be particularly harsh on your hardwood surfaces. As a result, you will need to ensure that the product you select has specifically been manufactured for hardwood floors and is approved by your manufacturer. 
  • Homemade Ammonia/Vinegar Solutions: Hot water solutions of ammonia and vinegar are highly popular homemade remedies for stripping floor wax. And while they may be efficient, it is worth noting that the extensive exposure of your floor to hot water will place it at risk of water damage. 

How to Remove Wax Buildup on Hardwood Floors

Things You’ll Need

  • A soft-bristled brush
  • Absorbent cloths
  • Mineral spirits
  • Steel wool
  • Rubber gloves
  • A face mask
  • Knee pads

1. Prepare the Room

Empty the room of all furniture and open every window and door. Using a soft-bristled brush or broom, sweep the floor clean of dust and debris.

2. Remove the Surplus Wax

This process is especially time-consuming and effort-intensive. You will need to apply the mineral spirits to the floor using a spray bottle and scrub it with the steel wool.

If your floor comes with bevels, you will also need to scrape them manually to get rid of the wax in the crevices.

As the wax is loosened you will need to wipe it off the surface and taking another cloth, wipe the floor clean.

3. Clean Any Left Over Residue 

Once you have finished cleaning each section, you will need to clean the floor with an additional application of mineral spirits to new clean cloths. This last step will ensure that no wax residue has been left behind.

Certain experts recommend carrying out this step twice. To ensure you have been thorough in removing all the wax, simply apply mineral spirits to another clean cloth and go over the section you have cleaned. 

The absence of any residue on the cloth will mean that every trace of wax has been removed. However, the presence of any coloration as noted above will mean that you will need to go over that part of the surface with a cloth and mineral spirits, once more.

What You Can Do Following Wax Buildup Removal 

Now, you know how to remove wax from hardwood floors. But what else will you be able to do following the procedure?

1. Apply a Fresh Coat of Wax

To protect your hardwood flooring from stains and conceal slight blemishes, you will have the option of applying a fresh coat of paste or liquid wax. You can take a look at our article on how to wax hardwood floors – it covers the procedure in detail and looks at the best products for your hardwood floors.

waxing hardwood floors

2. Repair Slight Water Damage

If you intend to get rid of white spots on your floor caused by water as referenced above, you will need to sand the affected area once you have removed the wax, and then wipe it repeatedly with an oxalic acid crystal solution until the stain is eliminated. Once you have done so you will be able to stain or seal it before refinishing it.

3. Eliminate Scratches and Scarring.

If your hardwood floor happens to be excessively damaged by scratches or scarring, you will be able to sand it. And once you are through you will be able to apply a brand new finish of your choice, restoring your floor’s original classic appeal.

Unless you’ve just returned from spending the past year and a half on another planet, you don’t need this or any other article to explain or emphasize the importance of taking precautions against the transmission of disease. The COVID-19 pandemic has taught us a lot.

The past forty years have given rise to infectious diseases that had previously been unheard of. But COVID-19 is the virus that changed the way the whole world thinks about disinfection. It changed our entire approach. For some of us, COVID-19 even became a partisan issue.

In this article, we’ll discuss combating the COVID-19 virus and other pathogens on a wood floor. The article will also answer some frequently asked questions about how to do this, and what to expect.

The following assumes that your hardwood floors are finished with a urethane type of sealant. As always, follow the manufacturer’s recommendations and directions.

Is There A Way To Disinfect Hardwood Floors Without Using a Bucket and Without Rinsing?

We’re not terribly high on the mop and bucket idea. This is mostly because we understand how damaging it can be to drench hardwood or expose it to more moisture than absolutely necessary. Mopping calls for this as part of the process and rinsing calls for the process to be repeated.

There is indeed an easier way to disinfect hardwood floors.

In fact, there are a few easier ways. Let’s discuss what you should know.

Sanitizing vs Disinfecting A Wood Floor: What’s the Difference?

According to The Centers For Disease Control and Prevention (CDC):

  • Cleaning is a process where soap and water is used to remove germs, dirt and impurities. By reducing the number of germs, cleaning reduces the risk of infection.
  • Disinfecting uses chemicals to kill germs. Disinfecting doesn’t necessarily target dirt and impurities. By killing germs, disinfection reduces the risk of infection.
  • Sanitizing lowers the number of germs on surfaces or objects to a safe level, as judged by public health standards or requirements. This process works by either cleaning OR disinfecting to lower the risk of spreading infection.

With these facts in mind, cleaning should precede disinfecting.

According to the U.S. Environmental Protection Agency:

EPA expects all products on List N (EPA’s list of approved disinfectants) to kill the coronavirus SARS-CoV-2 (COVID-​19) when used according to the label directions.

This means that no matter what organisms it kills, in order for a product to call itself a disinfectant, organisms that are COVID-19 pathogens must be included in the scope.

Using an Antibacterial Wood Floor Cleaner to Disinfect Hardwood Floors

cleaning products for hardwood floors

Antibacterials focus on reducing the number of bacteria whereas the focus of disinfectants is broader. Disinfectants (antimicrobials) reduce the number of bacteria, viruses, fungi, and certain types of insect vermin. All products labeled “disinfectant” kill COVID-19 microbes.

While many products reduce the number of many types of microbes, and meet the standards for categorization as a disinfectant by the EPA, some manufacturers choose to label their products as antibacterials instead. We can only assume that such decisions are driven by marketing strategies. But depending on the active ingredients, products labeled “antibacterial” can be used to disinfect. Product labels are key.

Although they seem to be few and far in between, there are a few disinfecting floor cleaners available on the market. Rejuvenate® makes an antibacterial wood floor cleaning product that’s also approved as a disinfectant by the EPA.

Rejuvenate® antibacterial wood floor cleaner still needs to be rinsed. But for bargain hunters and for those who prefer not to work any harder or longer than necessary, the term, “two-fer” (two for one/two in one) applies. For those who consider themselves to be devotees of both, you’ve hit paydirt.

Should You Use Bleach To Disinfect Hardwood Floors?

To be clear, bleach is a disinfectant. Clorox is the most popular brand of bleach.

Yet, Clorox manufactures disinfecting wet mopping cloths that do not contain bleach. Clorox also recommends its non-bleach wood floor cleaning product over bleach for cleaning wood floors. These two facts should tell you everything you need to know about using bleach to disinfect hardwood floors.

Undiluted bleach should never be applied to a wood floor unless removing the finish and/or the color is the goal. Applying a dilute form offers no relief from rinsing. So, let’s cross bleach off the list..

Should You Use A Steam Mop To Disinfect Hardwood Floors?

Try thinking of it this way; If it isn’t safe to transfer a product’s use as directed to the palm of your hand for a full five seconds, it probably isn’t a good idea to use on hardwood floors. Does that seem extreme? Then, check out your wood floor manufacturers’ recommendations. If the manufacturer recommends the use of a steam mop to disinfect your hardwood floors, raise your hand.

See what I mean?

Of course, the reason for not applying steam to hardwood floors might not be quite the same as the reason for not applying it to your skin. But by sticking with this rule of thumb, you’ll be giving your wood floor the gentle treatment it requires.

As a cleaning solution, antibacterial, antiviral, antimicrobial, boiled water, and steam are equally effective options. But applying a high-temperature solution to a wood floor will do more harm than good.

For floors installed with glue (floor adhesive), applying extremely hot water or steam is likely to cause the glue to lose its adhesive properties,

For wood floors installed with nails, a boiling hot solution would cause both the nails as well as the floorboards to expand considerably. The nails are more apt to rust and stain your hardwood floors before ultimately causing the floorboards to become less securely fastened.

This isn’t to say that steam can be applied to a floating wood floor without consequence either.

As it is, a hardwood floor’s exposure to moisture should be limited. Where wood floors are warped or have dark stains on them, moisture is the culprit. To expose a wood floor to moist heat or to do so on a routine basis doesn’t align with the effort that should be undertaken to limit the floor’s contact with moisture.

How to Disinfect Hardwood Floors without Damaging Them

Despite the best intentions, and sometimes, because of them, wood floors can be damaged. But this doesn’t need to happen. As long as exposure to water, harsh chemicals, and extreme measures is limited, the risk of damage is minimal. Hence, the rule of thumb as discussed earlier.

How to Disinfect Hardwood Floors Naturally

The terms “natural”, “naturally”, and “nature” conjure ethereal images of flowered meadows where the sun shines and breezes blow gently.

They might not be as pleasant as the scenario above, but chemicals, chemical bi-products, and chemical reactions are also natural.

The active ingredients usually contained in an EPA registered disinfectant are natural in that they are environmentally safe.

Of course, it would be nice to find a disinfectant that’s safe to use around children and pets as well. An inexpensive supermarket or drugstore product that doesn’t need to be rinsed would also be helpful.

There’s only one product that ticks all the boxes – hydrogen peroxide. Where the previously discussed “two fer” is analogous to paydirt, hydrogen peroxide is the motherlode.

Hydrogen peroxide is usually sold in concentrations of 3% or 6%. You can use the 3% concentration to disinfect your hardwood floor without first diluting it.

Hydrogen peroxide is sold in dark brown colored or opaque containers to protect it from light. Prolonged exposure to light and temperatures above 80F can cause the solution to become inert. It’s best used within a couple of months of purchase as it will expire in six months and will lose its effectiveness.

Use Hydrogen Peroxide To Disinfect Hardwood Floors

Transfer hydrogen peroxide from its original container to a clean spray bottle. Be sure to set the original aside so that you can transfer any remaining peroxide back into it when you’re done disinfecting your floors.

If you have a wet mop with a built-in cleaning solution container, you can bypass the spray bottle and pour hydrogen peroxide directly into the container instead.

You’ll also need several clean microfiber sleeves for your flat mop or untreated cleaning cloths for your Swiffer-style mop.

Working in sections:

  • Spray the hydrogen peroxide directly onto your hardwood floor.
  • Allow the floor to remain wet for 30-40 seconds.
  • Use a dry, microfiber mop head to wipe the peroxide from the floor.
  • Continue wiping the floor until it’s completely dry. Doing this will remove any haze that might remain. If the mop head becomes saturated, replace it with a clean, dry one.

Many people report that using hydrogen peroxide to clean and disinfect their hardwood floors also left them looking almost new. A pleasant side-effect.

How To Disinfect Hardwood Floors Without Lifting a Finger

Although you’ll still need to vacuum your wood floor to remove dust and other particles, the number of pathogens and insect vermin are very effectively reduced with the application of ultraviolet light. Many ultraviolet light fixtures designed with disinfection and elimination of insect vermin in mind are available for household use at reasonable prices.

Of course, because ultraviolet light isn’t the type of disinfecting medium evaluated by the EPA, it is neither approved nor rejected for categorization as a disinfectant. But ultraviolet lamps are frequently used in patient facilities where pathogens can be especially problematic if not immediately eliminated.

How To Prevent Pathogens From Contaminating Your Hardwood Floors

For the vast majority of the world population, it is customary to remove shoes before or immediately upon entering a home. Why this isn’t customary in the U.S. is not certain. Given the enormity of our science and technology community and all that we know about the spread of disease, there’s no excuse for not adopting this custom.

Shoes are dirty and should not be worn inside the home any more than they should be worn to bed. When shoes are worn outside, they pick up organisms that are present on sidewalks, streets, and gutters.

Naturally, these organisms will be transported from the street to locations inside the home if the shoes that transport them aren’t first removed. Removal of shoes also keeps dirt, mud, and sand from being tracked in and scratching your hardwood floors.

Ultraviolet light units are available in the form of hand-held wands. If shoes must be worn inside, passing a wand over the uppers and soles couldn’t hurt.