They are two varieties of flooring that can provide your home with the natural appeal, charm, and sophistication of solid hardwood at a fraction of the cost. However, they couldn’t be more different.

Engineered hardwood comes with an upper layer that is actually made of real hardwood and can thus provide an added touch of authenticity, as well as an enhanced degree of stability compared to solid hardwood.

Vinyl plank floors happen to be a subcategory of vinyl flooring which has been designed to resemble real wood as closely as possible and is even manufactured in the form of planks that can be clicked together. Also referred to as luxury vinyl flooring, it is considered to be more prestigious than laminate flooring and is several times thicker than standard vinyl flooring.

Which option should you choose? To find out the right answer, both floor types have been examined in detail with comparisons drawn up between them using key qualities that should be taken into consideration during the process of selecting a flooring surface. Examining them according to your preferences will enable you to make the best choice for your dream home.

Engineered HardwoodVinyl Plank
LifespanWill last between 30 – 50 yearsWill last between 5 – 25 years
Cleaning and maintenanceRequires special products and itemsEasier to clean and maintain
Water resistanceWater-resistant but not waterproofIs waterproof
Susceptibility to sunlightWill fade with continued exposure over timeWill fade with continued exposure over time
CostMore expensiveRelatively cheaper
Ease of installationSlightly complexEasy
Refinishing optionsCan be sanded and refinishedCannot be sanded or refinished
VarietyA wide range of colors, species, stains, and finishes are availableAn extensive range of colors and styles is available
Suitable for petsYes (high Janka rating, distressed finish recommended)Yes
Overall valueMay raise the value of your home significantlyMay not raise the value of your home significantly

Durability

This quality is one of the most important you will need to take into consideration when selecting a flooring option for your home. This is because selecting a durable surface can save you the extra cost and effort involved in shopping for new flooring and having to install it all over again.

Engineered hardwood

Engineered hardwood is pretty durable and also comes with added stability owing to its multilayered core. High-quality varieties can last for up to 50 years. However, because it is made from wood which is a porous material, it is by no means waterproof.

It is also susceptible to scratching and unlike solid hardwood cannot be refinished several times to get rid of extensive damage (high-quality products are the exception in this case).

Vinyl plank flooring

Vinyl plank flooring is also considered to be one of the more durable flooring options available however it does not last as long as engineered hardwood flooring since its lifespan does not exceed 25 years.

Yet, one of its key advantages over the former is its resistance to wear and tear and to scratching in particular; these qualities make it especially child or pet-friendly.

Another is its water resistance. Newer models which are made from polymers are fully waterproof making them ideal for mudrooms, kitchens, and bathrooms.

Verdict

In terms of longevity, engineered hardwood wins overall, yet in terms of water and scratch resistance and all the daily concerns they entail, vinyl plank flooring is the preferable option.

Cleaning And Maintenance

Different types of flooring surfaces have different types of cleaning and maintenance requirements. Some can be cleaned using general cleaning materials and do not require any special kind of maintenance. Others can only be cleaned using approved materials and their maintenance may involve considerable expense. 

Engineered Hardwood

The refined beauty engineered hardwood floors can provide requires special care to be maintained. Reaching for any available brush or broom and using a very wet mop or even a steam cleaner might simply ruin your floors with scratches from hard bristles or from buckling, crowning, or cupping due to water damage.

To clean your engineered hardwood floors effectively, you will need to ensure you use manufacturer-approved products and avoid harsh cleaning solutions which may also cause damage to the finish. You will also need to endeavor to use soft-bristled brushes and brooms when sweeping to avoid scratching the surface.

This surface is also susceptible to blemishes. Depending on their severity and number it may be possible to repair scratches on engineered hardwood floors with a clear coat or colored markers, wax pencils, or filler and a stain.

Alternatively, you may need to refinish the entire surface. However, unlike solid hardwood floors which can be refinished several times, it may only be possible to refinish your engineered hardwood surface once. The only exceptions are products that have a veneer layer of over 3mm.

Vinyl Plank Flooring

Despite vinyl plank flooring’s impressive resistance to moisture and scratching, you should still aim to use soft-bristled brushes when sweeping and should clean it with a microfiber mop which must be squeezed properly to eliminate as much moisture from it as possible during the process.

You will also need to ensure you avoid harsh cleaning products such as ammonia, bleach, or high pH detergents (mild dish soap is best) and avoid steam cleaning it as well.

The use of wax on surfaces in this category must also be avoided since doing so may cause buildup rather than providing them with an alluring sheen.

Vinyl plank flooring cannot be refinished and you will need to replace the damaged part of the floor using extra planks from the batch you have purchased.

Verdict

Both surfaces require the use of soft-bristled brushes and microfiber mops during cleaning. Neither take kindly to harsh cleaning products and require approved solutions or mild soap. However, vinyl plank floors are generally low maintenance compared to engineered hardwood floors.

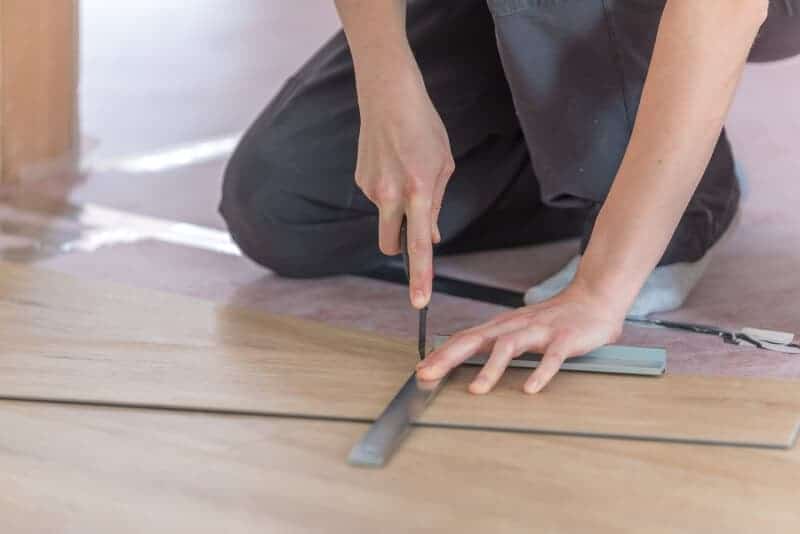
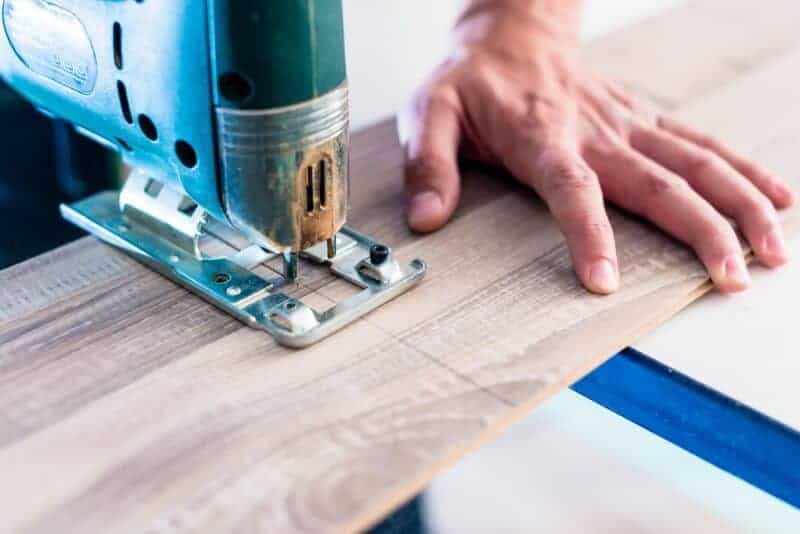
Ease Of Installation

Flooring which is easy to install can enable you to save on cost and even time. Several homeowners now prefer to install their flooring themselves rather than relying on professional assistance. However, depending on the level of skill required, hiring the services of a contractor may be the more prudent and cost-effective option in the long run.

Engineered Hardwood

In terms of hardwood floors, engineered hardwood is considered to be an easier option compared to solid hardwood. Homeowners who are rather savvy with home renovation projects will be likely to find the floating installation or the nail-down installation methods easier than the glue-down method. The third option is to install engineered hardwood flooring over a concrete slab.

Vinyl Plank Flooring

Flooring surfaces in this category are even easier to install compared to engineered hardwood floors and are considered one of the most convenient in this regard.

The procedure may either involve locking them together if they have a tongue and groove design or gluing them down if they happen to be of the peel and glue variety, and do not require the services of a professional.

Verdict

If you prefer to save on time and avoid complexity, vinyl plank flooring will be preferable to engineered hardwood since you will be able to install it yourself. The simplicity of the process means that you will be able to complete it promptly compared to the latter option. It also means you will be able to spend less money since you would not need to hire a contractor.

Susceptibility To Sunlight

Sunlight can add a touch of natural magic to our surroundings bathing them in the warmth and glow of summer or spring. 

And yet it can also fade organic and non-organic materials. As a result, the susceptibility of your flooring of choice to damage from the sun’s rays is also another factor that you will need to take into consideration as well as protective measures you may need to take to preserve its charm for as long as possible.

Engineered Hardwood

Wood is sensitive to sunlight and will fade over time as a result of continued exposure to it. This is mostly due to its ultraviolet rays although infrared and visible light also plays a role. The change to your hardwood floors will depend on the nature of the wood used and certain species will lighten as a result of exposure while others will darken.

For example, cherry will darken rather quickly to a reddish color and jarrah will also develop a more intense color over time. On the other hand, walnut and hickory will lighten after a while. 

Vinyl Plank Flooring

Despite its impressive resistance to factors such as scratching and moisture, vinyl plank flooring is also susceptible to fading as a result of prolonged exposure to sunlight. As a result, you may need to rely on tinted windows or the use of window treatments to protect it.

Verdict

Both engineered hardwood and vinyl plank flooring are susceptible to damage from sunlight over time. It is worth noting that it is possible to find engineered hardwood that comes with UV protection in its finish or certain varieties of vinyl plank flooring which have been manufactured with wear layers that have UV protection.

Alternatively, you may also need to use window films to filter out UV light or rely on low-e coated glass.

Cost

Quite often when embarking on a reflooring project, a tradeoff will have to be made between your set budget and your preferences. Factors worth considering will not only include the cost of the flooring but also the cost of installation.

Engineered Hardwood

Surfaces in this category are generally considered to be cheaper compared to solid hardwood and often cost $4 – $10 per square foot. However, depending on the installation method you are choosing, you may also have to consider the cost of hiring a professional which may cost you between $3 – $8 per square foot.

Vinyl Plank Flooring

Luxury vinyl plank costs even less than engineered hardwood with prices ranging between $2.50 – $5 per square foot. Installation is pretty cheap compared to engineered hardwood and ranges between $1 – $3 per square foot. However as noted above, this is one of the easier flooring options to install and you may be able to cut costs even further if you install it yourself.

Verdict   

If you intend to enjoy the aesthetic appeal of one of the more expensive flooring surfaces for a fraction of the cost, vinyl plank flooring may be the preferable option given that it is considerably cheaper compared to engineered hardwood.

Variety

Availability of a wide selection of options increases the likelihood of you being able to obtain the style and color of flooring which perfectly suits your preferred esthetic for your home. Certain types of surfaces can be especially versatile in this regard.

Engineered Hardwood

If you select this option, you will find that you will have an extensive selection to choose from. Regardless of your preferred species, grain, finish, and grade, you will be able to find just what you need.

Vinyl Plank Flooring

Because luxury vinyl plank flooring is printed, the variety on offer is practically limitless. As a result, you will be able to have access to an even greater selection of colors and styles.

Verdict

While vinyl plank flooring offers a truly impressive range of options, engineered hardwood can provide you with all the choices you need to imbue your home with the natural appeal of real wood.

Which Is Better: Engineered Hardwood vs Vinyl Plank Flooring

If you are interested in obtaining the authenticity of hardwood which comes with enhanced moisture resistance and stability at a lower price than solid hardwood, then engineered hardwood will be an excellent choice. The fact that it is also sustainable and will add to the value of your home are added benefits for selecting this flooring option.

However, if you prefer a more child-friendly surface that is low maintenance, has an enhanced resistance to moisture and scratching, and can also be very budget-friendly, you may prefer vinyl plank flooring.

vinyl floor and underfloor heating – a combination that is becoming increasingly popular. Nevertheless, it is a topic that always raises questions. In this article you can find out which vinyl flooring is suitable for underfloor heating systems and what you should bear in mind when laying , so that you can benefit from the advantages of your vinyl floor on underfloor heating in the long term.

A wide range of applications, attractive appearance, easy installation, resistant material properties and much more – the advantages of a vinyl floor are obvious.

Underfloor heating also impresses with numerous advantages such as cost-effectiveness, cleanliness and environmental friendliness.

In single and multi-family houses, the proportion of underfloor heating as a heating system is now just under 50 percent.

It is therefore not surprising that the installation of vinyl flooring on underfloor heating is also becoming increasingly popular.

That’s all that matters:

Criteria for vinyl flooring on underfloor heating

While there was a lot of discussion about the suitability of vinyl flooring on underfloor heating in the past, the combination has now proven itself through predominantly positive experiences.

In principle, there is absolutely no objection to the installation of vinyl flooring on underfloor heating, provided that certain conditions are taken into account in advance:

Exact Temperature

The most decisive criterion for laying vinyl flooring on underfloor heating is whether the chosen heating system ensures reliable temperature control.

Unlike other floor coverings, such as laminate, parquet or tiles, a vinyl floor reacts primarily to heat.

If the temperature rises, the material expands strongly, the heat decreases, it tightens again.

Strong temperature fluctuations or too fast temperature rises can lead to unsightly joint formation or permanent damage to the vinyl floor.

Therefore, it is important that the underfloor heating does not heat the vinyl floor too much or too quickly.

The maximum surface temperature of vinyl floor heating should not exceed 27° C.

Hot water underfloor heating vs. electric underfloor heating

The classic version of hot water underfloor heating generates heat by flowing warm water through plastic or copper pipes.

What is often seen as a disadvantage has a positive effect for vinyl floors:

The sluggish lead time of a hot water underfloor heating ensures a slow heating of the vinyl floor and thus protects the material.

In addition, the temperature in the pipes remains relatively constant between 26 and 28° C throughout the heating period.

The flow temperature – i.e. the temperature at which the water circulates through the pipes – has no influence on the vinyl floor and can therefore be quite higher.

Especially with modern low-temperature underfloor heating systems, the surface temperature can be precisely regulated by built-in thermostats.

It should be noted, however, that the installation of a hot water underfloor heating system involves relatively high effort and a certain height must be maintained for the final floor ingesis. Especially in the case of renovation work on existing buildings, the building conditions must therefore be carefully checked in advance.

Otherwise, however, hot water underfloor heating must be used without hesitation for vinyl floors.

Caution is required with electric floor heating systems.

In this variant, the heat is generated by the combination of current and voltage, which leads to a significantly faster and sometimes higher temperature increase than with hot water underfloor heating.

Although modern models also have the necessary technical requirements for temperature control, the installation of vinyl flooring on electric underfloor heating systems has not been recommended before.

Expert Heating installation

In general, the installation of underfloor heating under a vinyl floor exclusively should be carried out by a specialist.

This ensures that the substrate is prepared professionally and that any moisture in the screed has been sufficiently baked out before laying the vinyl floor.

In addition, not only must the construction height on the entire floor area be precise, but also the pipes of the underfloor heating must be installed in such a way that a uniform distribution of heat on the vinyl floor is guaranteed. Even spot heat nests can cause damage to the vinyl floor.

Special Footfall sound insulation

To ensure that the heat from the underfloor heating is ultimately transferred to the surface of the vinyl floor in an energy-efficient manner, the lowest possible thermal resistance of maximum 0.15 m2K/W is required.

In addition to the thickness of the floor and the thermal conductivity of the material, the impact sound insulation or vapour barrier used also affects this value.

For underfloor heating systems on which a vinyl floor is to be laid, special footfall sound insulation is available.

The quartz sand most contained in it stores heat and releases it to the room.

Other insulating materials such as polystyrene, cork or foam, on the other hand, prevent the heat from spreading and are therefore unsuitable for use with vinyl floors on underfloor heating .

Contrary to its previous reputation, vinyl floors achieve excellent results in terms of energy efficiency and heat performance.

Due to the low heat transfer resistance and the good thermal conductivity, rooms with vinyl flooring can be effectively heated by underfloor heating.

Which vinyl floor is designed for installation on Underfloor heating suitable?

If an adequate underfloor heating system has been found and the necessary preparations have been made, the crucial question arises as to the right vinyl flooring.

All vinyl floors suitable for installation on underfloor heating systems are specially marked.

If a vinyl floor does not have a corresponding label, a written confirmation of suitability for underfloor heating from the vinyl floor manufacturer should be obtained prior to installation.

The extent to which a vinyl floor is suitable for use on underfloor heating also depends on the design and the type of installation.

Basically, a distinction is made between vinyl on HDF carrier plates and solid or full vinyl.

Vinyl on HDF is similar to laminate and is floating using a click system. There are also click systems that are made entirely of vinyl.

The thinner full vinyl, on the other hand, consists of homogeneous planks and is only glued to the screed on a full surface.

Types of laying from vinyl flooring to underfloor heating

Basically, all types of laying work to install a vinyl floor on hot water underfloor heating systems.

However, there are differences in energy efficiency, albeit mostly minor.

Solid or full vinyl flooring, which is glued to the surface, is best suited for installation on underfloor heating.

The direct connection between the vinyl floor and the substrate using suitable adhesives and the relatively low material thickness of maximum 5 – 6 mm ensure optimum thermal conductivity.

But also the floating laying of vinyl floors on underfloor heating is possible.

However, in this type of laying, in contrast to the fully bonded installation, a thin air layer forms between the substrate and the vinyl floor, which impairs the thermal conductivity.

In addition, in the case of floating vinyl floors on underfloor heating, a footfall sound insulation is necessary, which additionally affects the heat transmission resistance.

Vinyl floors on HDF substrates, which are usually much thicker than solid vinyl floors, are particularly suitable for installation on underfloor heating less optimal.

In addition to the impact sound insulation, which is already integrated in many vinyl floorboards, an additional vapour barrier is also required for mineral substrates (e.g. cement screed or anhydrite screed) so that rising damp cannot damage the substrate material of the vinyl floor.

In any case, when laying vinyl flooring over underfloor heating, it is essential to follow the manufacturer’s specifications and installation instructions. You will also need a orderly vinyl cutter to place clean cuts.

Laying vinyl floor on tiles with underfloor heating

Often a vinyl floor is also laid on existing tiles, under which there is already underfloor heating.

This also applies in this case:

Even if it is basically possible to lay a floating (click) vinyl floor, it is recommended to use a fully glued full vinyl floor to prevent heat loss.

Is a vinyl floor on underfloor heating Harmful?

A question that until a few years ago was quite justified:

Vinyl floors used to contain harmful plasticizers, which developed toxic fumes when heated, for example by underfloor heating.

Today, however, vinyl floors in Europe are subject to strict conditions, which ensure that the use of harmful phthalates is dispensed with.

Therefore, unless an old vinyl floor is used, the laying of vinyl flooring on underfloor heating has no negative health effects.

A vinyl floor is not only convincing because of its appearance, but is also robust and easy to clean.

The quick and easy cleaning of a vinyl floor works best with a vacuum cleaner. In this article you will learn what is important for a vacuum cleaner for vinyl flooring.

Vacuum cleaner for vinyl floor (with cable):

As simple as the laying of a vinyl floor is, as robust and resistant is the surface. The material is hard-wearing and withstands even heavy use.

Nevertheless, a vinyl floor – like any other floor – must be cleaned and maintained regularly in order to maintain its long-term lifespan. Stones, sand or other dirt can permanently damage the sealed protective layer of the vinyl floor, scratch the surface or make it blunt.

Dry cleaning of vinyl floors

One of the great advantages of a vinyl floor is that it can be cleaned with relatively little effort.

Especially in daily cleaning, vinyl floors are not very demanding: Dry cleaning with a soft brace, a mop or a vacuum cleaner keeps the vinyl floor clean again in no time.

Unlike a broom or mop, the vacuum cleaner whirls up fewer fine dust particles when cleaning.

Even coarser dirt can be removed quickly and effectively with the vacuum cleaner – which is especially important in households with animals or children.

Very coarse dirt, such as stones, should be removed with the vacuum cleaner anyway, otherwise the vinyl floor could be scratched during sweeping.

Which vacuum cleaner is suitable for vinyl flooring?

Vinyl floors have a softer surface compared to laminate or tiles, which can easily cause unsightly scratches if the vacuum cleaner is handled incorrectly.

Therefore, when selecting the vacuum cleaner for vinyl floors, care must be taken first and foremost to ensure that there are no metal plates or sharp edges at the bottom of the nozzle.

Vacuum cleaners with special brush attachments are best used for cleaning the vinyl floor.

Thus, the vacuum cleaner nozzle glides gently over the vinyl floor without scratching the surface. These special attachments are available in different sizes and finishes, making it easy to reach corners and other hard-to-reach areas.

If you want to be on the safe side, use a vacuum cleaner with parquet nozzle for cleaning the vinyl floor – these are softer and also have longer bristles, which reliably prevents scratches in the vinyl floor.

Vacuum cleaner for vinyl floor (without cable):

Scratches by vacuum cleaner – what to do?

And if the vinyl floor has been slightly scratched by vacuuming, suitable vinyl floor repair kits or special PU cleaners can help. Fine scratches in the vinyl floor can also be polished out with cooking oil. To protect against scratches, you should also think of a floor protection mat. Even dust-sweeping robots usually leave fewer scratches, which makes them work completely differently.

vinyl flooring is known for its simple installation. However, in order for it to be optimally adapted to the spatial conditions, it is often necessary to cut the vinyl floor. How to cut the vinyl floor quickly and exactly and what is important for a vinyl cutter, you can find out here.

Bestseller in the category vinyl cutters:

Vinyl flooring is not only available in different decors and finishes, vinyl floorboards or planks are also available in different dimensions.

Nevertheless, it is hardly possible to lay a new vinyl floor without adapting it there or there.

Room dimensions, corners or cut-outs for heating pipes require the vinyl floor to be cut to size accordingly.

How can vinyl flooring be cut?

Most vinyl floors can generally be cut with little effort – even without special tools.

Regardless of whether it is a solid or solid vinyl floor with a relatively low material thickness between 2 mm and 5 mm or a click vinyl floor on HDF carriers with a thickness of approx. 6 mm to 10 mm.

Cut solid or solid vinyl flooring

A simple, sharp cutter knife, a pen and a cutting rail or an angle are sufficient to cut a vinyl floor made of full vinyl.

Cut vinyl floor with the cutter knife

For this purpose, the cutting edge is simply marked with a pen and the surface of the vinyl floor is cut with the cutter.

The rail ensures that both the marking and the cut are made straight and at the right angle.

With correspondingly low material thickness and a little force, a cut is usually sufficient to cut the vinyl floor exactly.

Click vinyl floor cutting

Even click vinyl floors can be cut quickly and precisely with a commercially available cutter or carpet knife – even vinyl floors with HDF carrier plates or cork.

After the interface has been marked with a pen and an angle or rail, the surface of the vinyl floor is easily carved with the knife.

If the ends of the vinyl floor plank are then pressed down – preferably at a table edge or above the knee – the click vinyl breaks at the set point and a clean edge is created.

For short fringe pieces, which can no longer be broken well by hand, it helps to bend the short side with the help of pliers.

Keine Produkte gefunden.

Vinyl floor sawing

If you are not so comfortable with the cutter, you can also saw the vinyl floor in most cases.

A crosscut saw is just as suitable for straight cuts as a jigsaw.

A jigsaw can also be used to cut corners from a vinyl floor, as is required for laying on doors.

Vinyl floor sawing

Likewise, to cut holes for pipes or to set non-straight or round cuts.

However, the use of a saw is not necessary: corners, holes and curves can be cut just as well with the cutter.

Vinyl cutter – the comfortable alternative

It is even easier to customize vinyl floors with a vinyl cutter.

The practical, versatile devices, also known as laminate cutters, ensure exact cuts in no time at all, thus saving time and making work much easier.

Vinyl cutters are suitable for both adhesive vinyl and click vinyl and can cut thick and thin vinyl floors with a material thickness of 2 mm to 11 mm depending on the model.

Keine Produkte gefunden.

Straight cuts are just as possible as angle cuts – most devices also have additional functions to be able to cut skirting boards or corners, for example.

Only cut-outs – such as for heating pipes – are not possible with a vinyl cutter not possible.

In principle, vinyl cutters in two versions Differences:

Manual vinyl cutters

In the case of manual vinyl cutters, the vinyl floor is cut by a blade, which is operated with a lever.

Depending on the model and the thickness of the panel, the vinyl floor can be cut precisely and without material wear by lever action with more or less effort.

Non-slip rubber feet ensure a secure grip of the device, and one hand is always free to fix the vinyl floor element in addition – moving or slipping the cutting edge is therefore virtually impossible.

Another advantage of manual vinyl cutters is that they can be operated wirelessly. They do not require power supply, can therefore be used on the go and do not cause noise or dirt.

Electric vinyl cutters

As an alternative to manual vinyl cutters, there are electric models.

These are equipped with a motor to cut the vinyl floor.

An electric vinyl cutter is especially recommended if physical exertion is to be avoided as far as possible or if large areas of vinyl flooring are to be laid in the shortest possible time.

However, the appropriate power supply must be guaranteed for motor-powered vinyl cutters – in addition, higher noise and dust generation is also created.

Keine Produkte gefunden.

Vinyl cutters at a glance

Vinyl cutters are available in a wide variety of designs from a wide range of manufacturers – from the practical basic model for do-it-yourselfers to the comprehensive all-in-one device for professional use.

The models differ on the one hand naturally in price, but on the other hand also in their technical characteristics, equipment and functions.

What to look for in a vinyl cutter

The wide range of different vinyl cutters makes the decision is often not easy. However, there are some criteria that are based on the selection of the appropriate model.

  • For example, there are models that are only suitable for cutting vinyl panels or tiles, while other models are more versatile and are also suitable for laminate, parquet or precious wood.
  • There are also glaring differences in the cutting width: depending on the model, this can vary from just under 20 cm to a maximum of 46.5 cm.
  • The same applies to the thickness of the material: ideally, the vinyl cutter should be able to cut materials up to at least 10 mm.
  • Especially with adhesive vinyl it is advantageous if the vinyl cutter is equipped with a non-stick coated blade to avoid an impairment of the cut by sticky adhesive.
  • Features, such as an integrated dust bag or laser, can add value to the vinyl cutter.

The best vinyl cutters in comparison

There are many manufacturers of vinyl cutters, models even more.

Among the most famous brands of vinyl cutters are for example

  • Wolfcraft
  • Logoclic
  • Master
  • Wolf
  • Lux
  • X4 Tools
  • Kwb
  • Qteck
  • Batavia
  • Güde
  • Gmc

All manufacturers offer certain advantages to their models – be it in terms of quality, price-performance ratio, functionality or user-friendliness.

Guidance is provided by regularly carried out product tests and comparisons from various – more or less – independent portals, such as Stiftung Warentest or similar.

If that’s the way it goes, Wolfcraft is right at the top of the bestseller list with its VLC 300, VLC 800 and VNC 250 models.

But also models such as the Logoclick LE 210 or the X4-Tools laminate vinyl cutter receive best marks in ratings and price-performance ratio.

Which model is ultimately best depends on the individual requirements and the actual field of application.

Bestseller in the category vinyl cutters:

Rent vinyl cutters

If a vinyl cutter is only needed for a single use, it often does not stand for buying a new device.

Do-it-yourself stores such as Hornbach, Obi or Hellweg therefore usually also offer the possibility of borrowing a vinyl cutter.

But do-it-yourself flea markets as well as portals such as Shpock or ebay are also a good alternative: Vinyl cutters can also be bought cheaply.

vinyl flooring is considered to be a robust and resistant flooring that offers numerous advantages.

However, the laying of a vinyl floor in outdoor areas is not recommended in principle.

Find out in this article why this is the case – and which floor coverings are better suited for outdoors than vinyl floors.

While vinyl floors are absolutely convincing indoors and almost can be installed in any room, there are essential outdoor areas Influencing factors that add too much to the material:

Why is vinyl flooring not suitable for outdoor use?

Vinyl floors primarily react to heat.

When the temperature rises, the material expands considerably, and when the temperature drops, it tightens massively.

The interplay of wetness and dryness can also cause permanent damage to the vinyl floor.

In the outdoor sector, neither strong temperature fluctuations nor alternating wet and dry periods can be avoided.

Direct sunlight and extreme heat followed by the cloud-breaking thunderstorm in summer, sizzling cold, freezing fog or snowfall in winter – due to its pronounced shrinkage and stretching behavior, the vinyl floor would change the weather conditions outside, on the terrace or balcony in the long run.

Also for outdoor installation in covered plants, a vinyl floor is not provided for.

Thus, the sun can heat the ground in a conservatory to over 50° degrees, which leads to the swelling of the vinyl floor. Even the high temperature differences between summer and winter in garden houses would not be long withstand the vinyl flooring.

Even if manufacturers are repeatedly launching vinyl floor coverings on the market that have also been approved for outdoor installation, there are still alternatives that are more suitable for outdoor use.

Alternative Outdoor flooring

Floor ingescent outdoors must meet special requirements.

The different variants of outdoor floors differ in terms of appearance, required base and type of installation, as well as properties in terms of weather resistance, frost-freeness or resistance.

In addition to tried-and-tested materials such as ceramic tiles, natural stone, concrete or real wood, there are also modern surfaces made of plastic, which promise a long-lasting and easy-care flooring outdoors.

Especially artificial stone slabs or floor coverings made of WPC (Wood Polymer Composite) – a mixture of wood fibres and thermoplastic plastic – are enjoying increasing popularity. Visually and haptically, WPC boards hardly differ from their natural competitors, but are easier to install and are characterized above all by their higher resistance compared to real wood.

Contact adhesive for fixing vinyl floors to the wall

Gluing a vinyl floor to the wall is a novel and increasingly popular alternative in interior design.

This article explains what is important when installing vinyl floors on the wall.

Until now, vinyl was primarily known and proven for laying on floors.

But modern vinyl floors can also be attached to the wall.

Due to the advantageous material properties and the limitless selection of different decors, they open up a wide range of possibilities in the design of the room. However, in order to achieve a lastingly beautiful result, there are some important aspects to consider.

Which vinyl floor can be mounted on the wall?

As the demand for vinyl floors for the wall has risen sharply in recent years, the vinyl flooring market has responded.

Since the world’s leading trade fair Domotex 2018, more and more manufacturers have been offering vinyl floors that are also specially designed for the design of walls.

These products, marketed under the term Luxury Vinyl Tile (LVT for short), are a cost-effective and user-friendly alternative to laminate and parquet, but especially to ceramic tiles.

Vinyl floors are generally available in two versions:

  • as solid or solid vinyl
  • or as a ready-made vinyl with click system on HDF carriers.

In principle, all vinyl floors can be attached to the wall.

Also those that are actually intended for conventional use as flooring. However, there are differences in the preparation of the substrate and in the assembly.

Glue full vinyl floor to the wall

The material of full vinyl floors is much thinner than vinyl on HDF.

If a full vinyl floor is to be fixed to the wall, the substrate must therefore be completely flat and smooth.

Otherwise, bumps would penetrate the wall, resulting in unsightly dents in the vinyl floor.

However, the thinner material also has advantages: it is easy to process and easily cut against the wall with a sharp knife.

A full vinyl floor is usually mounted in planks that are attached to the wall.

In order to ensure long-term durability, the full-surface bonding with a suitable adhesive is most suitable.

The use of a double-sided adhesive tape or the attachment of the vinyl floor to the wall with nails is not recommended.

Joints and transitions can be filled and sealed with silicone. This also makes the vinyl floor on the wall water resistant, making it suitable for use in bathrooms.

Fixing click vinyl floor ingtotheis on the wall

Unlike full vinyl floors, click vinyl floors forgivable minor bumps in the underground due to their higher strength.

If a click vinyl floor is to be attached to the wall, it is therefore not absolutely necessary to spat it absolutely smoothly beforehand – dry and even the substrate must still be.

The assembly of click vinyl floors requires some practice:

The boards can be connected relatively easily by the click system, but still have to be attached to the wall with a suitable adhesive at the same time.

It is best to glue the click vinyl floor from bottom to top on the wall so that the boards can support each other.

In addition, the expansion and shrinkage behaviour of the Click vinyl floor must be taken into account:

In the edge area, so-called expansion joints must be released so that the material can work accordingly.

These joints play a crucial role, especially in click vinyl floors on HDF carriers, as otherwise unsightly joint or dent formation can occur during moisture or heat exposure due to e.g. solar exposure.

Is a vinyl floor on the wall also possible in the bathroom?

A major advantage of vinyl flooring on the wall is that it is water-resistant and can be applied to almost any existing substrate.

Accordingly, it is particularly popular with the renovation of bathrooms, because the elaborate, noise- and dirt-causing removal of existing tiles can be dispensed with.

When selecting the vinyl floor for the wall, care must be taken to ensure that it is specifically approved for use in wet rooms.

In addition, it must be ensured that the substrate is sealed against water and moisture.

However, this should already be the case with existing tiles on the wall, so that a new sealing is not required. With fully glued vinyl flooring on the wall, the joints can be easily sealed with silicone.

For click vinyl floors, the groove and spring provide waterproof joints, but expansion joints must remain in the edge area.

Suitable vinyl floors are basically water-resistant, so that neither splash water nor prolonged water exposure damage the surface.

Appropriate sealing of the substrate also prevents mold formation under the vinyl floor on the wall due to penetrating moisture.

With what glue can the vinyl floor on the wall be fastened?

In order to glue vinyl flooring to the wall, it is recommended to use contact adhesive, which is applied to the substrate and vinyl floor. Contact adhesives are easy and safe to use – both planks made of full vinyl and click vinyl planks adhere immediately to the substrate and cannot slip.

As an alternative to the contact adhesive, special polymer adhesives can also be used.

Regardless of the product, the adhesive must in any case match the weight and thickness of the vinyl floor on the wall – and the adhesive strength must not be caused by evaporating ingredients such as water or solvents.

In wet rooms, the vinyl floor should only be attached to the wall on a polymer-based basis, as these can also be water exposure ensure long-lasting durability. From self-adhesive Vinyl floors on the wall are generally discouraged in the bathroom because the dry adhesive is not geared to this.

Regardless of which adhesive is used, make sure that the wall is dry, clean and level before the vinyl floor can be fixed to the wall.

Recommended repair sets from this article:

Invalid table id.

vinyl floors are considered to be resistant and robust, but they are not indestructible.

Heavy furniture, excessive strain or small household accidents can leave their mark. In this article you will learn how best to repair damage to your vinyl floor.

How can damage be caused to the vinyl floor?

The typical damages of vinyl floors can basically be divided into three categories:

  • damage to the surface, such as scratches, grinding marks, cuts or holes
  • dents or bubbles and
  • Detachments at corners and edges.

While damage to the surface is often caused by carelessness or excessive stress, the causes of the other two types of damage are sometimes insufficient processing quality or moisture penetration.

How does the repair of vinyl floors work?

A major advantage of vinyl floors is that most damages can be repaired relatively easily – even without expert support.

The actual amount of repair work required depends on the type and severity of the damage.

In the case of minor damage, vinyl flooring can be repaired by treating only the affected area, while in the case of larger or more serious damage, the damaged flooring must be replaced.

Remove scratches and grinding marks

Whether by moving a heavy piece of furniture or a small stone in the sole of a shoe – punctual excessive stress can cause scratches, sanding marks or small cuts on the vinyl floor.

A suitable vinyl floor repair set helps with superficial damage: The repair fluid applied with a sponge or cloth fills and seals minor scratches or cuts in the vinyl floor.

The repair kit thus prevents the damage from spreading to deeper layers of the soil.

Sanding marks on the surface can also be retouched with special PU cleaners or care products – these act like a polish, making unsightly scratches paler.

In addition, the vinyl floor receives the necessary care.

It is important that the damaged area is thoroughly cleaned before repair so that the effect of the sealing or polishing is not impaired by dirt or dust.

Keine Produkte gefunden.

fill in the hole

A hole in the vinyl floor not only impairs its appearance, but also carries the risk of mould growth due to moisture entering the floor. This is a problem especially with vinyl floors in the bath.

It is therefore essential that it be repaired quickly. To do this, the damaged area is best cut out of the floor and replaced with a precisely fitted counterpart made of leftover vinyl flooring.

It is essential to use a metal bar and a very sharp knife to ensure clean, smooth cuts.

It is even easier to use a punch, which simply punches out the damaged area.

Then the edges of the inserted repair piece are covered with adhesive tape and the resulting cracks are filled with cold welding agent. When this is dry, the seams are hardly visible.

TIPP: If there are no more remnants of the vinyl floor, the hole can also be sealed with repair wax (actually intended for wooden floors) or silicone in the appropriate colour.

Another alternative are special repair sticks available in specialist shops, which are welded to the floor.

Remove bubbles

If the vinyl floor throws bubbles, there can basically be two reasons for this: air pockets during installation or water damage.

In order to be able to repair the vinyl floor, the underlying cause should therefore first be determined.

To do this, the bladder is cut open with a sharp knife and lifted.

If the substrate of the vinyl floor is dry, the repair can be started immediately; if, on the other hand, it is damp, the area must be completely dry before taking any further steps.

To remove the bulged area, clean the subfloor and the raised vinyl floor plank, spread new vinyl floor adhesive evenly over it with a spatula and replace the plank.

After removing excess glue from the edges with a clean cloth, the repaired area is smoothed with a rolling pin so that it is fully bonded.

Until the adhesive is completely dry, the area is fixed with a heavy object (e.g. a stack of books).

Re-glue corners and edges

Loose corners and edges are basically repaired in a similar way to bubbles.

In this case, the vinyl floor is not cut open, but is instead opened up to the point where it is still completely stable.

However, care must be taken not to cause kinks. With the help of a hair dryer, old adhesive residue can be easily warmed and removed before applying new adhesive and pressing the vinyl floor firmly back on.

How can severely damaged vinyl floors be repaired?

In the event of extensive or more serious damage, it is recommended to replace the vinyl floor completely at this point.

With floating laid vinyl floors, individual planks can be removed very easily, as there is no fixed connection with the subfloor.

But even glued vinyl flooring can be replaced without any problems: To do this, the damaged vinyl plank is cut out evenly with a sharp knife and removed.

Lines in the decor or existing joint lines serve as orientation aids and facilitate the exact adjustment of the replacement part later.

For floor elements that are difficult to remove, the heating of the adhesive with a hair dryer is an effective remedy.

Unless an entire vinyl floor plank is replaced, the removed floor piece serves as a template for cutting the new element to size and shape, as well as for the decor and the colour.

This is particularly important for vinyl floors that have arched patterns.

In the next step (for floating floors) the longitudinal and transverse springs on the replacement plank are removed and the adhesive is applied evenly (see video above).

While the glue is drying, the repaired area should be weighted down so that the floor does not bend.

To protect the floor from scratches in future, you should also use a office chair underlay for chairs with castors .

Keine Produkte gefunden.

Helpful household remedies for small damages

Even if the repair of vinyl floors is basically not an unsolvable task – it is even better if it can be avoided completely.

For example, through simple tricks or proven household remedies like these:

  • With cooking oil fine scratches in the surface can be polished out without much effort.
  • For dark vinyl floors, such as walnut, scratches can also be treated with dark shoe polish or special repair sticks.
  • Wax drops are best removed with a plastic spatula. Stubborn residues are being attacked by hairdryers and blotting paper or paper towels.
  • The hair dryer also serves its purpose in the case of dents or bumps: simply warm the affected area in the vinyl floor until the floor becomes soft, remove the bruise with a rolling pin or wallpaper roller or weigh down the heated area with a suitable object.
  • Rubber abrasion – for example from dark shoe soles – is best removed with PU cleaner.
Invalid table id.

Slicone sealants for sealing joints in vinyl floors

Invalid table id.

Joints in vinyl flooring are not only unattractive to look at, but sometimes also carry the risk of permanent damage. In the following, you will learn what you should therefore already consider when laying vinyl flooring and what you can do if joints in the vinyl floor open up.

What causes joints in the vinyl floor to fall apart

Like many floor coverings, a vinyl floor reacts to different room conditions.

The material works – joints are created or dissolved.

In most cases the reasons for joints in the vinyl floor are either heat or moisture.

Heat

While parquet and laminate floors are primarily sensitive to moisture, vinyl floors primarily react to heat.

The material expands strongly when the heat is affected and reassembles when the temperature drops. The result is diverging joints.

Especially often joints are created in the vinyl floor in rooms with large windows or direct light. The sun’s irradiation leads to a sharp increase in the temperature on the surface – and consequently to the expansion of the vinyl floor.

With darker soils this effect is even more obvious than with brighter soils, as these reflect sunlight better.

But even with underfloor heating systems, the vinyl floor expands more, which is why it is essential to ensure that the surface is not heated too quickly or too highly.

Moisture

Incoming moisture and subsequent drying also cause joints to rise in the vinyl floor.

Especially in rooms with high humidity or direct contact with water (e.g. B. with vinyl flooring in the bathroom) this can cause permanent damage or mould growth.

Which avoids joints in the vinyl floor

Due to its material properties, the vinyl floor needs sufficient leeway to work.

Therefore, it is important to insert a expansion joint at the time of installation. This applies wherever the vinyl floor meets immovable components (e.g. walls, pipes, columns, built-in furniture) or other floor coverings.

This expansion joint serves to compensate for the elongation and pulling of the material and to allow joints to diverge only where it is intended.

The rule of thumb for the edge distance is at least 5 mm or, in large rooms, 1 mm per metre of length.

Vinyl floor gets joints – what to do?

There are several ways to close joints in the vinyl floor. Various products are available from specialist retailers to fill, glue or seal joints.

Elastic materials – e.g. silicone – are best suited to fill joints in the vinyl floor. They remain permanently flexible, which allows the soil to expand accordingly and contract again.

Corresponding joint fillers are available in numerous different colours and compositions. Therefore, they are versatile and are ideal for closing joints in the edge area.

Invalid table id.

It can also be used to seal transitions to connection joints in doors, skirting boards or stairs.

Sealing joints waterproof is particularly important for vinyl floors in wet rooms to prevent moisture from entering.

Massively laid vinyl can be easily sealed with silicone, e.g. in the edges and connections to tiles, but this is not recommended for floating floors.

The range of vinyl bases is diverse – they are available not only in countless colours and designs, but also in various thicknesses.

It is not so easy to keep an overview and to make the right choice, especially not.

The following summary of commercially available vinyl flooring thicknesses and their areas of application should help you to make a decision.

What does the vinyl floor thickness depend on?

With regard to the thickness of vinyl floors, two factors must be taken into account: the substrate and the wear layer.

Thickness of the carrier material

As regards the carrier material, a basic distinction is made between vinyl on HDF carrier boards and solid or solid vinyl.

Vinyl on HDF has a structure similar to laminate and is equipped with a click system.

Such a vinyl floor can only be laid floating and has a thickness of approx. 10 mm.

In contrast, solid or full vinyl only between 2 and 5 mm thick, is available with and without click system and is suitable for both floating and glued installation.

The thickness of the base material has an effect on the construction height of the floor, which is particularly important when renovating existing buildings.

If the vinyl floor is laid on an existing floor covering, such as on tiles, thinner variants are particularly suitable.

However, even if the old vinyl floor is removed, the overall height of the existing floor must be taken into account in order to avoid difficulties in tricky places (e.g. door sills). If in doubt, the door must otherwise be shortened.

Thickness of the wear layer

What is commonly understood by the thickness of the vinyl floor refers mainly to the top layer.

This surface, which is usually made of polyurethane, not only determines the appearance of the floor due to the incorporated decoration, but also protects the vinyl primarily against external influences such as wear, damage, moisture, e.g. with vinyl flooring in the bathroom or dirt.

The fact that the vinyl flooring is basically all the more hard-wearing and durable, the stronger this protective wear layer is, seems hardly surprising.

But which strengths are suitable in practice for which areas of application?

Vinyl flooring in practice: Which thickness for which room?

The thickness of the wear layer has a decisive influence on the resistance and robustness of the soil.

Commercially available vinyl floors are available in four different designs:

  • 0.2 mm
  • 0.3 mm
  • 0.55 mm
  • 0.7 mm.

When selecting a suitable floor, the daily stress and strain of the respective room plays a decisive role.

In living areas with low levels of wear and tear, such as bedrooms or offices, floor coverings with a 0.2 mm or 0.3 mm wear layer are completely sufficient.

If the floor is exposed to higher loads, as is the case in corridors, kitchens, living rooms and children’s rooms, but especially also in damp rooms such as bathrooms, the use of vinyl floors with 0.55 mm wear layer is recommended.

These are not only easier to clean, but are also more durable and more resistant to moisture.

Vinyl floors with a wear layer of 0.7 mm are ideal for the contract sector in particular.

Whether office, doctor’s surgery, salesroom or warehouse – floorings with a very high wear layer withstand even heavy loads and street dirt, brisk customer traffic or punctual loads from heavy shelves or desk chairs do not leave marks so quickly. Nevertheless, you should use a office chair underlay.

The most important question first:
Floating vinyl flooring or better to glue?

On the basis of our relevant experience, we advise against a floating installation of vinyl flooring in almost all cases.

A floating vinyl floor that has deformed due to temperature fluctuations
A floating vinyl floor that has deformed due to temperature fluctuations 😀

Many manufacturers of vinyl floors write in their installation guidelines that the floor must not be installed under windows with strong light incidence or rooms with high temperatures.

What has this fact to do with the question “floating or glued installation“?

Most (click) vinyl floors for floating installation are made of solid vinyl, which can deform even at summer temperatures. Under windows with a lot of light, this happens particularly quickly.

This manifests itself in the formation of “hills” (convex deformation) and can push the ground upwards in the middle of the room.

This can cause doors to no longer open (!) or the floor to become irreversibly deformed. In our experience, therefore, in almost all cases floating installation is to be avoided.

If one also considers the Prices for vinyl floors, incl. Laying coststhe floating installation offers no price advantage compared to the much higher quality and more durable glued version.

Laying vinyl floor floating: advantages

  • fast installation
  • also feasible for laymen
  • very cheap for self-publishers

Floating installation of vinyl flooring: disadvantages

  • High susceptibility to heat
  • Danger of jointing
  • Danger of setting up the individual elements
  • No price advantage over a (much higher-quality) bonded installation by a service provider

The glue vinyl flooring is not the easiest, but the best way to obtain a stable and durable floor covering. However, the preparatory work must be carried out very precisely so that the vinyl flooring can be perfectly glued to the substrate.

The following methods are available:

  1. a full-surface bonding by means of adhesive and tooth filler
  2. gluing with a self-adhesive covering

You can find out right away how vinyl flooring works and what the differences are between the two methods.

Floating vinyl floor piles up
Another floating vinyl floor that would have been better glued 🙂

Prerequisites for successful bonding

Certain conditions must be met in order to glue a vinyl floor in such a way that it lies evenly on the floor without leaving any marks. This includes a clean, cementitiously filled and smoothly sanded substrate. You can find out how to prepare the substrate perfectly here.

If the subfloor is not perfectly levelled and sanded, the vinyl floor may, in the worst case, have dents or waves after gluing.

Then all the effort was in vain… 🙁

The different types of bonding

1. Full-surface bonding

For full-surface bonding, is applied to the well-prepared substrate with a toothed trowel dispersion adhesive (a wet adhesive), on which the 2 to 4 millimetre thick vinyl planks are then laid.

With the so-called “full-surface gluing“, work is always carried out in paths that correspond to a multiple of the width of a plank. What exactly is meant by this, you can see in the following video.

For this purpose, the wet adhesive is applied to the substrate over a large area over the entire width with precision using a notched trowel and, after allowing the adhesive to flash off briefly, placed in the adhesive bed. When gluing full-surface vinyl flooring, work must be carried out quickly, as the wet adhesive no longer adheres properly after 30 to 40 minutes.

How much adhesive apply?

In addition, neither too much nor too little adhesive should be applied to the substrate to achieve optimum adhesion. If you glue a vinyl floor, you do this with a so-called toothed spatula. These are available in different versions. Depending on the size of the “teeth”, different amounts of adhesive are applied. You can find out exactly which tooth size you need from the manufacturer/dealer of your vinyl floor.

The advantages of a glued vinyl floor

Glued vinyl flooring offers numerous advantages, namely this:

  • Solid vinyl is firmly bonded to the substrate, making the floor covering very stable and resistant. This is also the reason why it is used in the shop building as well as in the fair– and event area, among others.
  • Even in the case of underfloor heating, the adhesive vinyl flooring is the best solution, as the low installation height and the firm connection of the floor covering to the substrate enable a direct heat transfer.
  • A glued vinyl floor satisfies the highest demands and offers good room acoustics.

If you want to have a vinyl floor glued as a tenant, you should first obtain the permission of the landlord in order to be legally on the safe side.

2. Vinyl floor with self-adhesive underside

When bonded with a self-adhesive coating, the back of a module or plank is already prepared with adhesive, which is protected by a film. This is simply removed when the vinyl floor is glued, and the vinyl plank is applied to the previously primed underbody.

This technique, which is used for the vinyl floor ingeste, is popular with do-it-yourselfers, as it requires no skill with adhesive and tooth spatula. Nevertheless, extreme precision is required, o.g. when creating the first rows.

In order to lay a self-adhesive vinyl floor in a first-class manner , not only manual skill is required. It also takes a lot of time. Trained craftsmen can do the work very quickly. You will find one of our craftsman’s workshops also in your vicinity.

Laying of self-adhesive vinyl flooring

Before the vinyl floor can be glued to the already prepared substrate, it should acclimatize around 24 hours before bonding in the publishing room, so that it can adapt to the indoor climate.

Determining the direction of installation

Since the door is the main line of sight into the room, the laying process starts from here. The first step is the most important one, as it determines that the first row and the rows following it are laid exactly.

On the back of the plank there is (usually) an arrow indicating the installation direction.

This direction must be adhered to for all planks. The back slide is pulled off a bit and the first plank is placed exactly at the guide.

Then the rest of the film is removed and the plank is pressed to the floor.

Planks that need to be resized are scored with a sharp knife scored and then bent off. The second row of planks is then arranged at least one third offset from the first row.

For solid vinyl, usually no vinyl cutter or similar tool is necessary.

The holes required for the heating pipes are ideally made with a Forstner drill bit (for floating laid vinyl)

With glued solid vinyl, it is possible to square the holes with a cutter, or carpet knife, and break out. At the end, the skirting boards are screwed to the wall.

This is what we need to glue to the vinyl floor:

  • An adhesive spatula
  • Adhesive
  • A sharp cutter knife or a floor laying knife with trapezoidal blade
  • A bevel/angle or metal ruler
  • A line strike/chalk line or alternatively a line laser

Measuring the room before sticking

Before laying the vinyl floor, we have to think carefully about where we want to place our first 3-5 rows.

Typically, this is e.g. an exterior wall, which covers the entire length/width of the room.

We should also measure whether our wall of choice is at least reasonably parallel to the opposite wall. If this is not the case, the end result may be that you need to make diagonal cuts that do not look very nice.

In case of doubt, it is better to measure and average a little more.

Cut vinyl floor properly for installation

Vinyl floors can be cut with e.g. a large pair of scissors or a carpet knife. Professionals only scratch the surface with a sharp knife and break off the vinyl plank. This is the fastest way to install vinyl flooring.

Do not apply too much glue

The adhesive has a limited time in which it receives its adhesive strength.

If you wait too long, the adhesive must be laboriously scraped off the floor. It is therefore recommended to mark exactly beforehand how far the adhesive should be applied.

Example:

We want to relocate 5 rows at the same time. Let’s assume a plank has a width of exactly 17 cm. So we draw a marker that is 17 cm x 5 wide (85 cm).

So we apply the adhesive to a track of exactly 85 cm width.

We then lay our first 5 rows of the vinyl floor on the adhesive bed. Then we draw the next 85 cm and so on.

Bonus Tip #1:

After each track that was laid, the flooring should be pressed again.

For this purpose there are, for example, special metal rollers, which are also used for laying carpets. Such rollers can usually be rented from any hardware store.

Alternatively, a board can be wrapped with a towel, with which you can then rub the freshly laid vinyl floor “along“.

Bonus Tip #2:

Even professionals it happens during installation that some adhesive gets onto the vinyl floor.

However, instead of washing it off immediately, it is better to wait until the adhesive has dried.

When washed off, the adhesive only spreads more and is difficult to remove from the joints later. If, on the other hand, it is left to dry, it can usually be removed easily after the vinyl floor has been laid .

Bonus Tip #3

If you need to interrupt the vinyl floor laying for several hours or days, remove excess adhesive from the substrate.

To do this, it is best to take a wooden board with a straight edge and press the excess adhesive flattened on the floor.

This is particularly important in the area of the edges of the vinyl that has already been laid. Otherwise, the glue must be scraped off with a scraper the next day.