It’s possible that at some point in your wooden floor’s lifetime, you’ll encounter an area that has become darkened. This area might consist of a single, dark spot or there may be several spots or even several areas that have become discolored. The color might be a light greyish one, a deep, dark black color, or something in between. 

In this article, you’ll find answers to frequently asked questions related to the cause, removal, and prevention of black stains on wood floors. 

Is It “Normal” For A Wood Floor To Darken? 

This type of discoloration cannot be considered a “patina” of any sort as it is not part of any hardwood floor’s mellowing or aging process. Although it could be categorized as something that isn’t terribly unusual, this darkening is not normal. It is a stain and as such, it should be addressed. 

Why Are There Black Stains On My Wood Floor? 

If you weren’t on hand to actually witness the event or series of events that caused this, the cause is nevertheless evidence that an event has occurred. Dark stains indicate that a chemical reaction has taken place between the tannins in your wood floor and moisture or more specifically, the moisture’s level of acidity. 

If your hardwood floor shows no signs of warping, then the moisture is most likely to have come from above the floor rather than underneath it. 

Certain Types of Wood React More Profoundly Than Others

If your hardwood floors are:

  • Unsealed or
  • The seal has become worn
  • The wood has a high concentration of tannins
  • The grain of the wood is open

Then, depending on the acid content of the moisture it’s exposed to, it doesn’t take long for wood to become stained in this way. 

As with many hardwoods, their grain is one of the qualities that make them such natural choices among furniture makers. The grain’s detail and beauty are easily captured with a light application of stain or a mere rubbing of oil or bee’s wax. 

However, hardwoods contain higher levels of tannins. 

Proportional to the concentration of acids and minerals contained in the moisture, and the amount of tannins contained in the wood, the chemical reaction between them can be mild or quite profound. 

This Chemical Reaction Causes The Wood To Darken

Oak and walnut are particularly tannic hardwoods. Urine is a particularly acidic water based substance. The odor notwithstanding, the reaction between the tannic and uric acids is 

especially dramatic. 

All this makes it easy to imagine that a floor made entirely of hardwood could have several dark spots.  

If This Is The Case, Then There Really Is No Point In Crying Over Spilled Milk. Right?

Granted, by virtue of the fact that it can be so cathartic, crying certainly seems to have its therapeutic benefits. But because there continues to be a complete lack of evidence to suggest that crying can undo an event that has come to pass, the wisdom contained in the old adage also continues. 

As to its effect on a hardwood floor, it’s true that milk doesn’t contain uric acid. But milk does contain lactic acid. Lactic acid is ten times more acidic than acetic acid. If you think it will help you come to terms with it, then break out your crying towel because if it isn’t removed from your hardwood floor, even milk, whether spilled or intentionally applied, can cause the floor to darken. Harsh, I know, and not unlike urine, the smell is no picnic either. Sorry. 

Can Dark or Black Spots On Hardwood Floors Be Removed?

While the answer to this isn’t a 100% “Yes”, the outlook is certainly far from bleak. The odds for success are improved if you can answer “Yes” to the following:  

Have Offensive Odors Been Resolved? 

If there is a lingering odor, then whatever caused your floor to stain is still present. It’s possible for germs, bacteria and other unpleasantness as evidenced by the presence of odor, to be in residence underneath and in between the floorboards. 

Has The Moisture Been Resolved? 

Until the floor is completely dry, there isn’t much point in considering repair of the damage that not being completely dry caused. 

To Remove Dark Stains, You’ll Need To Remove The Cause

In other words, each of your hardwood floor’s boards needs to be thoroughly dry and odor needs to be treated. 

NOTE: This might entail removal of the undry boards. If you don’t have the skill or confidence to do this on your own, call your local flooring expert. If the expert is willing to remove the boards and then come back to install them once you’ve taken care of business, that’s even better. 

If your flooring expert suggests cleaning the boards with oxalic acid followed with borax, then do this. Follow his/her instructions to the letter. 

Otherwise, proceed with the following:

What You’ll Need To Remove Odor and Black Stains From Your Wood Floor

How To Get Those Smelly, Black Stains Out Of Your Wood Floor:

Remove The Floor’s Finish

  1. You’ll need to first strip the finish from the floorboards.
    1. to do this, be sure to follow the manufacturer’s instructions on the back of the container of the floor stripping product. 
    2. You can apply this with your paintbrush to be sure to keep the stripping solution contained to the affected area. 
    3. Use your plastic putty knife to scrape the lifted floor seal residue. 
    4. Use a clean rag to wipe and contain the residue from the putty knife. 
  2. Once your hardwood floor has been stripped, you might find the dark spots have lightened somewhat. This is to be expected. You’ll need to continue nevertheless. Especially if any odor is still present.

Remove Odor From Your Hardwood Floor

  1. Fill one of the spray bottles with the enzyme solution. Fill the other with hydrogen peroxide. Be sure to mark or label the spray bottles accordingly.
  2. Spray the affected area with enzyme solution. Be sure to spray in between the boards as well, but don’t drench the area or allow puddling. Allow the solution to dry. 
  3. Spray the area again with the enzyme solution. If after a few minutes, no odor is detected, pat the area dry. Otherwise allow the solution to dry.
  4. Repeat steps 5 and 6 as necessary.

Remove The Black Spots From Your Hardwood Floor

  1. Use your scrub brush to remove any residue from the affected area of your wood floor.
  2. Spray hydrogen peroxide well inside the area of the floor that has been stripped only. 
  3. Saturate a clean rag and lay it over the darkened area. Place another next to the first and continue until the entire darkened area is covered. 
  4. Cover the saturated rags with plastic wrap. Use a water jug or heavy book to keep the plastic in place.
  5. Allow the rags to remain in place up to eight (8) hours checking the rags occasionally to be sure they haven’t become too saturated with the stain to continue delivering the peroxide.
    1. Replace any stain-soaked rags with rags freshly saturated with peroxide.
    2. Replace the plastic wrap 
  6. When eight hours have passed, remove the soaked rags from the floor.
  7. When the floor has dried, the stain should be gone.
  8. If some discoloration remains, use the sandpaper.
    1. Working outward from the center of the discolored area, apply light pressure and smooth strokes that move in the direction of the grain of the wood.
    2. If the natural color of the wood doesn’t begin to appear after three or four strokes, move on to the next area and the next, sanding these in the same way and using three or four strokes in each of these areas as well. Sanding will help to expose the pores in the wood, but too much sanding will result in dipping this section of floor.
  9. Repeat steps 8-14.

By now, the stains should be completely gone. If any floorboards remain darkened, sand these lightly. if the discoloration still isn’t gone, they should be replaced. 

How To Prevent Black Stains On Hardwood Floors

The key to preventing black stains on your hardwood floor is in understanding that its exposure to moisture doesn’t need to be terribly prolonged to cause this. 

  • Clean spills right away
  • Follow up with an appropriate disinfectant. Be sure to follow the manufacturer’s instructions. 
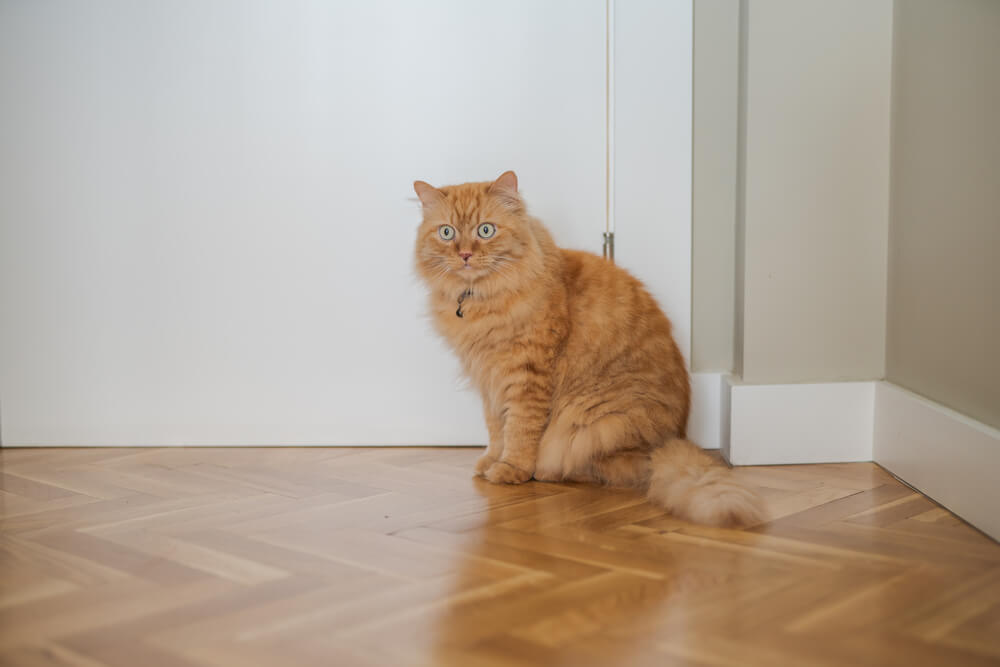
  • If you have pets, be sure to inspect your home routinely for “accidents”. Use an enzyme solution to clean these right away as well. We even have a detailed guide on cleaning pet urine stains & smell from hardwood floors.
  • Routine inspection should include a check for leaks you might not be aware of. Look under the sinks, the washing machine, and the dishwasher especially. 
  • If you discover a leak, place a container underneath it to catch the water, and dry the area completely. Continue to empty and replace the container until the leak can be repaired.

By taking care of problems before they start, you’ll save yourself a lot of hassle, stress, and energy…

…which of course, translates to more beach time.

A nice area rug brings comfort and style to a room with natural hardwood floors. But all carpets, including area rugs, are notorious for accumulating stains from spills, pets, or muddy feet. Even gentle use over time can break down the intricate fibers that together form a beautiful rug.

That’s why it’s critical to clean an area rug regularly and to know the right way to do it. Your technique is especially important on a hardwood floor because you can seriously damage the floor with improper cleaning.

Follow the steps in this guide to keep your area rugs looking and smelling fresh for years without removing the rug from the room or harming the flooring below.

How Often Should You Clean an Area Rug on Hardwood Floors

area rug on hardwood floors

If you take the time to clean your area rug often, it will last you a long time and stay looking neat throughout its lifespan.

The simplest way to take care of a rug is to vacuum it weekly. Dirt, dust, and small rocks that end up on a rug need to be vacuumed up or they will eventually work their way into and through the carpet backing. This will lead to wear and tear on the rug, or worse, the hardwood floors. 

Since some dirt and other material will always pass through the woven backing of the rug, it is a good idea to vacuum the underside, too. Simply flip the rug over (you can do half at a time if it’s easier) and vacuum the backing with the wand attachment.

Stains or pet accidents should be cleaned as soon as possible — preferably while they are still wet. This is the best practice to eliminate odors and watermarks.

A deep clean using baking soda, carpet shampoo, or steam should be done every six months.

If you aren’t sure how to deep clean your rug on hardwood floors, keep reading this guide for the steps you can take to keep both the area rug and the floor looking great.

What You’ll Need

Equipment / Tools

  • A vacuum cleaner
  • Soft sponges, brushes, or rags

Materials

  • Baking soda (sodium bicarbonate)
  • Carpet shampoo
  • A thick plastic sheet (slightly larger than the size of the rug)
  • Masking tape, painter’s tape, or another non-marking tape

Instructions

Before you get started, gather the items you are going to need from the list above. Move any furniture that is sitting on top of the rug, preferably a few feet away. If you are only cleaning a small stain or the rug is not very dirty, you may not need to do all of the steps listed below. Skip the heavier cleaning methods if you do not find them necessary.

Remember to pay careful attention to the state of your hardwood floor. If the cleaning process is getting more than a very slight amount of water on the floor, clean it up with towels or a mop right away.

How To Clean An Area Rug On Hardwood Floor

Cleaning an area rug on top of a hardwood floor demands extra care. Remember that prolonged exposure to water or even brief exposure to a large volume of water can severely damage your hardwood floor.

If you work carefully and prepare the area, you can get your area rug clean again without hurting the floor. Here are the steps in the process:

1) Vacuum the Rug

Roll over the whole rug with a vacuum cleaner. Remember to flip the rug and vacuum the backside if at all possible. Shaking the rug can also help remove dust from the fibers and backing. Vacuum or sweep up any dust left behind from the rug before you move on to the next step.

2) Prepare the Area

Prepare the area so that you can clean the rug without exposing the hardwood floor to water or chemicals. The best way to do this is to create a waterproof barrier between the area rug and the floor.

Roll the rug up to one end and lay out a thick plastic sheet that is at least as large as the area rug. Use some non-marking tape on the corners of the sheet to keep it from sliding around. Choose a plastic layer that is thick enough so it will not tear easily during the cleaning process, as small tears will cause water to leak through.

Finally, unroll the rug to sit on top of the plastic sheet.

Note: If you are only performing a small spot clean, it may be sufficient to substitute a smaller area rug for the plastic sheet. Just be sure that it is larger than the area you are going to be cleaning. This won’t be waterproof, but it can provide enough protection for a light cleaning.

3) Remove Odors with Baking Soda

baking soda

Baking soda, also known as sodium bicarbonate, is a powerful odor absorber. To remove odors from your area rug, sprinkle a thin layer of baking soda over the entire rug. Allow plenty of time for the baking soda to absorb smells from the rug — plan for at least four hours, but overnight is best. After that, vacuum up all of the powder left on the rug.

For a stronger effect, you can create a thick paste by mixing a little lukewarm water in with the baking soda. Apply the paste with a soft brush or rag, rubbing it into the fibers in one direction. Just make sure to let the mixture dry completely before you vacuum it up.

This is a great method to target pet stains which can cause an unpleasant smell in a room.

Note: You can also use baking soda for spot cleaning if you only have one or two stains causing the odor and you do not have time to treat the whole rug. Or, if odors are not an issue in your room, you can skip this step.

4) Spot Clean the Rug

Now is the time to focus on any visible spots or stains on the rug. Dilute a small amount of dish soap into lukewarm water (hot water can affect the colors on some rugs). Apply the mild soap solution to the rug using a soft brush or sponge.

Scrub gently with the soapy brush to loosen any stuck-on dirt and stains. Avoid soaking the area rug completely. Use just enough water to get the rug clean.

To remove the soap, dip the brush in clean water and scrub again. Rinse the brush and replace the water several times until no more soap bubbles or dirt appear.

5) Clean with Carpet Shampoo

If the area rug requires a complete cleaning, use a carpet shampoo. Make sure to read the labels carefully and follow the directions to avoid damaging the color of your rug. Some shampoos need to be diluted with water before you use them.

Rub the carpet shampoo into the fibers of the rug gently with a soft sponge or brush. Use enough to cover all of the material but take care not to use so much that the rug is soaking wet.

Remove the shampoo by dipping the sponge in clean water and rubbing it into the rug. Repeat with fresh water until no more suds come out of your sponge into the clean water.

6) Dry the Rug Completely

Take your time to get all the water out of the rug. Speed the process by opening windows or setting up fans to move air around. This step is critical to prevent mold or mildew growth and to protect the hardwood floor when you remove the sheet.

During this step, also check the wood floor to see if any water has spilled or seeped in. Dry this with towels and fans immediately to avoid damage.

7) Replace the Rug

Once you are satisfied that the rug and the floor are completely dry, remove the plastic sheet from the hardwood floor. Roll the rug back out in its place.

8) Vacuum to Finish

Make one final pass with the vacuum cleaner. This will lift the carpet pile if it is matted down from cleaning and leave your area rug looking brand new.

FAQs

Can you steam clean a rug on hardwood floors?

The short answer is yes, but you need to be very careful to protect your hardwood floors from steam exposure. Water, including water in the form of steam, can damage hardwood floors in a number of ways. Improper steam cleaning may watermark or even rot the floor. A relatively slight change in humidity can cause the floor to expand or contract too rapidly, warping the individual boards and leaving your floor bumpy and uneven.

To avoid these problems, you need to place a waterproof barrier between the rug and the floor. After vacuuming the rug, roll it up to one end and carefully lay out a clean plastic sheet or tarp that covers the whole area underneath the rug. Roll the rug out flat on top of the plastic sheet and steam clean the rug. Wait for the rug to dry completely (fans can speed this process) before removing the plastic. Carefully inspect both the rug and the hardwood floor to be sure they are completely dry before you roll the rug out on the floor again.

Can you use a carpet shampooer on hardwood floors?

You should not use a carpet shampooer on a rug that sits on a hardwood floor. These machines put down too much water to safely operate on top of hardwood, even with a protective plastic sheet in place. It is much better to use carpet shampoo by hand with a soft sponge or brush so you can control the amount of water yourself.

Waxing hardwood floors refers to a procedure that involves applying solid or liquid wax to restore the sheen of your hardwood floor.

While it is no longer as commonly relied on as it once was decades ago, several homeowners are now opting for the practice due to its ability to provide their flooring with that elegant sheen that sets it apart from others with a polyurethane finish.

In this article, we examine the specific advantages of waxing your hardwood floors, when to do so and how to wax hardwood floors. We also discuss how to care for your floors once you have waxed them so their trademark gleam will be maintained for longer.

Should You Wax Your Hardwood Floors?

Yes you should, as long your floors do not have a polyurethane finish, are in excellent condition and you are using the right type of wax. 

Below we have listed the benefits and drawbacks of waxing your hardwood floors.

Benefits of Waxing Hardwood Floors

  • Ease of procedure: Unlike certain methods of caring for your hardwood floor, waxing is rather straightforward and can be carried out without professional help.
  • Improved longevity: Waxing your floor can enhance its longevity since the product is capable of seeping into the wood and providing it with additional protection.
  • Enhanced resistance to dirt: The wax applied will harden into a shiny veneer which will cover the floor in a protective layer. This coating can prevent spills from seeping into the wood and also protect it from minor scratches and scuff marks.
  • Safety: Compared to polyurethane floors, most waxes have a low VOC content meaning they are a safer option.

Disadvantages of Waxing Hardwood Floors

  • Substantial effort required: Although waxing is a straightforward process, it also requires a great deal of effort. Liquid waxes, for example, require repeated applications during a single floor waxing session and even solid paste waxes may require more than one coating depending on the type of your hardwood floor.
  • May cause staining: It is worth noting that hardwood floor wax may bring about a change in the color of your flooring, altering its original tones as it seeps into the wood.
  • Lower durability levels: Compared to polyurethane, hardwood floor wax is less durable and it is for this reason that the former is more widely preferred.
  • Difficulty of removal: In spite of the relative ease of applying it, the varnish left behind is rather difficult to remove. You can read our article on how to remove wax buildup from hardwood floors which discusses the procedure in detail.

How Often Should You Wax Your Hardwood Floors?

Hardwood floors should be waxed every 12 to 18 months. 

However, the ultimate determining factor of the frequency with which you will have to carry out the procedure is the amount of traffic received by a particular room or area.

Experts recommend that you do not wax your hardwood floors more than twice a year and that you ensure you wax your wood floors at least every three years.

What Is The Best Wax to Use on Hardwood Floors?

Solid Paste Wax

Products in this category are known to have a heavier consistency compared to their liquid counterparts. This is due to the fact that they come with a higher proportion of wax compared to the latter.

SC Johnson Paste Wax is an excellent example of a product in this category. The manufacturer recommends cleaning your floor with a solvent-based product before applying it with a soft cloth for optimal results.

Liquid Wax or Oil

These products are generally lighter compared to solid paste wax products — liquid wax has a higher solvent concentration (and a lower wax content) compared to paste wax. 

Unlike solid paste wax products they may require several applications although a mop may be used when waxing hardwood floors with them making their application somewhat more convenient compared to that of their solid counterparts. 

An example of a product in this category is the Dura Finish Liquid Wax which only requires occasional buffing and is capable of restoring the luster of your floor. It is also capable of covering 2,000 square feet per gallon and can be applied with lambswool, cloth, or fine steel wool.

Water-based Silicone

Environmentally friendly and toxin-free, water-based silicone products are ideal for hardwood floors that have a polyurethane finish. 

An example is the Quick Shine Multi-Surface Finish Polish which is free from parabens and fragrance and is safe for children and pets. This water-based polish is also capable of filling out minor scratches and of giving your floor a uniform appearance. 

It is also suitable for plank, laminate, and tile surfaces.

How to Wax Hardwood Floors

Things You’ll Need

  • A soft-bristled brush
  • A microfiber cloth or mop
  • A sponge mop (if using liquid wax)
  • A terry cloth (also for liquid wax)
  • Mineral spirits
  • A towel (if using hard wax)
  • A solvent-based cleaner
  • A solvent-based wax product
  • A soft cloth or a mop
  • A pair of gloves
  • A dust mask

Preparing The Surface

  1. Empty room of furniture and ensure it is well ventilated.
  2. Check the floor for any signs of warping since waxing is unsuitable for floors in this state.
  3. Carefully sweep the floor to remove every trace of dust and debris.
  4. Wipe the floor with a cloth dampened by mineral spirits to get rid of any lingering wax residues on it.
  5. Mop with a solvent-based cleaner to ensure the surface is completely clean.
  6. Leave the room in order for the floor to dry and do not permit any entry to it as doing so may result in sand, grit, or dust being reintroduced to it.

Applying Wax to the Hardwood Floor

  1. Before you start to apply the wax to your wooden floors, you will need to wear your mask which will prevent you from inhaling the wax’s fumes. You will also have to wear a pair of robust rubber gloves to protect your skin.
  2. Next, measure out a single spoonful of liquid or solid wax and pouring it on the floor, use your mop (if you are using liquid wax) or cloth (if you are using solid paste wax) to coat the floor with it following the grain.
  3. Repeat the procedure, working your way from the innermost part of the room to its entrance.
  4. If you are using a mop, you may need to use a cloth when waxing the part of the floor close to the wall or in corners.
  5. Once you have finished, you may need to wait for the floor to dry before repeating the procedure, if necessary. The waiting period may range from anywhere between 10 minutes to 1 hour, depending on the type of your hardwood floor and the wax you are using.

How Many Coats of Wax Should You Put on a Hardwood Floor?  

If you happen to be waxing unfinished hardwood floors with solid paste wax,  you will need to coat it twice.

However if you happen to be using the same product for finished surfaces, only one coating will be required.

If you are using liquid wax, two or three coatings at the very least would be required regardless of whether you happen to be working on finished or unfinished floors.

Buffing

This final step involves passing a cloth or a mop over the floor once you have covered it with the required number of coatings.

Buffing a waxed surface is important since it will ensure the wax goes further into the hardwood and is able to protect it more effectively as a result.

How will you know when to proceed to this step? By the wax coating taking on a blurry appearance.

If you have used solid paste wax, a towel would be suitable for buffing the surface.

In the case of liquid wax, you will need to use a terry cloth.

It is also possible for you to rent a buffing machine as well. You will need to ensure you follow the directions provided carefully during the procedure.

Caring For and Maintaining Waxed Hardwood Floors 

  • Check wax coating at intervals: Carry out periodic checks of the coating to determine if a fresh coat of wax is required. You will be able to do so by slightly wetting a soft cloth and wiping it on the surface. The presence of a whitish residue means that no waxing is required.  However if the cloth comes away with none, it will mean that the wax coating has worn off and more must be applied.
  • Buff any imperfections:  If you notice any uneven spots on the hardwood surface, you will need to buff it with a thick towel. Doing so will enable you to restore a uniform luster to your floor.
  • Protect surface with rugs and mats: The waxed hardwood floor should be protected from dirt, possible scratching from grit, and from wear by placing rugs, mats, and runners at high traffic areas and room entrances.

Spilled food, tracked rainwater or snow, and mischievous pets are just a few factors that can affect your floors’ cleanness. 

While dusting and sweeping them frequently can enable you to keep them clean, restoring their trademark gleam occasionally requires a bit more. 

Natural remedies can be especially effective in enabling you to restore your floors to a pristine state. This is because the right choices are efficient cleaners and safe, especially since they come with none of the buildup or smearing that certain chemical cleaners leave in their wake or the possible toxins they possess that may endanger your children or your pets.

This article discusses the steps you need to take to make your hardwood floors shine and the best natural remedies for doing so.

Preparation of the Room

Before you begin, you will need to clear the room of any furniture or electronics to ensure you have full access to your floor surface. Removing any obstructions will also prevent the likelihood of any dust or fluid accumulating in spots and causing further damage to the hardwood floor.

All furniture will have to be lifted and carried out of the room you intend to work on. Doing so will prevent further damage which may be caused as a result of scratching from dragging heavier pieces.

You will also need to remove all rugs and mats placed on the floor and open all your windows to provide it with the best chance at drying as quickly as possible.

Sweep & Vacuum Floor

Once you have cleared the room, you will need to thoroughly clean it of debris such as crumbs of food, bits of paper, strands of pet fur, and dust. Failure to do so may result in the dirt blending with the solvent and being absorbed by the wood, making it even more difficult to remove and further dulling the shine of the surface.

You will need to use a brush and a dustpan. Alternatively, you may also use a broom or a vacuum cleaner. Regardless of which option you choose, you will need to ensure that it has soft bristles since hard bristles will cover your floor with scratches.

Home Remedies to Use on Hardwood Floors to Make Them Shine Naturally

After sweeping or vacuuming the room, you will be able to begin preparing your cleaning solution or floor polish. We have selected the most effective home remedies you can use to make your hardwood floor shine and have described how you can prepare them.

1) Vegetable Oil and Vinegar

Vinegar is an excellent multifaceted home remedy and in this case, its ability to do away with grime, grease, and dirt make it an ideal choice for restoring your floor’s shine.

To create this solution, you will need to add ¼ cup of white vinegar to ¾ cup of oil and mix thoroughly. You will also have the option of adding essential oils such as citrus, lavender, or eucalyptus to it to provide a natural, pleasant fragrance.

However, it is worth noting that vinegar is acidic and as a result, may not be suitable for all hardwood floors owing to its ability to affect the finish in some cases.

As a result, you should consult the manufacturer at the moment of purchase to ascertain its suitability for your flooring surface.

2) Water and White Vinegar

When creating this solution you will need to add half a cup of white vinegar to each gallon of water you use. You will also need to ensure the water is hot for it to be able to evaporate quickly. A small quantity of lemon juice or even zest may be added to the solution to infuse the room with a pleasant citrus fragrance. (Alternatively, you may also add your essential oils of choice to the solution for your preferred fragrance.)

Adding a few drops of castile soap to your cleaning solution will also help get rid of grime on any floors which happen to be especially dirty. (This natural soap is not only gentle on your hands but is also renowned for its potent cleaning ability.)

3) Black Tea

A natural remedy that has been historically relied on to make old hardwood floors shine, black tea is another excellent option for caring for your wooden floors owing to the tannins it possesses.

You will need to boil a gallon of water and brew eight teabags in it. Next, you will have to leave the resulting solution of black tea to cool. Once it is ready, you will need to test it on a small part of your floor to ensure it will not discolor the hardwood.  (A corner is best since any discoloration would be least noticeable.)

How to Shine Your Hardwood Floor

Once you have prepared your home remedies, you will need to place them in a spray bottle. Next, you will have to lightly mist each portion of the floor you are working on and clean it with a microfiber mop. 

Alternatively, you will also have the option of attaching a microfiber cloth to the mop head and cleaning your floors as well. 

Floor Cleaning Tips That Keep Hardwood Floors Shining

1) Squeeze Excess Moisture From Your Microfiber Mop or Cloth

Doing so will prevent it from becoming waterlogged and in turn soaking your floors which may place them at risk of moisture damage.

2) Rinse the Mop or Cloth Thoroughly

As you clean or polish your floor, your mop or cloth will absorb dirt progressively.  As a result, you will need to pay close attention during the process and ensure you rinse it or clean it thoroughly before you continue to use it. You may also exchange dirty microfiber cloths with clean cloths if possible. 

Failing to do so will simply result in your spreading dirt all over the hardwood floor which may cause a dull appearance rather than the shine you hope for.

3) Ensure the Room Dries Properly

Once you have finished shining your floor you will need to ensure it dries properly before permitting entry into the room or passage through it. This is because it will be especially susceptible to streaking or staining due to traffic while it remains damp.

What’s more, replacing furniture before your floor has been dried properly may prevent dampness from evaporating completely from certain parts of the hardwood surface, e.g., under sofas, beds, furniture legs, rugs, flower pots, etc., and may increase the likelihood of mold and deterioration.

Related Articles:

If there’s anything more aggravating than having to pull your pillow out from between your bed and the wall, it’s having to do it again and again.

If this sounds familiar, then you have a bed that tends to slide on the hardwood floor every time you climb into or out of it.

Besides ruining a good night’s sleep, your runaway bed is damaging your hardwood floor.

Similarly, when a couch or sofa shimmies away from the coffee table, the floor underneath it becomes damaged even if only somewhat. But if this piece of furniture is enjoyed by a large family, the damage can be five or sixfold.

When a piece of furniture slides on a wood floor, it might not necessarily leave a scuff or a scratch on your hardwood floor, but it could leave four of them.

When furniture slides on hardwood floors repeatedly, the result is a floor that’s been continually scraped and scuffed. Not pretty.

Furniture That Should Slide On Hardwood Floors

On the other hand, furniture that doesn’t slide can also damage a hardwood floor. The feet of chairs, stools, and ottomans can really do a number on a wood floor if they don’t slide easily.

chairs on wooden floors

Many people who encounter a chair or a stool that doesn’t slide easily, simply resort to dragging instead of lifting if off the floor to move it. Once seated, they skip and drag the chair or stool closer to the table or bar. Again, your hardwood floor takes a beating.

The solutions for these types of furniture (and these types of people) are discussed in another post.

How To Keep Furniture From Sliding On Hardwood Floors

Specifically,

• Beds

• Sofas/couches

• Reclining chairs

How to Keep Your Bed From Sliding On Hardwood Floors

1. Rugs

When wood floors were first installed in homes hundreds and hundreds of years ago, rugs were used to keep cold air from coming in through the floorboards. A rug placed under and around the bed helped to ensure that the bed’s occupants stayed warm at night.

The rug also ensured that the bed’s occupant would set his/her feet on it instead of a cold floor upon rising daily.

Very little has changed since that time except that beds now sit atop wheeled bed frames. The wheels are the part of the bed that rests on the rug. When the wheels at the foot of a bed have a rug under them, the bed is far less likely to slide.

For the non-traditionalists and the less conventional, there are other ways to keep a bed from sliding on hardwood floors.

2. Caster Cups

Caster cups are made of rubber or silicone. Most are available in black and brown. They’re usually sold in sets of four that range in price from $8.00 to $20.00.

Simply lift the corner of the bed so that the caster is up high enough from the floor to slide the caster cup underneath it.

3. Caster Stops

The manufacturers of No-Lift caster stops claim to have the patent on them. What’s unique about these is that unlike a caster cup that is placed underneath the caster, this U-shaped device is placed on the floor, around the caster, and then squeezed or pinched snug.

Because no lifting is involved, these caster stops also seem to present a good way to assemble the bed frame itself.

Available in black or brown, a set of four caster stops sells for $12.95 

Here is a caster stop that we recommend: https://www.amazon.com/iPrimio-Black-Bed-Furniture-Stopper/dp/B07215FC8N/

4. Bed Risers

Bed risers are a lot like caster cups, but taller. They’re made of various different materials such as wood, abs plastic, or steel. These are available in various heights, colors, and finishes.

Bed risers equipped with electric outlets and USB ports are available as well.

It’s important to keep in mind that taller bed risers create the need for a customized bed skirt as they cause standard-length bed skirts to fall short of the floor.

However, for anyone who wants their bed to accommodate a specific headboard, bed risers are a very handy solution.

Here is a bed riser that we recommend: https://www.amazon.com/Bed-Risers-Power-Outlet-Ports/dp/B0883F3DSD/

How To Keep A Couch From Sliding On a Hardwood Floor

1. Coaster Cups

Each couch foot slips into one of these rubber “boxes”. The edges of each coaster cup keeps the foot secured to the rubber pad. When measuring for size, it’s better to buy coaster cups that are a bit too large. If they’re too small, the couch foot won’t fit inside the cup at all. This solution is for sofas and couches that aren’t perched on irregularly shaped feet.

Here is a coaster cup that we recommend: https://www.amazon.com/Furniture-Caster-Cups-Pcs-Anti-Sliding/dp/B08JM6KMCJ/

2. Rubber Bumpers

These pads are screwed to the underside of each couch foot. Thus, the solution is relatively obscure. The pad’s pre-drilled hoses are set up to countersink the screws that are included with the purchase. Only the rubber is exposed to the floor.

Rubber bumpers are available in various sizes. For those who don’t mind putting in the effort, these are an excellent choice to keep your couch from sliding on hardwood floors.

Here is a rubber bumper that we recommend: https://www.amazon.com/Medium-Rectangular-Rubber-Feet-Bumpers/dp/B00S4E7OOO/

3. Caster Cups

If there are casters on your couch or sofa, you can remove them and set them aside, but this won’t necessarily keep your couch or sofa from sliding.

In this case, depending on whether the casters were screwed into feet or the couch’s frame, you might still want to consider coaster cups or rubber bumpers. 

If you decide to keep the casters in place, your options are the same as the options for beds. But there aren’t a lot of decorator options among caster cups and if your couch or sofa isn’t skirted, the look might be unacceptable.

4. Risers

Most bed risers are appropriate for use on couches. Some are surprisingly good looking and let’s not forget that some are available with outlets and USB ports.

How To Keep A Recliner From Sliding On Hardwood Floors

Most reclining chairs rest on a pair of long rails that are braced together. This creates a platform of sorts so that the chair can recline while the rails (in theory) remain in place.

However, depending on what the rails themselves rest on, reclining chairs don’t always stay in place.

This is especially the case when the recliner is located in a room with a hardwood floor. When someone first sits in the chair and when they get up from it, the chair tends to slide backward on the hardwood floor each time.

Finally, when the chair has shimmied so far that the wall behind it prevents it from reclining; someone will drag the chair forward again. This process continues as the hardwood floor also continues to get the living daylights knocked out of it.

Ultimately, when someone decides the chair has seen better days, they discover that the hardwood floor’s better days ended a few thousand slips and slides ago.

This doesn’t have to happen!

1. Non-Adhesive Rubber Strips

Okay, so they’re a little pricey, and lining them up is tough, but these grips will work. The rubber is soft enough to give to the rails as the rails settle into it.

These strips are only available in three lengths. If your recliner’s rails are between lengths, opt for the longer and cut down to size.

Here is a non-adhesive rubber strip that we recommend: https://www.amazon.com/Stay-Furniture-Recliners-Grippers-Anti-Slip/dp/B07W68CK34/

2. Fitness Equipment Mats

Made of pure non-pvc rubber, these equipment mats are intended for all flooring types. You’ll need to cut one to size. Instead of cutting two strips for the rails, you might want to consider cutting a single, large piece so the edges fit just inside the shell of your reclining chair. It might be a little unsightly when the chair is in a reclined position, but it won’t be seen at all when the chair is closed.

The Most Important Thing To Remember

Of course, it’s important to implement solutions to keep furniture from sliding on hardwood floors. But overlooking the little things that should be routine can also take their toll.

  • Lift that cardboard box of Christmas ornaments instead of dragging it.
  • Wipe your shoes before entering the house
  • Clip your dog’s nails
  • Use a floor vacuum (or your vacuum’s flooring attachment) instead of moving dust and dirt across your wood floor with a broom or dustmop.

Compared to other flooring types, hardwood floors can be far more forgiving. With a little care and planning, yours can last for generations.

Know any cool tricks to keep furniture from sliding on wood floors? Please share. If you have pics to go with it, share these too!

Prefinished hardwood floors are flooring surfaces that are delivered to a residential or business address, ready for installation, due to having been sanded, stained, and sealed by the manufacturer.

Because the finishing process itself can be time-consuming, these flooring surfaces represent a more convenient option compared to their unfinished counterparts.

Cleaning prefinished hardwood floors regularly is an important part of their maintenance as doing so will prevent them from getting scratched or stained, enabling them to maintain their natural appeal while also enhancing their longevity.

How to clean prefinished hardwood flooring

1. Use a broom, brush, or vacuum cleaner to remove dust, debris, or pet fur.

Brushing and sweeping your prefinished wooden floors daily is highly recommended as doing so will prevent the accumulation of debris and dust which may not only stain them but scratch their surfaces.

Soft-bristled brushes and brooms are best as hard bristles may scratch the finish.

If you decide to use a vacuum cleaner, you will also need to ensure that you switch to a softer brush.

Vacuuming robots are also another excellent option for cleaning your prefinished wooden floors since they come with soft bristles which are ideal for loosening dirt particles. 

During cleaning, special attention should be paid to the corners as dirt may frequently accumulate in them.

2. Use a microfiber or cloth mop for dust mopping

For more intensive cleaning you should also dust mop your floors once a week. Microfiber mops are the best options because the splitting of their fibers enables them to carry a positive charge. This makes it easy for them to attract dust particles that have a negative charge.

Cotton mops are also an excellent option for dust mopping your floors as well.

3. Wet mop once a month

Again, microfiber mops are ideal in this case due to the ability of their fibers to reach into minute spaces, making them more efficient than standard mops. 

There is also the fact that they use 10-20 times less fluid than standard mops which is a key benefit since it is important to use a minimal amount of solvent when cleaning your prefinished wooden floors.

It is important to make use of solvents recommended by the manufacturer and you will need to discuss the issue with them when purchasing as it may differ depending on the brand in question. Certain cleaning solvents provided by reputable brands may also be suitable as well.

The best cleaner for prefinished hardwood floors

Two cleaning products which we highly recommend have been manufactured by Bona, a brand which possesses 100 years experience of providing floor cleaning solutions. 

In addition to being highly effective, they are also fast drying and environmentally friendly. They are:

1. The Bona Hardwood Floor Cleaner

A product that combines efficiency and convenience, the Bona Hardwood Floor Cleaner can be sprayed right away and then wiped with your microfiber or cloth mop of choice and will cleanse your floor instantly without leaving behind any buildup, residue, or streaks. 

It is low VOC and is also water-based, and as a result, is ideal for use in homes occupied by young children and pets. It is also Greenguard Gold certified and is eco-friendly, as well.

The Bona Hardwood Floor Cleaner is also especially versatile and is ideal for unwaxed, unoiled or polyurethane finished floors.

Check out the product on Amazon.

2. The Bona Free & Simple Hardwood Floor Cleaner

In addition to providing the impressive cleaning efficiency the brand is known for, the Bona Free & Simple Hardwood Floor Cleaner is also hypoallergenic (it will eliminate 93.3% of allergens from your hardwood floors). 

It is not only certified by Greenguard Gold but is also certified by the Asthma and Allergy Foundation of America.  As a result, it is ideal for your home if you have young children, are asthmatic, or have sensitive skin.

Like the Bona Hardwood Floor Cleaner, it is also water-based and can be used instantly. Only small amounts are required and you will simply need to spray the cleaner and wipe it up at once with your mop or cloth.

Check out the product on Amazon.

How to care for a prefinished hardwood floor

1. Clean your floors regularly

As noted above it is important to clean your floors frequently and to also pay attention to the following household cleaning items you use:

  • Brooms
  • Brushes
  • Mops
  • Cloths
  • Cleaning solvents
  • Vacuum cleaners

Using the right kind of products and tools will enable you to maintain the aesthetic quality of your flooring.

2. Protect your floors

Several factors can cause some sort of damage to your floors, and steps must be taken to safeguard against them. These include:

  • Your pets’ claws: Always keep your pets’ claws carefully trimmed to prevent them from scratching the surface of your flooring.
  • Liquids: Any liquid which spills on your floors must be cleaned instantly to prevent it from soaking into your wooden floor. You should also shut windows during a downpour to prevent rain from being blown in and forming puddles on the floor.
  • Avoid wearing footwear indoors: Always have all footwear left at the door to prevent them from wearing out the surface and possibly causing abrasions due to pebbles or sand stuck beneath them.
  • Furniture: Use felt furniture pads to prevent your chairs, cabinets, and tables from marring the smoothness of your wooden floors.
  • Sunlight: Light can fade the color of your flooring making it look worn and used. Hanging up drapes and limiting the amount of sunlight that enters a room will preserve the coloring of your prefinished wooden surfaces for longer.
  • Rugs and mats: Make use of rugs liberally to protect your floors particularly in high traffic areas. You should also make use of rubber mats in places where spills and leakages are likely to occur such as kitchens.

Other Tips

1. What other substances should I avoid using on my prefinished hardwood floors?

Apart from water which is unsuitable for your prefinished hardwood floors, due to the organic nature of wood, you should also avoid using the following on your flooring surfaces:

  • Oils: Oils leave residues behind which will detract from the appearance of your flooring surfaces. It is also important to avoid using furniture polish which can make your prefinished floors slippery.
  • Acidic or alkaline solvents: Vinegar and lemon juice belong in the former category and while certain experts recommend them for cleaning floors, it is worth noting that they can actually damage the finish of your prefinished hardwood surfaces. 

Those in the latter category such as ammonia will actually make your floors look duller rather than shiny and pristine.

2. How can I fix scratches on my prefinished hardwood floors?

Simply get a stain that is the same color as the pigment used for your floor and apply it with a small sponge. Sponges will work better than brushes in this case since it is important to apply just the right amount of stain without leaving any residue.

Certain experts prefer the use of makeup sponges since they are small and ideal for applying minimal amounts of the pigment.

Ensure you apply the stain in a smooth sweeping motion to the scratch and work the rest of it into the surrounding area as well.

3. Can I use wax to remove scratches on my prefinished hardwood floors?

No, you cannot. Although this option may be an excellent choice for cabinetry it is not for prefinished hardwood floors. This is because it will become smeared owing to traffic.

FAQS 

1. Can you steam clean prefinished hardwood floors?

Steam cleaning prefinished hardwood floors is not an option that is often recommended by manufacturers and in some cases, doing so may void the warranty of your flooring.

Despite its gaseous form and elevated temperatures, steam is still water which is harmful to prefinished wooden floors. As a matter of fact, this state will enable it to enter into minute cracks and scratches it would otherwise be unable to access in its liquid form.

Hence, using steam to clean your floors may result in swelling and mold which will, in turn, hasten the deterioration of the material itself and possibly result in your needing to replace your flooring.

However, certain providers which specialize in providing steam cleaners do state that it is possible to dry steam your prefinished hardwood floors since the vapor will evaporate instantly. 

They recommend checking that the floor seal is intact before dry steaming and preventing the cleaner from remaining on any particular position for too long as doing so may cause damage to that particular spot. 

2. Can you mop prefinished hardwood floors?

Yes, it is possible to mop prefinished hardwood floors. However, only dust mopping is permitted or mopping with a light application of cleaning solvent recommended by the manufacturer or purchased from a leading brand. You will need to wipe the solvent promptly.

Experts advise against using materials that contain ammonia, bleach, detergent or vinegar, which can be especially harsh and damage your flooring surfaces.

3. Can you sand down prefinished hardwood floors?

Yes, you can. Their status as hardwoods makes this possible. Quite frequently prefinished hardwood floors come with bevels and it is possible to sand them down as well.

However, you should be aware that doing so will reduce the number of times you will be able to subsequently sand them down in the future.

One example of when you may decide to opt for this procedure may be in the event of remodeling your home to create a uniform stain between two adjoining surfaces.

It is worth noting that a considerable quantity of dust will be generated during sanding and so you will need to cover any openings such as doors or windows with sheeting which can be held in place with masking tape.

Related Articles:

  1. Removing pet urine stains from hardwood floors

Firstly, just so we’re all clear on this, glue and adhesives work best when applied by accident. It’s a law of some sort.

In fact, it never fails and while it’s true that accidents can be prevented, adhesives have a way of upending even the most carefully laid plans. What’s up with that?

Given the accidental aspects of glue and adhesives have naturally become second nature, I’ve nevertheless, resigned myself to the fact that I’ll probably never figure out a quick, painless, and odor-free way to remove an acrylic nail from the third knuckle of either index finger. 

…and naturally, because I am admittedly, something of an expert in all things accidental, I can state with authority, that spills are a subset of accidents.

Also as an expert, I can offer my assurance that if it says, “spill proof” on the label, it’s a liar. Plain and simple. That’s just all there is to it because for some of us, it is indeed possible to spill toothpaste. 

Hopefully, when you’re done reading, you’ll have a better understanding of:

  • How to remove adhesive/glue from hardwood floors naturally
  • How to remove adhesive/glue from unfinished hardwood floors
  • How to remove linoleum glue from wood floors

Here’s What You Should Know About Adhesives On Wood Floors

Most glues and adhesives contain plasticizers. Very few do not. Super Glue is among these few. It becomes plastic as it cures. But either way, it’s either as strong or stronger than what it’s attached to. 

The reason this matters is because plasticizers will bond to the lacquered finish of your hardwood floor. Once Super Glue, Gorilla Glue, adhesive tape, or even something as innocent as a sticker is affixed to it, the finish is forever compromised even if only slightly. Removal of the adhesive and/or plasticized glue is all well and good, but the lacquered finish will never be quite the same. 

Of course you can sand the area where the finish is compromised, and apply a new finish, or you can hire an expert to do this as well as feather the edges into the existing finish that surrounds it. But even the best expert can’t get this section to look like it’s part of the rest and most will tell you as much.

Even though it was applied in sections or strips, the fact remains that all of your hardwood floor’s sealed finish was applied at the same time. Each of those sections or strips was united with the one next to it to form a complete, and entire whole. A patched area will never truly appear to be part of the rest. 

In summary, the floor should be refinished.

The moral of the story ﹘ if it needs to be taped to the floor, then it doesn’t need to be on the floor to begin with

The news isn’t all bad. Most people find that even when a dull spot or a resurfaced patch is located in a place that a rug doesn’t cover, they can still live with it. Considering the cost to strip and refinish an entire floor almost invariably makes living with this type of thing infinitely easier to manage. 

You’ll Still Need To Remove Glue From Hardwood Wherever You Find It. 

Even if it means you’ll end up with several dull spots on your floor, the stickers, tape, and/or droplets of glue are far more unsightly. Leaving them as they are won’t improve the situation.

Contrary to popular belief, removing glue and adhesive does not require for the use of harsh chemicals, solvents, vinegar, denatured alcohol, mineral spirits, mineral oil, mineral water, vitamins and minerals, …etc. 

So, What’s Up With Acetone?

Acetone is not recommended for use on anything that you don’t want removed.

Many People suggest the application of acetone diirectly onto the glue only. This would be a swell idea as long as you’re sure none of it will seep, leak, creep, or crawl onto the surrounding area. 

Right.

I’m pretty sure I couldn’t pull it off either, especially given my track record for this sort of thing. 

This isn’t to say these things don’t have their place, but for now, we can avoid them. 

How To Remove Glue From Hardwood Floors Naturally

Things You’ll Need

Note: In case you don’t have these things handy, you can click on each of the items to purchase the one we recommend.

If there are several places on your hardwood floors where glue or adhesive needs to be removed, or if you suspect the work could require a few hours of effort,  consider adding the following:

Removing Krazy Glue/Super Glue, Adhesive Tape, Stickers From Hardwood Floors

  • Spray a bit of bee’s wax on either side of your brass putty knife. Allow any excess wax to drop onto the area of the floor located next to the edge of the glue/adhesive that’s closest to you. You’ll be starting at that edge and working forward. 
  • Use your non-dominant hand to hold the blow dryer directly over the glue (Oops! yes, turn it on first)
  • With your dominant hand, hold the edge of the putty knife at an angle of about 45o to gently push or chip at the glue. Always be sure: 
    • to push outward and away 
    • the surface under your putty knife has bee’s wax on it or you’ll gouge the floor
  • The adhesive should move along fairly easily. Use your clean rag to wipe it from your putty knife. 
  • As for the glue, stay after it. Try chilling the putty knife by running it under cold water. Alternate between using the dryer and the chilled putty knife. This will cause expansion and contraction of the glue and the surface of the floor if only slightly. 

Ultimately, the glue will release in little chips at a time until the last chip is gone.   

  • Use your clean rag to gather up the loosened chips as you go. Be sure to gather all of them. Stepping on a stray later on can scratch your floor. 
  • Roll up the clean rag so that the chips of glue stay contained in it. Use the clean exterior of the rolled up rag to wipe away any excess bee’s wax and give the area a light buffing. 

How To Remove Floor Glue From Wood

If you’ve installed your glued hardwood floor, you might find that you’ve spilled some of the glue. You might discover that some of it has squeezed up from between the boards. 

If this happens, be sure to remove the glue immediately by wiping it thoroughly with a clean cloth dampened with water. Once the glue dries, removal is next to impossible. 

As I’m always sure to let anyone know, flooring installation professionals are a very conscientious and fastidious lot. (I know I don’t have to say that, but I got a mortgage, a ton of bills, and this gig pays!

Yet, if upon the completion of your professionally installed, glued hardwood floors, you happen to discover that one of the eminently talented installation experts overlooked a spot of floor glue that spilled onto the unfinished wood, all you need to do is call to advise of the situation. Your flooring installation will be sure to correct the trouble as soon as your message is passed along. 

In the meantime, you are in a far better position to remove the glue and since the glue will become far more difficult to remove with every minute that passes, there’s no benefit in deciding it’s not your job. 

Instead, do whatever’s necessary to remove the glue immediately and save the responsible party argument for another time. A clean rag and water should take care of this.

How To Remove Linoleum Glue From a Wood Subfloor

If you find yourself faced with traditional black mastic on a subfloor, it can only mean that the linoleum that was once held by it has been removed. Why anyone would do this – I’m sure I have no idea. As long as the tiles are all in one piece and all pieces are stable, linoleum is the ideal substrate for most other types of flooring. There is no need to remove it. 

Even if a few of the linoleum tiles are broken, as long as they can be glued into place, the floor remains a viable substrate. 

However, once the linoleum has been removed, on its own, the adhesive, or mastic as it was originally called, is likely to interfere with the installation of new flooring of any kind. The mastic will need to be removed. 

Black asbestos mastic was produced until the mid ’70s. Some manufacturers continued to produce asbestos mastic well into the ’80s. 

Because of this, it’s important to know what you’re dealing with. Where black floor glue with the tell-tale black comblike markings is discovered in a home built before 1975, the glue most likely contains asbestos. Asbestos removal should never involve sanding or scraping of any kind. Dust and other particles of asbestos are especially deadly. 

As long as it remains undisturbed, the risk associated with being around asbestos is minimum. 

For that matter, I can’t imagine that inhaling dust and particles of any kind of sanded adhesive would be beneficial to anyone’s health, but where black mastic asbestos is concerned especially, this is what makes removal so tricky.  

The safest way to remove black mastic asbestos is by laying hot wet towels over one section at a time until the glue becomes soft enough to be peeled away with a putty knife. 

On the whole, removing glue and adhesive from hardwood floors can be tedious and trying, and removal of black mastic asbestos can create health concerns. But by taking proper precautions and using appropriate tools, you’ll find that the process of removing any of these from hardwood floors can be completed efficiently, effectively, and safely. 

Of course, for the accident-prone, there’s still no pain-free way to do it, but once you get your glued fingers separated from the bathroom counter, you too can have terrific-looking hardwood floors. 

If you’ve had hardwood floors in your home for longer than about five minutes, you’ve probably heard or read about all kinds of solutions and ways to get and keep your floors, cleaner, shinier, better, etc.

It’s pretty tough to mention hydrogen peroxide while suppressing the urge to sing its praises. Its use as an antiseptic on topical cuts, scratches, and abrasions is widely known. Where oral care and hygiene are concerned, its benefits are touted by dentist and ear, nose, and throat specialists.

However, depending on your reasons for using hydrogen peroxide on hardwood floors, and the results you’re after, there might be a downside.

Read on to learn about cleaning hardwood floors with hydrogen peroxide, its benefits, and drawbacks.

The Effects of Hydrogen Peroxide on Wood Floors

According to the Centers For Disease Control (CDC), hydrogen peroxide is an effective antiseptic that also kills fungi, mold spores, yeast, viruses and bacteria.

Because these dangerous organisms are known to be present on floors the world round, using hydrogen peroxide as a homemade wood floor cleaner is an excellent choice.

Moreover, although the term, “homemade” suggests that some sort of alchemy or mixing of substances, is involved in creating hydrogen peroxide, in truth, having a jug of it on hand is as easy as picking it up on the next trip to the supermarket for only a few dollars.

Among the other benefits of hydrogen peroxide — when applied to floors and other surfaces, it’s a very effective and environmentally safe, kid-safe, and pet-safe cleanser and antiseptic.

Also, most people who use hydrogen peroxide to clean hardwood floors report that their floors look new.

Still, cleaning hardwood floors with hydrogen peroxide can have unintended results.

Will Hydrogen Peroxide Damage Hardwood Floors?

No, it won’t.

The word, “damage” might be a bit over the top because unless full-strength hydrogen peroxide is applied, there are very few negative effects that can’t be remedied. So the worst that can be said is, “hydrogen peroxide can be something of a trouble-maker.”

One of the negative effects is clouding. The chemical properties of hydrogen peroxide can have a bleaching effect. Thus, people with floors that are polished with wax or oil, or sealed with acrylic or urethane coating might find that using hydrogen peroxide caused the finish to become cloudy and dull — but this is very rare.

When applying hydrogen peroxide to unfinished floors to remove pet, food, or other types of stains, it’s possible for some of the surrounding wood to also become involved in the process. Hence, the result can be an unintentionally lightened area of wood.

However, a cloudy finish can be screened and recoated, and bleached wood can be stained to match the color of the rest.

Another negative aspect ─ prolonged exposure to moisture can cause hardwood floors to cup, buckle, lift, or become water-stained. Moisture can even cause mold growth or wood rot.

Yet, although hydrogen peroxide is a watery substance, if used to clean the floor’s surface, it isn’t necessary to apply very much of it. If you work in small sections, the floor can be clean and dry long before moisture has time to do any damage.

If used in the right concentration and in the right way, the benefits of using hydrogen peroxide to clean hardwood floors outweigh the risks.

How to Clean Hardwood Floors With Hydrogen Peroxide

Firstly, you’ll need to decide whether you want to clean your hardwood floor or just the surface layer of your floor, e.g., wax, oil, or lacquer-type finish.

Sometimes only the surface layer of the floor needs to be cleaned. This is usually characterized by a dull, dingy, or scuffed-up appearance.

In other cases, the wood itself might be stained. There are too many types and causes of stains to list them all, but pet urine is one of the more common types. Pet urine is characterized by an area(s) that is/are blackened.

This blackened look usually indicates a chemical reaction has taken place where uric salts or crystalized urine came into contact with the hardwood’s tannin. Because there’s less tannin in softer woods, the stain may be a grayish color.

To Clean The Surface Of A Finished Hardwood Floor:

Firstly, whatever you do, whatever you try, test it in a small, inconspicuous area.

Next, you’ll want to remember to clean the floor in sections.

Stuff You’ll Need To Have:

  1. Cleaning-grade hydrogen peroxide (35%)
  2. Spray bottle
  3. Microfiber mop and several extra mop heads.
  4. Vacuum with floor accessory attachment. (It’s that sort of flat one with little, tiny rollers and a fringe or felt on the bottom. …Yes, that one.)

For Cleaning Stains From An Unfinished Floor, Add:

  1. A roll of cellophane and
  2. A roll of paper towels or several terry cloth rags.  

Stuff You’ll Need To Do:

  1. With the floor accessory attached, vacuum the floor. Be sure to get close to the baseboards to remove any hidden dust and debris.
  2. Mix a solution of ½ cup peroxide and ½ gallon of water.
  3. Fill the empty spray bottle with the solution. Set the rest aside.
  4.  Spray a thin film of solution over the first section of floor.
  5. Use your microfiber mop to wipe the section dry.
  6. Spray and mop the next section and the next until you’re done. If your mop head         becomes too wet to dry the floor, replace it with a fresh, dry one.         

There. All done. Feel free to invoke your bragging rights in the comments section below, before and after photos, the whole shabang.

Huh? What? Oh yeah! The rest of the solution. Use it to clean and disinfect the rest of your home’s surfaces, of course!

To Clean An Unfinished Hardwood Floor

Assuming you’ve sanded the floor down to the raw wood, you’ll be pleased to know the toughest part of the job is behind you.

  1. Saturate several layers of paper towels with hydrogen peroxide.
  2. Lay the towels over the stain or a section of it.
  3. Lay cellophane over the towels. Use something heavy to keep the cellophane in place over the soaked towels.
  4. Check the underside of the towels occasionally to be sure they haven’t become too saturated by the stain to keep absorbing it. If they have, replace them with fresh ones that have been soaked with the peroxide solution.
  5. Allow the towels and cellophane to remain in place up to eight (8) hours.
  6. Remove the towels and repeat the process for each section of floor or stain to be cleaned.         

Note: There’s no requirement of completing the entire eight hour process before starting the next section. To clean several sections or an entire room full of sections, the work can proceed in phases.

Once the floor is completely dry, it will need to be stained to match the color of the rest before a new finish is applied.

Of course, if you’re unsure of your proficiency at color matching or of any of the steps in the process, you can always let a professional flooring expert do the job.

Everything about puppies, kittens, and other baby animals is adorable.

Sure, but here’s the qualifier: “until you get them home”.

Admit it — Whatever reasons you had for bringing home a puppy or kitten, not everything about pet ownership has been sunshine and flowers. Why? Because puppies and kittens seem to have a way of eating two ounces of puppy or kitten chow and turning into two pounds of… Well, you know the rest and the “rest” doesn’t quite bring flowers to mind.

As to sunshine, if there had been more of it when you got out of bed this morning, you might have been able to see the “rest” before stepping in it. But step in it, you did.

Welcome to Day One

It won’t necessarily keep Day Two from being as eventful, but a few words about how to manage these “events’ might help.

When you’ve finished reading this, you’ll have some insight as to how to remove dog/cat urine, stains, and odor from hardwood floors.

Remove Urine Quickly

It’s best to remove urine before it’s had a chance to sit. As contact with water or a watery substance becomes prolonged, the more at risk your hardwood floor becomes. It doesn’t take long for urine, especially, to eat away at a floor’s finish.

Once this happens, the wood is apt to absorb water and become swollen. The pieces no longer fit neatly into the space they were collectively intended for. If the floorboards were installed with glue, prolonged contact with water can cause loss of adhesion. If not, your hardwood floor could still be left with an ugly stain.

It’s important to remove any type of liquid from your floor as soon as it’s discovered. This is especially important if the liquid is urine. If you can only smell urine, but don’t see any, you’ll need to hunt it down. The sooner it’s found, the better.

It helps to use a blacklight to detect urine. You can buy one of these at most pet supply retailers for about $10.

WARNING; before using any product or solution on your floor, be sure to test it first in an inconspicuous area. The following suggestions assume the urine hasn’t penetrated your hardwood floor’s finish or seal.

Remove Dog Urine and Urine Smell

  • A pair of disposable latex or vinyl gloves are recommended.
  • Bring a roll of paper towels and a plastic bag (a supermarket shopping bag will work) to the location of the first puddle.
  • Lay as many paper towels over it as necessary for the urine to be completely absorbed.
  • Gather the paper towels in a single wad so that it fits easily into the plastic bag.
  • Use more paper towels as necessary to wipe off any residual moisture. These go in the plastic bag as well.
  • Move on to the next puddle and repeat the process.
  • Set the plastic bag in a garbage receptacle located outside your home.
  • Apply a no-rinse floor cleaner that contains a disinfectant.
  • Follow the directions/recommendations of the floor cleaner’s manufacturer.

To Be Sure There’s No Lingering Urine Smell

To be sure there’s no lingering odor or that your pet doesn’t smell any ammonia that would cause it to instinctively leave a fresh calling card,

  • Sprinkle some baking soda over the area.
  • Use a broom to work some of the baking soda into the seams of the hardwood floor.
  • Allow the baking soda to remain for eight hours before sweeping it into a dustpan

Instead Of Baking Soda, Apply An Enzymatic Cleaning Solution

Enzymes consume the problem, whereas baking soda works by neutralizing it. 

However, a solution that can seep into the cracks between the boards of a hardwood floor can deliver enzymes to these places. The enzymes will work to clean any hidden urine. Thus, the cause of urine smell is eliminated.

So while enzymatic cleaning solutions are more costly than baking soda, they’re also far more effective in eliminating hidden urine and its associated smell.  

When the facts are weighed, enzymatic cleaning solutions are the best way to eliminate lingering odor and prevent stains that could form later.

Remove Cat Urine and Urine Smell

Cat on Wood Floor

Removing cat urine presents more of a challenge compared to dog urine.

Cats tend to be more private than dogs when eliminating urine. Because of this, finding a puddle isn’t always easy, despite the much stronger smell of cat urine.

If you do find one, then as with dog urine or any spill, it’s important to remove it right away.

The same process for removing fresh dog urine can also be applied in the case of cat urine.

As with dog urine, to prevent lingering smell, an enzymatic cleaning solution is your best bet.

Remove The Pet Urine Stains From The Raw Wood

If your hardwood floors have urine stains on them, it means urine has penetrated the floor’s finish or seal.

Whether it’s dog or cat urine, these stains are usually indicated by areas of the hardwood floor that have turned a color ranging from light gray to black, depending on the type of wood your floor is made of.

When uric acid comes into contact with the tannins in the wood, the chemical reaction is a sort of burning of the tannins. Hence, when wood has characteristic stains, this indicates that it has come into contact with urine.

Because a hardwood floor’s finish doesn’t contain tannins or tannic acid, we can assume that the characteristics of these urine stains mean that the urine has penetrated the hardwood floor’s finish.

Given that the floor’s finish has been compromised anyway, you might as well sand the floor down to the raw wood.

To Remove Pet Urine Stains And Odor

We know that urine odor is present whenever and wherever urine is also present. The same is true of stains. Although a urine stain won’t leave when the urine does, it’s important to eliminate all traces of uric acid to eliminate odor and to keep stains from returning.

Firstly, now is as good a time as any to dispel a myth

Somehow, there’s one myth in particular that has all but attained urban legend status. Call it a social climbing myth. For pragmatists, it still rates no better than folklore.

As with most myths, this one probably started innocently enough even if we don’t know the specifics surrounding its beginnings, but no doubt we’ve all heard the one about vinegar.

Here’s the reality; there is nothing that vinegar in combination with something else or on its own, can do so effectively or uniquely that it could possibly outweigh the potential for negative consequences associated with its application on hardwood floors. 

Don’t believe it? That’s your right. There’s no reason or rule that requires anyone to stop believing something doesn’t work until there’s proof that it doesn’t …er …right. 

Okay. So according to the wisdom of the ages, if you mix some water with vinegar, baking soda, and dish soap, you’ve got yourself a bottle of (wait for it) water, vinegar, baking soda and dish soap. THAT’S ALL. . 

Granted, the disinfecting properties of vinegar are indisputable. Vinegar is acidic and as such it’s very good at killing germs, bacteria, and even some types of mold. 

As for baking soda, it’s alkaline properties make it an effective odor eliminator.

However, alkalis and acids neutralize one another. When this happens, salt and water are the result. What purpose do these serve? It’s not like water doesn’t already have a starring role in this concoction.  

This leaves the dish soap. Dish soap is a surfactant. As such, it breaks up water’s surface tension so that the water is better able to penetrate whatever it’s applied to.

So, basically, surfactants make water wetter.  

Scientifically, this business of combining vinegar and baking soda doesn’t make a lot of sense. Why so many people swear by it is anyone’s guess, but if this recipe does work, the soap and water should take the credit.    

Besides, soap and water won’t leave your entire house smelling like you’ve spent the last few days preparing nothing but Caesar salad.

The recipe is said to be equally effective for eliminating cat urine stains and odor. 

All things being equal, the recipe could also be said to be equally ineffective.

The Best Way To Get Dog And Cat Urine Stains And Smell Out Of Hardwood Floors  

Since you’ve sanded your floor down to the raw wood, there’s no harm in sanding a little more to see if the stain is just a shallow one. If lighter colored wood begins to appear with just a few strokes of sandpaper, you’re on the right track. You won’t need to apply the following method.

Sanding Wood Floors

If the stain is too deep for a few strokes of sandpaper to take care of, this method is for you:

Hydrogen Peroxide Is The Answer

Note: This method will lighten the color of the wood surrounding the stained part and it will also cloud the finish. So work in small sections for optimum results.

If any stains are located near a wall, remove the base shoe to be sure the floor underneath isn’t also stained. Check the base shoe as well.

Once you’ve sanded your hardwood floor down to the raw wood:

  • Saturate a heavy cloth, such as felt, terry cloth or several layers of paper towels with hydrogen peroxide.
  • Place the saturated cloth over the affected area.
  • Place some clear plastic wrap over the cloth. Use something weighty to keep the wrap in place, e.g., a sealed jug of water.
  • Look underneath the cloth every hour or so to check on the stain’s progress. If the cloth becomes saturated with the dark color of the stain, replace it with freshly soaked, clean one and lay plastic over this as well.
  • Repeat this process if necessary.
  • Allow the covered, saturated cloth to sit over the stain for about eight hours. Longer if necessary.
  • Soak up any excess and be sure to dry the area as completely as possible.

This method takes time, but it does work.

There’s just one solution left to apply. Spray it onto the floor you’ve just dried.

It’s possible for urine to be located in places on your hardwood floor or nearby that you don’t know about or can’t see. Male dogs and cats lift their legs when they urinate. By the time you see a puddle, the urine on the wall could be dry. This doesn’t mean it isn’t doing damage and it doesn’t mean the smell is going anywhere. Any urine that might have made its way behind the base shoe or under the floor boards will also be troublesome later.

Given this, an enzymatic cleaning solution should be applied to these areas.

Here’s some science without all the nerdy stuff

We understand that what digestive systems eliminate isn’t truly digested or it would hardly present itself. So the trick is in causing a kind of further digestion.

Because digestion requires enzymes and bacteria, these become key ingredients in eliminating what a digestive system doesn’t fully eliminate before giving it the old heave ho.

When an enzymatic solution is applied to organic compounds, the digestive process continues. That’s right. The solution doesn’t merely neutralize or combat urine, it eats it. It continues to do this until nothing is left.

When Enzymes Are Delivered In A Water-Based Solution, They Can Eliminate Urine In Places We Can’t See 

When the urine is gone, the source of urine smell is also gone.

Enzymatic cleaning solutions are used in a variety of applications. Garbage chutes, dumpsters, grease traps, and dog kennels. They are so well-proven that standard equipment on the next vacuum you buy could very well be and enzyme-treated HEPA-Filter.[1]

Enzymatic Cleaning Solutions Eliminate Dog And Cat Urine. 

It’s really just that simple.

Enzymatic cleaning solutions also eliminate other stains and smells. Examples are vomit, feces, sweat, blood, grease, mustard, ketchup, and wine.  

Cat Urine Smells So Much Stronger Than Dog Urine — Isn’t Cat Urine Harder To Get Rid Of?

The reason cat urine smells stronger than dog urine is because it is stronger. 

That doesn’t mean it’s harder to get rid of. Cat urine is more concentrated, but cats don’t produce as much urine as dogs and they don’t urinate as frequently. With cat urine the area to be cleaned is smaller, but the process might need to be repeated several times.

Dog urine is more dilute than cat urine. But because dogs produce more urine by volume and they urinate more frequently, the area to be cleaned is significantly larger.

There’s really no difference between cleaning a very large area once, or a very small area a few times. It’s a half-dozen of one and six of the other.

Best Enzymatic Cleaners For Cleaning Pet Urine

…and don’t worry. You got this!