How To Repair Scratches In Hardwood Floors
The rich, natural beauty of hardwood floors adds elegance and warmth to almost any room. So much that it makes the appearance of a scratch, scrape, or gouge look especially out of place.
Yet, as much as you try to avoid damaging your floor, it’s almost impossible to expect everyone else to be as diligent. Kids, dogs, guests, service technicians, and furniture movers can all leave wood floors looking pretty rough.
In this article, we’ll discuss various solutions for repairing scratches in your hardwood floors as appropriate to the type and size of the scratch. You might not be able to keep accidents from happening, but in this article, we’ll also discuss ways to keep them from damaging your hardwood floors.
Please note that as always, it’s best to test remedies and products in an inconspicuous area. Be sure to follow the product manufacturer’s directions and recommendations.
Also, wear safety goggles and personal protection as appropriate including a respirator whenever working with solvents or solvent-based products.
Identify and Assess The Damage
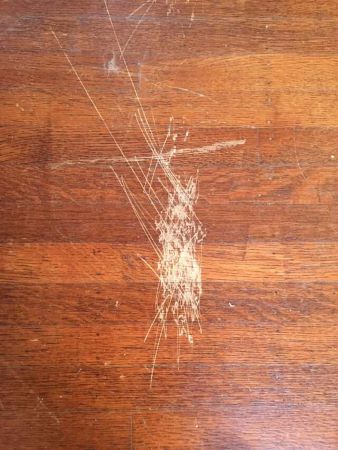
The depth and width of a scratch are important factors in determining how to proceed. If the scratch is superficial and doesn’t interfere with the wood underneath the seal, then only the seal needs to be repaired.
If your wood floors are unsealed, or the scratch is deeper than the sealing layer, the treatment processes are different. These instructions assume your hardwood floor is finished with a water-based (lacquer) seal.
Determine the extent of the damage. Are there several scratches? Scratches and gouges?
Determine the extent of the work area. If a large area of your hardwood floor needs to be repaired, consider dividing it into smaller, manageable sections.
Prepare The Work Area
This is arguably the most important step in the process of fixing scratches on wood floors. Any dirt or grime that isn’t removed will either affect adhesion or become part of the repair itself. Possibly both.
- Use a damp, lint-free cloth to clean the affected area. The area must be completely free of dust and any other debris
- To clean the scratch itself, use an old toothbrush or non-ferrous scrub pad. You can also dab some mineral spirits onto the pad to clean out any grime.
- Use a damp cloth to thoroughly remove the mineral spirits.
- With sandpaper that’s 150 grit or finer, gently sand the affected area following the direction of the wood grain.
- Use a vacuum to remove dust and debris created from sanding.
- Clean the surrounding area again with a damp, lint-free cloth.
- Wipe dry. Use a fresh lint-free cloth if the one you’re using is too damp or has debris on both sides of it
- If the scratch or gouge is damp, be sure to allow it to dry completely. Or you can aim a blow dryer at it on the cool setting for a few minutes.
Fixing scratches on hardwood floors calls for sanding at various stages throughout the process. Be sure to clean and dry as described above (steps 6-8) after every sanding. The next step should not be started before this is done.
Fixing Superficial Scratches on Hardwood Floors
For a Scratch That Hasn’t Penetrated Below The Seal,
- Continue to sand the scratch with sandpaper until it’s smooth and level with the surrounding area.
- Apply sealant. Be sure to select a (water-based) sealant in a sheen type that’s the same as the existing one. Consider using a spray-on sealant. Spraying usually makes it easier to blend the new application with the existing one.
- Allow the sealant to dry according to the manufacturer’s recommendations.

Fixing Minor Scratches on Hardwood Floors
For Scratches That Have Penetrated The Surface
- Use 150 grit or finer sandpaper to sand over the scratch. Sand in the direction of the grain using light strokes. You’ll be sanding to expose the raw wood with the least exposed wood being farthest from the scratch.
Place some wide Long Mask painter’s tape just outside the edges of the scratch. You’ll now be confining the work area to the space inside the tape.
The tape you select must be appropriate for use on finished floors and veneers. The reason certain masking tapes are referred to as “long mask” has nothing to do with the length of the tape. The term refers to the length of time the tape can stay on a surface before removal becomes difficult. Depending on the selection, these tapes can remain on a surface for 14-60 days without damaging the surface they’re applied to. Regular masking tape doesn’t offer this benefit.
If a masking tape is blue in color, it doesn’t necessarily mean that it’s a true long mask tape. Be sure to select carefully.
- Select a wood filler that matches the type of wood you’re repairing (e.g. beech, maple, pine, etc.). If the color dot on the package doesn’t match your wood, it’s okay to select a different species of wood. (Rule of thumb: Select a color that’s lighter than the field (background) color of the raw wood being repaired.) You can mix fillers of different colors (species) or you can add stain to the filler to create a match. Alternatively, you can reserve the sanding dust from this project and mix it with clear resin. But it’s doubtful the process will yield as much dust as necessary.
- Apply the wood filler onto the scratch.
- Use a plastic putty knife to scrape away excess wood filler mixture. The mixture should be level with the surrounding floor. If it sits just slightly above level, that’s okay too.
- Allow the filler to dry thoroughly according to the manufacturer’s recommendations.
- Remove the painter’s tape.
- Sand the filled scratch until the dried filler is level with the rest of the floor. Sand any area around the scratch that has filler on it. All residue around the scratch needs to be removed completely. If not, the repaired scratch will appear to have a very unheavenly halo around it when the project is complete.
- If it wasn’t mixed in with the wood filler, apply a coat of stain. For a deeper color, apply another coat after allowing the first coat to dry. Remember to always select a lighter color when in doubt. You can mix another stain into it to create a match.
- Apply the (finish) sealant and allow it to dry thoroughly.
- To replicate the grain of your floorboard, or to make it appear continuing, see “How to Create the Look of Wood Grain On Wood Filler”, below.
- If you think another coat of seal is necessary, follow the manufacturer’s recommendations. Some call for a light sanding between coats.
Fixing Deep Scratches and Gouges on Hardwood Floors
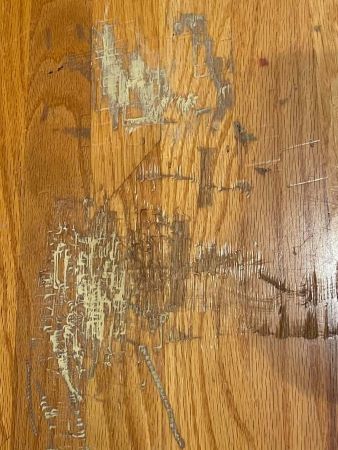
Dogs tend to scratch repeatedly when they’re anxious to get past a closed door. This is especially true of puppies. Because of this, the area in front of entry doors can be extensively damaged.
Of course, entryways are also the most likely places for deep scratches, gouges caused by improper handling of furniture and appliances. But even so, dogs seem to be the biggest offenders.
If you’re sure your dog has stopped scratching for good, and you’re done moving heavy objects, then the steps for fixing minor scratches on hardwood floors are appropriate to take.
However, if :
- The depth of the scratch or gouge on your hardwood floor so deep that the substrate is exposed or
- The length of a scratch or gouge is located within 1/4” from any edge of the floorboard or
- You’ve already repaired this particular area of a floorboard more than once
Then, you should probably consider replacing the damaged floorboard(s).
How To Prevent Scratches and Gouges on Your Hardwood Floors
- Use a good floor vacuum. Small stones and other types of hard matter can scratch hardwood floors when trapped under a moving or sliding object (e.g. a mop head or chair foot). Keeping your hardwood floor as free of dust and debris as possible will help prolong its life
- Apply felt pads to chair feet. Apply new pads before the old ones wear out.
- Apply castor cups to couch and bedframe casters. For more information, read our article on keeping furniture from sliding on wood floors.
- Crate train your dog.
- Keep your dog’s nails clipped.
- Place rugs in strategic locations (e.g. Inside the front door, under the coffee table, and in the hall)
- Switch out shoes with non-slip socks when entering from outside.
- When moving appliances or heavy furniture, save your hardwood floors and your back by Investing in an Airsled.
* Last updated on 2024-07-26 / We are using affiliate links / All images are served from the Amazon Product Advertising API.
Table of Contents
