Tag Archive for: scratches

The best laminate floors can represent quality meant to last. Thanks to their wear layer, they are not only resistant to fading from sunlight but are also resistant to wear and scratching.

However, no floor, irrespective of how expensive it is, is completely resistant to the claws of your furry friends, a fork being wielded by a toddler, or that huge bit of grit stuck beneath one of your preschooler’s sneakers.

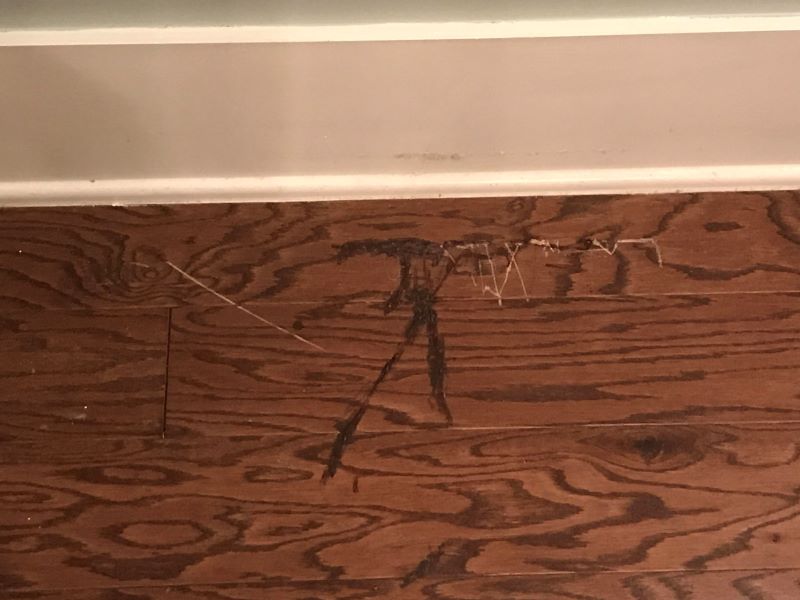
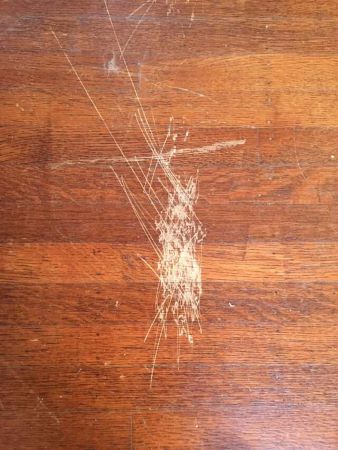
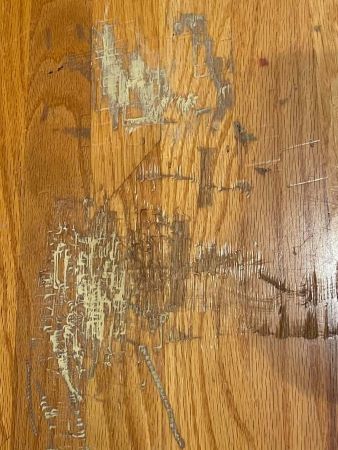
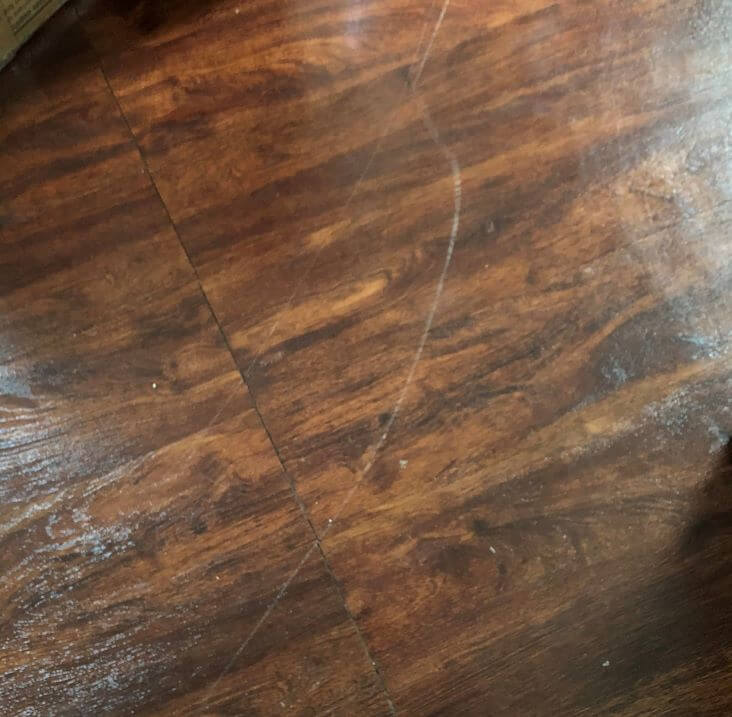
Thankfully, minor scratches on your laminate floor do not have to be permanent. Here we will show you how to remove scratches from laminate flooring using simple techniques and inexpensive items which can have your surfaces looking just the way you love them, in no time at all. 

scratch on laminate floor

How to Remove Scratches From Laminate Flooring

The first thing you will need to do before applying any of the options provided below is clean the affected area and leave it to dry.

Once your floor is ready, you will be able to use colored putty, pencils, markers, burn-in sticks, or even oil to get rid of the blemishes on your floor. The first three items are often provided as part of a laminate floor repair kit or can be purchased separately.

We have provided detailed steps on how to proceed below.

1. Burn-In Sticks

These products can be used for shallow scratches. However, they require a burn-in knife or flameless heat gun to melt them.

Once the tip starts to gleam, you will need to apply it to the scratch. You will then need to scrape off the excess with a hard flat object such as a credit card, and then buff your floor.

2. Colored Putty

This method is best used for removing scratches that are somewhat larger but do not necessitate the removal of the affected board.

You will need to apply some of the paste to the scratch you wish to conceal, using a putty knife.

You will also need to remove any excess quantities using the knife and then use a cloth to buff the floor.

3. Home Remedies

If you happen to be dealing with a particularly superficial scratch, you will be able to use some oil applied to a cloth to conceal it by rubbing it gently. Coconut or olive oil will be suitable in this instance.

4. Pencils and Markers

Options in this category are ideal for removing minor scratches. When using either option, you will need to ensure that the color is an exact match for your floor. You will then need to gently apply the pencil or the marker across the scratch until it is completely concealed. 

Once it becomes indistinguishable from the rest of the plank, you will need to stop as continuing may leave a darker trace on the board. Finally, you will need to use a clean cloth to buff the floor.

(Both pencils and markers happen to contain the same material and are effectively the same thing in different forms.

Those used for wood floors will also work perfectly on your laminate floors and you will be able to use them instead if you already have one available in the color and shade that you need.)

5. Wax Sticks

This alternative is ideal for the deepest scratches on your laminate floors. It is actually possible to mix colors when using them to obtain the perfect hue for your floor. 

Once you have gotten the color you want, you will simply need to apply the product you have purchased following the manufacturer’s instructions and wait for it to dry.

6. Replace Affected Planks

If the scratch happens to be particularly deep, you may need to remove the affected planks and replace them with alternatives from your surplus supply.

You will be able to do so by removing the base molding, working your way toward the damaged plank, and removing the other boards in front of it. You will also need to replace it with a brand new board and replace the other planks which are in excellent condition, and finally, put back the base molding.

If you happen to have glued your planks, you may need to cut out the damaged board. However, it is worth noting that a fair amount of skill will be required to do so and you may need to call on a professional to carry out the procedure.

Best Laminate Flooring Scratch Removers 

There are several products in this category that can be used to restore a uniform, even appearance to your laminate floors. Some of the most effective of them have been provided below:

1. Katzco Repair Kit 

This wax stick and marker laminate floor set comes with an impressive variety of colors that you will be able to blend to obtain the ideal hue for your floor. (The manufacturer has also provided a color matching guide to assist you in this regard.)

The markers are quick drying ensuring the process of repairing scratches will be completed as soon as possible, providing you with an even, scratch-free surface.

Just small quantities are needed, ensuring you will be able to make use of it for as long as possible, and any repaired spots will be virtually indistinguishable from the rest of the floor.

2. Fortivo Repair Kit

With this repair kit consisting of putty and stains, you will be able to take care of moderate scratches on your laminate surfaces.

Color matching support is also provided to ensure you get it perfectly right.

There are also clear tips provided by the instruction manual, which will enable you to take the right steps towards achieving a floor that seems almost brand new. 

3. Mohawk Quick Fill Burn-in Stick

This burn-in stick is nimble enough to get into small cracks once heated. It will also set impressively firmly as well once it has cooled. You will also be able to remove any surplus with ease using a credit card.

Special care should be taken to select the right color before purchasing.

How to Prevent Scratches on Laminate Flooring

Protective measures can go a long way towards preserving the sheen of your laminate floor and preventing the occurrence of scratches which can mar its elegance.

Here are a few cost-effective methods that will enable you to protect your floors:

1. Using Rugs and Runners

These features are great for enabling your laminate floors to better handle the inevitable wear and tear of high traffic areas, energetic kids, and playful pets. 

What’s more, they can also serve to enhance your decor ensuring you get to enjoy additional benefits for placing them around your home.

2. Doormats

Placing doormats outside and inside entrances to your home can protect your floors. External rugs will remove most of the grit and those used in the interior will protect your floors from any lingering debris, while also serving as a spot at which visitors and residents alike can leave their footwear.

3. Furniture Protection Pads

Placing felt furniture protection pads beneath the legs of your tables, stools, and chairs can significantly reduce the risk of scratches and dents on your laminate floors. Heavy-duty felt pads with a firm adhesive grip are highly recommended.

However, the presence of these pads does not mean that you should permit your furniture to be dragged rather than lifted.

(Furniture protection pads should also be replaced three times a year.)

Conclusion

Owing to an abundance of cost-effective remedies, scratches on laminate floors happen to be an issue that is generally easy to resolve.

Taking protective measures as an extra precaution can also go a long way in reducing the risk of such blemishes affecting the surfaces in your home, ensuring they can effectively enhance the elegance of your living space, as a result.

Guests who won’t take off their shoes, kids who love nothing better than clambering onto one piece of furniture and launching themselves off it and onto another, that armchair which actually turned out to be heavier than it looked. These are just a few reasons scuff marks can appear on your smooth gleaming wooden floors and detract from the pleasant natural touch they bring to their surroundings.

Thankfully such unsightly blemishes can often be removed. We discuss exactly how you can do so by showing you what you will need and how to remove scuff marks from wood floors and as a result, restore your surface to its original perfection.

scuff mark on hardwood floors

10 Ways to Remove Scuff Marks From Hardwood Floors

Scuff marks are actually blemishes on the finish of a hardwood floor and are by no means permanent. As a result, they can often be removed by means of simple procedures.  

The items you will need to remove them can be easily obtained and are by no means costly, ensuring you will be able to get rid of those scuff marks without needing to expend a great deal of time or effort.

However, it is worth noting that scuff marks need to be removed as soon as they appear since they are easier to get rid of when they are new.

1. Buffing With a Damp Cloth

Items you will need

  • A small quantity of water
  • Clean microfiber cloths/ a towel/ a sponge

If you have a clean microfiber cloth, towel, or sponge, all you will need to do to remove any scuff marks from your wood floor is simply dampen one of those items with a little warm water and buff the spot.

It is worth noting that although this method can be effective for new scuff marks, it may not be as efficient for those which have lasted for some time. 

2. Using  an Eraser

Items you will need

  • A pink pencil eraser/a rubber eraser
  • Clean cloth/towels
  • Some water

The first thing you will need to do is slightly wet a towel or cloth and wipe the scuff mark with it. Next, you will have to apply the eraser to the blemish. Once it has been gotten rid of, you will need to clean the floor with another dry cloth.

To achieve the best results, you will need to ensure you use a clean eraser. Alternatively, it would also be possible for you to buy rubber scuff erasers from a retailer specializing in home decoration.

However, you should be aware of the fact that frequently relying on an eraser to remove scuff marks on wood floors may eventually dull their shine.

3. Footwear With Rubber Soles

Items you will need

  • Rubber-soled shoes

If you have shoes that have rubber soles, you will also have the option of slipping them on and rubbing them over the scuff marks to remove them.

Paying close attention to the color of your soles and your floors is important since soles may actually cause discoloration on your floors if the latter happen to be lighter in color. 

4. A Tennis Ball

Items you will need

  • A brand new tennis ball
  • A knife
  • A mop stick

This method will require your cutting an ‘X’ in the ball and inserting the mop stick into it. 

Next, you will need to rub the tennis ball against the scuff mark taking care not to apply too much pressure. Following this procedure, the scuff mark should disappear. 

5. Baking Soda

Items you will need

  • Baking soda
  • A clean microfiber cloth/sponge
  • Warm water

This option is ideal for floors that have perfectly smooth surfaces and no scratches. You will have to make a paste with the baking soda and dabbing it with a clean cloth or sponge, apply it to the scuff marks.

Any residue should be wiped away with a clean damp cloth.

6. Toothpaste

Items you will need

  • White non-gel toothpaste
  • A clean microfiber cloth/sponge

Like baking soda, toothpaste happens to be one of the mildest abrasives available, it is also only suitable for smooth floors with no scratches since it may get into them and contrast with your floor especially if the surface happens to be darker in color.

Simply use a cloth to apply the toothpaste to the scuff mark and wipe it off with another clean damp cloth.

7. Applying WD40

Items you will need

  • WD40
  • Microfiber cloth

WD40 is an excellent option for light scuff marks. All you will have to do is simply spray the solvent onto the affected part of your floor and then wipe it with a microfiber cloth.

In addition to being ideal for restoring the uniform appearance of your floor, WD40 may also make it gleam when applied. However, it can also make your floor rather slippery and you will need to ensure you remove any residue.

8. Applying Mineral Spirits

Items you will need

  • Mineral spirits
  • Microfiber cloths
  • Gloves
  • Dish soap

In addition to being suitable for thinning paint, cleaning brushes, and taking care of slight scratches, mineral spirits are also ideal for cleaning scuff marks. 

All you will need to do is apply a small amount to a clean microfiber cloth and wipe the affected area. Since this product can cause slight irritation and is also flammable, you may need to wear gloves when applying it. You will also need to clean the residue away with dish soap to ensure none is left behind.

9. Steel Wool

Items you will need

  • Grade #0000 fine steel wool
  • Floor wax

This option is best used when you intend to get rid of scuff marks which are particularly difficult to remove. 

It is also worth noting that it comes with the risk of dulling the shine of the surface it is used on. A good solution to that issue is to apply a slight quantity of floor wax to the steel wool before using it to remove the scuff marks.

10. Store-Bought Products

Items you will need

  • A store-bought solution
  • A clean microfiber cloth/sponge

Store-bought products for caring for hardwood floors can also be used to remove scuff marks.An example is the Bruce Hardware Floor Cleaner which is renowned for its ability to keep hardwood floors shiny and in excellent condition without leaving any residue. All you will need to do is spray a small quantity on the damaged area before wiping it with a cloth. No additional wiping will be required afterward.

Exuberant kids running all over the house, your pet Labrador pawing at the floor in a fit of pique, mischievous teens dragging furniture across the floor to hide broken china. These are just a few factors that can cause scratches on your engineered hardwood floors.

Is it possible to get rid of those blemishes and restore that surface to its former smoothness? And how would you need to go about it?

Find out in this post where we discuss how to fix scratches in engineered hardwood floors and key factors which you will need to take into account to be able to do so.

scratches on engineered hardwood

Things You’ll Need

To make the necessary repairs, you will need the following items which have been categorized according to the kind of scratch you will need to fix.

General Items

  1. Rubbing alcohol
  2. Cotton swabs

For Faint Scratches

  1. Clean white cloth
  2. Extra plank of wood for testing
  3. Markers (clear coat or colored)
  4. Paper towels

For Moderately Sized Scratches

  1. Clean white cloth
  2. Blow dryer/heat gun
  3. Wax pencil

For Major Scratches

  1. Painter’s tape
  2. Putty knife
  3. Sanding sponge
  4. Stain pen
  5. Stainable wood filler
  6. Wipe-On Poly

Preparing the Area  

The first thing you will need to do is remove any furniture or rugs from the area you need to work on.

If you happen to be handling scratches that are spread out, you may need to empty the entire room.

Next, you will need to clean the room thoroughly with a brush or vacuum, and then a mop.

You will also need to apply rubbing alcohol to the area around it and to the scratch to completely remove any lingering debris.

You will also need to ensure you have purchased all the items you need to effect the repairs and have them with you ready for use.

How to Fix a Minor Scratch on Engineered Wood Floors

Faint Scratches

If you have to fix surface scratches on engineered hardwood floors, or a series of them, you will need to try out the marker you intend to use on a spare plank of your flooring, or in a small spot in a corner where it is unlikely to be noticed.

Doing so will enable you to select the right color and prevent you from unintentionally discoloring your hardwood floor surface.

Once you have determined the right color to use, you will need to apply it following the direction of the scratch.

You will then need to wipe the treated surface with a paper towel and leave it to dry.

light scratches on engineered wood flooring

Moderately Sized Scratches

For scratches that are somewhat wider and more prominent, you will need a wax pencil of the right color — you may be able to test it on a white cloth to ensure it is the color you need or on a spare plank that belongs to the hardwood batch in question.

Once you are satisfied that the wax pencil is a matching color, you will need to light the blow drier or heat gun to melt the wax. 

Next, you will need to apply the wax pencil to the scratch and when you are done, you will need to buff it and the surrounding areas using a clean cloth.

Varathane Scratch Repair Pen

This product is ideal for minor scratches and has been specifically designed to conceal them.

It is not only easy to apply but will fill blemishes with a varnish which will dry promptly. The Varathane Scratch Repair Pen also provides a filling that is especially durable and will not crack.

Minwax Blend-Fil Repair Pencil

Produced by a leading brand, the Minwax Blend-Fil Repair Pencil is ideal for those scratches on your floor which are slightly larger than usual. 

It comes in different colors which can be blended to obtain the hue which is just right for your floor.

In addition to being easy to apply, it is also easy to clean with mineral spirits. The result is a durable filling that can be buffed to blend in with the surrounding wooden surface.

How to Repair Major Scratches or Gouges on Engineered Hardwood

Surround the area to be treated with painter’s tape. Next, apply the wood filler as smoothly as possible to the damaged part of the floor and leave it to dry. 

Sandpaper it so that the surface becomes uniform and dabbing the stain on a piece of cloth, apply it to the wood filler.

Wipe off the excess stain and leave to dry. If the treated area seems to have a slight sheen to it, simply touch it up with a small quantity of Wipe-On Poly and rub it in vigorously to create a more uniform appearance.

Minwax Stainable Wood Filler

This product has been designed for both convenience and efficiency. The Minwax Stainable Wood Filler is not only fast-drying but is also easy to sand. 

It is also suitable for both water and oil-based stains and is suitable for indoor and outdoor use.

Sanding Engineered Wood Floors

This process is considered a suitable option for repairing scratches that tend to be rather numerous and widespread.

Unlike solid hardwood floors, engineered hardwood floors are often considered unsuitable for sanding.

And while this may be true in certain respects, it does not necessarily apply in every circumstance. The main qualities which will make surfaces in this category suitable or unsuitable for sanding include:

The Thickness of the Veneer

Unlike solid hardwood floor planks which consist of hardwood in their entirety, only the topmost layer — the veneer or wear layer — of engineered hardwood floor planks are made from the material. It is this difference that makes it possible to sand down surfaces consisting of the former several times.

However certain engineered hardwood floors have particularly thick veneers, i.e., above 3mm in thickness. Those in this category may be sanded.

Hand Scraping

Certain engineered hardwood floors have been treated to make them appear distressed and older, to enhance the character they provide to a home. 

This process is referred to as hand scrapping and it renders engineered hardwood floors less suitable for sanding. Certain experts believe that it may only be possible to sand floors that have been hand scraped once.

Preventing Scratches on Engineered Wood Floors

Protecting your hardwood surfaces from scratches is of paramount importance since they can detract from the beauty of your home if left unattended and if allowed to grow in number.

The following steps will enable you to protect your hardwood floors from scratches and preserve their charm for longer.

Establish a No Footwear Policy

Shoes can often bring in grit and small pebbles trapped beneath their soles which in turn can cause scratches on your floor.

High heels can also cause dents on the surface due to the pressure they apply. The risks posed by footwear means that disallowing them in rooms with hardwood floors will play a role in significantly reducing the risks of scratches and dents to them.

Make Use of Indoor and Outdoor Mats

It may not always be possible to enforce a footwear ban and that is where mats come in.

They serve to catch any lingering grit or pebbles which happen to be sticking to soles, or which might even have snuck into shoes or sandals and stuck to socks.

A rough-textured outdoor mat is ideal for visitors to wipe their footwear on and would see most of the grit removed, and a smoother textured indoor mat can also serve to remove grains of sand that make it past the outdoor mat.

Make Use of Furniture Protectors

The legs of sofas, tables, stools, and chairs can cause damage to hardwood floors, especially when they happen to be particularly heavy.

Felt furniture protectors can help prevent your dining or sofa set from causing scratches and dents on your floors, and are highly recommended as a result.

We recommend checking out our article on keeping furniture from sliding on hardwood floors.

Sweep and Vacuum Often

Sweeping or vacuuming frequently will prevent the accumulation of dirt, sand, and dust which can cause scratches on engineered hardwood floors.

Brooms, brushes, and vacuum cleaners should have soft bristles to prevent them from causing scratches themselves on your floors.

It is also important to lift furniture when sweeping or vacuuming to prevent the accumulation of debris beneath their legs as this can also constitute a scratching hazard.

Take Care of Pets’ Paws

Your pets can also play a role in damaging your floors especially if they happen to be particularly active and like to play outdoors and paw at surfaces.

Ensuring you keep their claws carefully trimmed and clean their paws once they come in from a run in the garden or a walk will reduce the risk of them scratching your engineered hardwood floors.

Clean Up Any Accidents Instantly

If any china or crystal is broken, you must ensure you clean it up instantly and take special care to sweep up any broken shards. Failing to do so will place your floor at risk of getting scratched especially in the event of anyone stepping on one of the broken pieces (and will also place residents at risk of injury).

Make Use of Rugs and Runners

Placing rugs at strategic spots such as dining and coffee tables can prevent or at least slow down the wear and tear of your floors and even reduce the risk of their sustaining scratches. 

Rugs can also be used for covering scratches on engineered hardwood floors. 

Runners are also an excellent choice for protecting high traffic areas and can reduce the likelihood of your needing to repair any scratches on your hardwood floors.

The rich, natural beauty of hardwood floors adds elegance and warmth to almost any room. So much that it makes the appearance of a scratch, scrape, or gouge look especially out of place. 

Yet, as much as you try to avoid damaging your floor, it’s almost impossible to expect everyone else to be as diligent. Kids, dogs, guests, service technicians, and furniture movers can all leave wood floors looking pretty rough.  

In this article, we’ll discuss various solutions for repairing scratches in your hardwood floors as appropriate to the type and size of the scratch. You might not be able to keep accidents from happening, but in this article, we’ll also discuss ways to keep them from damaging your hardwood floors. 

Please note that as always, it’s best to test remedies and products in an inconspicuous area. Be sure to follow the product manufacturer’s directions and recommendations. 

Also, wear safety goggles and personal protection as appropriate including a respirator whenever working with solvents or solvent-based products. 

Identify and Assess The Damage

Major scratches in wood flooring

The depth and width of a scratch are important factors in determining how to proceed. If the scratch is superficial and doesn’t interfere with the wood underneath the seal, then only the seal needs to be repaired. 

If your wood floors are unsealed, or the scratch is deeper than the sealing layer, the treatment processes are different. These instructions assume your hardwood floor is finished with a water-based (lacquer) seal. 

Determine the extent of the damage. Are there several scratches? Scratches and gouges? 

Determine the extent of the work area. If a large area of your hardwood floor needs to be repaired, consider dividing it into smaller, manageable sections. 

Prepare The Work Area

This is arguably the most important step in the process of fixing scratches on wood floors. Any dirt or grime that isn’t removed will either affect adhesion or become part of the repair itself. Possibly both. 

  1. Use a damp, lint-free cloth to clean the affected area. The area must be completely free of dust and any other debris
  2. To clean the scratch itself, use an old toothbrush or non-ferrous scrub pad. You can also dab some mineral spirits onto the pad to clean out any grime. 
  3. Use a damp cloth to thoroughly remove the mineral spirits.
  4. With sandpaper that’s 150 grit or finer, gently sand the affected area following the direction of the wood grain. 
  5. Use a vacuum to remove dust and debris created from sanding. 
  6. Clean the surrounding area again with a damp, lint-free cloth. 
  7. Wipe dry. Use a fresh lint-free cloth if the one you’re using is too damp or has debris on both sides of it 
  8. If the scratch or gouge is damp, be sure to allow it to dry completely. Or you can aim a blow dryer at it on the cool setting for a few minutes. 

Fixing scratches on hardwood floors calls for sanding at various stages throughout the process. Be sure to clean and dry as described above (steps 6-8) after every sanding. The next step should not be started before this is done.   

Fixing Superficial Scratches on Hardwood Floors

For a Scratch That Hasn’t Penetrated Below The Seal, 

  1. Continue to sand the scratch with sandpaper until it’s smooth and level with the surrounding area.
  2. Apply sealant. Be sure to select a (water-based) sealant in a sheen type that’s the same as the existing one. Consider using a spray-on sealant. Spraying usually makes it easier to blend the new application with the existing one. 
  3. Allow the sealant to dry according to the manufacturer’s recommendations.
Minor scratches in wood flooring

Fixing Minor Scratches on Hardwood Floors

For Scratches That Have Penetrated The Surface 

  1. Use 150 grit or finer sandpaper to sand over the scratch. Sand in the direction of the grain using light strokes. You’ll be sanding to expose the raw wood with the least exposed wood being farthest from the scratch. 
  2. Place some wide Long Mask painter’s tape just outside the edges of the scratch. You’ll now be confining the work area to the space inside the tape.

    The tape you select must be appropriate for use on finished floors and veneers. The reason certain masking tapes are referred to as “long mask” has nothing to do with the length of the tape. The term refers to the length of time the tape can stay on a surface before removal becomes difficult. Depending on the selection, these tapes can remain on a surface for 14-60 days without damaging the surface they’re applied to. Regular masking tape doesn’t offer this benefit.

    If a masking tape is blue in color, it doesn’t necessarily mean that it’s a true long mask tape. Be sure to select carefully.

  1. Select a wood filler that matches the type of wood you’re repairing (e.g. beech, maple, pine, etc.). If the color dot on the package doesn’t match your wood, it’s okay to select a different species of wood. (Rule of thumb: Select a color that’s lighter than the field (background) color of the raw wood being repaired.) You can mix fillers of different colors (species) or you can add stain to the filler to create a match. Alternatively, you can reserve the sanding dust from this project and mix it with clear resin. But it’s doubtful the process will yield as much dust as necessary. 
  2. Apply the wood filler onto the scratch.
  3. Use a plastic putty knife to scrape away excess wood filler mixture. The mixture should be level with the surrounding floor. If it sits just slightly above level, that’s okay too.  
  4. Allow the filler to dry thoroughly according to the manufacturer’s recommendations. 
  5. Remove the painter’s tape. 
  6. Sand the filled scratch until the dried filler is level with the rest of the floor. Sand any area around the scratch that has filler on it. All residue around the scratch needs to be removed completely. If not, the repaired scratch will appear to have a very unheavenly halo around it when the project is complete. 
  7. If it wasn’t mixed in with the wood filler, apply a coat of stain. For a deeper color, apply another coat after allowing the first coat to dry. Remember to always select a lighter color when in doubt. You can mix another stain into it to create a match. 
  8. Apply the (finish) sealant and allow it to dry thoroughly. 
  9. To replicate the grain of your floorboard, or to make it appear continuing, see “How to Create the Look of Wood Grain On Wood Filler”, below.
  10. If you think another coat of seal is necessary, follow the manufacturer’s recommendations. Some call for a light sanding between coats. 

Fixing Deep Scratches and Gouges on Hardwood Floors

Major scratches & gouges in wood floors

Dogs tend to scratch repeatedly when they’re anxious to get past a closed door. This is especially true of puppies. Because of this, the area in front of entry doors can be extensively damaged. 

Of course, entryways are also the most likely places for deep scratches, gouges caused by improper handling of furniture and appliances. But even so, dogs seem to be the biggest offenders.  

If you’re sure your dog has stopped scratching for good, and you’re done moving heavy objects, then the steps for fixing minor scratches on hardwood floors are appropriate to take.

However, if :

  • The depth of the scratch or gouge on your hardwood floor so deep that the substrate is exposed or 
  • The length of a scratch or gouge is located within 1/4” from any edge of the floorboard or 
  • You’ve already repaired this particular area of a floorboard more than once 

Then, you should probably consider replacing the damaged floorboard(s). 

How To Prevent Scratches and Gouges on Your Hardwood Floors

  • Use a good floor vacuum. Small stones and other types of hard matter can scratch hardwood floors when trapped under a moving or sliding object (e.g. a mop head or chair foot). Keeping your hardwood floor as free of dust and debris as possible will help  prolong its life 
  • Apply felt pads to chair feet. Apply new pads before the old ones wear out. 
  • Apply castor cups to couch and bedframe casters. For more information, read our article on keeping furniture from sliding on wood floors.
  • Crate train your dog.
  • Keep your dog’s nails clipped.
  • Place rugs in strategic locations (e.g. Inside the front door, under the coffee table, and in the hall)
  • Switch out shoes with non-slip socks when entering from outside.
  • When moving appliances or heavy furniture, save your hardwood floors and your back by Investing in an Airsled.