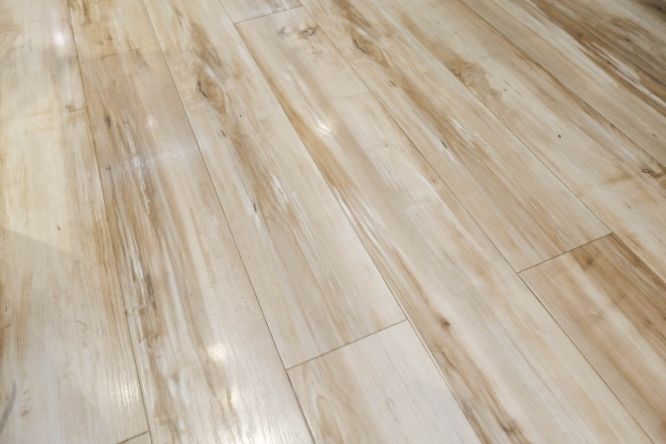
For any homeowner, mold is one of the scariest household problems you can find. Unfortunately, it can grow easily with just a little moisture, organic material, and time. Hardwood flooring is one material that is prone to mold growth, especially in a bathroom or kitchen where water is present.

Mold can be extremely dangerous to people. For that reason, large mold problems require professional removal. If you discover mold that covers a large area or appears to be growing on studs, subfloor, or other structural elements of your home, call a professional.

If you just have a little mold on the surface, such as from a short-term leak or spill, you can go ahead and correct it yourself by following this guide. Protect yourself with the necessary gloves and a breathing mask.

After you remove the mold on your hardwood floors, you should always make sure to fix whatever allowed the mold to grow. Clean the area more often and fix any areas where water regularly leaks or pools.

Is Mold on Hardwood Floors Dangerous?

Not all types of mold are dangerous, but some definitely can be. Black mold can weaken neurological function and cause serious damage to the heart and lungs. Eventually, this can lead to death. 

Mold can get into your lungs over time if you do not clean it up or quickly if you disturb the mold without a protective mask.

If conditions are wet enough, the mold can also eat into the walls and subfloor, weakening the structure of your house.

For these reasons, you need to protect yourself by cleaning bathrooms, kitchens, and other “wet” areas of your home regularly and checking plumbing occasionally for leaks or other mold-growing problems.

If you have discovered mold on your hardwood floors, make sure not to walk on or touch the mold in any way. This will disturb the mold and release it into the air.

Leave the moldy area alone until you are prepared with a certified mask (such as an N-95) or a filtered respirator. You should also wear disposable gloves when you remove the mold and throw the gloves away when you are done.

Signs of Mold Under a Hardwood Floor

If your wood floor has just a little mold growing on top, you can clean it and keep using it. But if the mold has penetrated deep into the flooring and subflooring, you have a much bigger problem on your hands.

First, inspect the wood for serious warping. If there are larger-than-usual gaps between planks or if the boards are curling up at the edges (cupping), you have significant water damage.

You can find out how deep the mold goes by checking to see if the wood is still solid. Take a flat screwdriver and try to press it into a board in the moldy area. 

If you can’t press the screwdriver into the wood, it is probably still dry and clean below the surface. But if the wood is soft like a sponge and you can push the screwdriver deep into it, the wood is bad. Water and mold have penetrated deep into the floor.

If your floor fails the screwdriver test, you should call a flooring or cleanup professional to evaluate the leak and see how deep the moisture has spread.

Deep seeping moisture with mold will probably require that you completely replace the flooring in the area, and it may even be necessary to replace the subfloor materials.

How to Remove Mold on Hardwood Floors

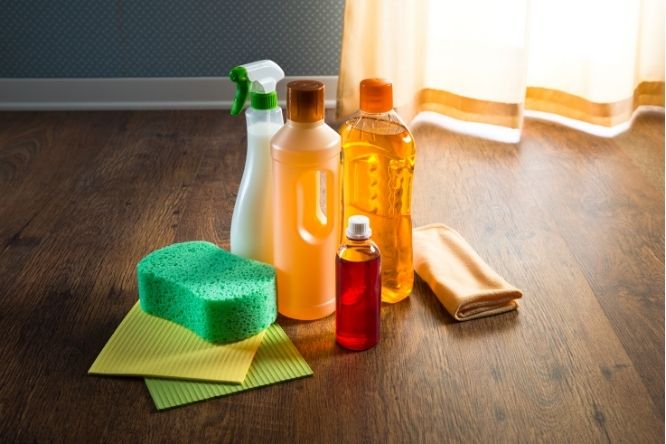
Tools and Materials You Will Need

  • Disposable rags, sponges, or paper towels
  • Rubber gloves
  • An N-95 mask or another filtering mask (not just a simple cloth or surgical mask)
  • Water and a spray bottle
  • Dish soap
  • Bleach (optional)
  • Vacuum cleaner with a HEPA filter (optional)

Step 1: Personal Mold Safety

At all times when cleaning mold, wear a filtering mask and gloves. Do not touch the mold or moldy materials with your skin. The spores may be too small for you to see and can make you sick or spread to other areas.

Throw away any gloves, paper towels, or rags that you use to touch the mold. Do not wash and reuse them. You should only need one or two rags to remove a small spot of mold.

Bring a garbage can near the spot you are cleaning so you do not have to carry your used rags through the house.

Ventilate the area without making it too windy. Open windows in the room and place a fan nearby — just don’t point the fan directly at the moldy area because it will blow mold spores around the room. When you are cleaning the mold, you can use the fan to blow the room out.

Always wash your hands with soap and hot water after working near mold.

Step 2: Use Soap and Water to Remove the Mold

Mix up a solution of dish soap and hot water. Rather than using a huge bucket that could spill on the hardwood floor, mix it in a spray bottle. This will work better for cleaning the mold anyway.

Dish soap will not kill the mold, but it is a good first step because it can remove most of the mold and cannot damage the finish on your hardwood floor.

Spray the dish soap solution on the moldy area until it is covered. Let it sit for 1 minute and wipe it off with a rag. Press down firmly and try to wipe up all of the mold in one swipe.

Dispose of the rag with mold on it immediately. Repeat if necessary.

Step 3: Kill Mold With Bleach (optional)

Bleach has a powerful sanitizing ability and can kill mold in just a few minutes. However, it has some dangers:

  1. Bleach puts off harsh fumes, so you need good ventilation in the room
  2. Bleach can only kill the mold on the surface of the wood, not what is growing below
  3. Bleach can damage the finish on your hardwood floor

Because of these risks, you might want to avoid using bleach on your floor. It depends on the finish you have on your floor and how deep the mold appears to be growing. You can test an inconspicuous spot to see if it hurts your floor’s finish.

If you decide to use bleach, water it down in a spray bottle. Use only 1 part bleach to 10 parts water (you can also use a bleach-based cleaner such as Clorox spray – just read the bottle to see if it is safe for hardwood floors).

Spray the bleach to completely cover the mold. It will start killing the mold on contact, so you do not need to let it sit for long.

Leave the bleach on the mold for no more than 5 minutes (you can wipe it off instantly if you are worried about your hardwood floor’s finish). Swipe it up with a rag and throw it away.

Note: You may have read that white vinegar can also kill mold. Some people prefer vinegar because it is natural — but vinegar is bad for hardwood floors. Vinegar takes 60 minutes to kill mold, which is way too long to leave liquid sitting on hardwood floors. It can damage the finish and seep into the wood, causing bigger problems. Skip the vinegar for your hardwood floor and use a bleach solution that kills mold faster.

Step 4: Clean Up

Dry any spills you may have made while cleaning. Throw away any rags or paper towels that touched the mold. Take out the trash.

If you have a vacuum cleaner that is equipped with a HEPA filter, you can vacuum the room to remove any mold spores.

A regular vacuum filter will not catch the spores but rather spread them around the room. So, if you don’t have a HEPA vacuum, just mop the floor with a mild cleaning solution.

Throw away the gloves and mask you wore while cleaning and wash your hands thoroughly with soap.

Preventing Mold on Hardwood Floors

The two best ways to prevent mold are to clean regularly and to keep moisture from getting to the wood in your house.

Wood floors should be mopped with a light cleaning solution designed for hardwood. This can help to remove the first mold cells before they grow and eat into the hardwood floor.

Make sure to wring the mop out so you do not put too much water on the wood. It’s a good idea to dry the floor with a microfiber mop afterward.

Mopping every few weeks will go a long way to prevent mold growth.

There are several things you can do to keep moisture low on your hardwood floors:

  • Always dry up spills or excess mop water right away
  • Inspect plumbing occasionally and fix any leaks
  • Also inspect windows and doors and repair leaky seals
  • Control splashing in common areas with rugs, a shower curtain, etc.
  • Seal crawl spaces and sump pump basins that can humidify your house

Any large amount of water can cause mold. Even small amounts of moisture can let mold grow if the area is frequently wet. You can buy a wood moisture sensor if you are concerned about humidity affecting the wood in your house. This machine will give you a percentage of moisture content for the wood to show whether you are in danger of growing mold.

In terms of interior decor, hardwood floors have long been considered ideal for bestowing an ambiance of sophistication, or rustic appeal on homes, schools, or workspaces.

However, they also have very specific maintenance requirements such as waxing. This procedure is ideal for finished and unfinished hardwood floors and can restore their natural sheen. Waxing hardwood surfaces can also enhance their longevity and also protect them from getting stained frequently.

However, over time, the wax used tends to build up. When this happens, your floor will no longer display a smooth polished appearance making it necessary for the excess wax to be removed.

This article takes a close look at this issue and how to resolve it. We discuss how to remove wax buildup from hardwood floors, the best products for doing so, and what products you must avoid.

Why Should You Remove Wax Buildup on Wood Floors?

1. The Accumulation of Trapped Dirt and Blurriness

As wax accumulates, the use of indoor heaters can melt it and cause debris such as hair, pet fur, or dirt to sink into it. It can also result in scuff marks being made in it as well.

Wax buildup will make your floors look blurred and cloudy in addition to trapping particles.

2. The Presence of Scratches

Over time, your hardwood floor will get scratched, either by your pets or simply by grit that clings to the soles of feet, stockings, and footwear. To refinish it, you will need to get rid of the overlying layer of accumulated wax covering it.

3. Slight Water Damage

Occasionally, water damage may cause a whitish discoloration on certain parts of your floor. This is caused by the moisture penetrating the wax and part of the process of remedying the damage will involve removing any wax on the floor.

Checking for Wax Buildup

If you have noticed any stains, scratches, or even general dullness on your floor or simply wish to refinish it, you will need to find out if there is a layer of wax you need to get rid of first.

You can do so by using the following:

  • Sandpaper: Lightly pass sandpaper across the floor. If there is any wax present, it will ball up.
  • Mineral Spirits: Apply a small amount (no more than a few drops) of mineral spirits to a cloth. Next, wipe the floor with it. The presence of a brownish, yellowish, or even whitish smear means that there is wax on your floor.
  • Water: Simply place a drop of water on your floor and wait for a minute. The appearance of a white spot beneath the drop within that timeframe will indicate the presence of wax.

The Best Wood Floor Wax Removers 

Mineral Spirits

Also referred to as turpentine substitute, and white spirit, this petroleum-derived solvent is cheap, mild smelling, and low in VOCs (volatile organic compounds). It is also capable of dissolving the wax on your floor enabling you to remove it from the surface completely.

Although mineral spirits may affect certain surfaces adversely, it does not do so to wood and is therefore suitable for hardwood floors as a result. However, the solvent is unsuitable for no-wax surfaces since it will strip them of their gleaming finish, leaving them with a matte, dull appearance.

It is also flammable and should be handled with caution.

Sunnyside Corporation’s Mineral Spirits is an excellent example of mineral spirits which can be used for this purpose. This particular product has been produced by the Sunnyside brand which has been manufacturing potent solvents for over a century.

In addition to being low odor and suitable for use on wooden floors, it is also ideal for cleaning paint brushes, rollers and sprayers, and degreasing mechanical components.

Products Which Are Unsuitable for Removing Wax Buildup

  • Acetone: A colorless, flammable, and volatile fluid, acetone is also known to be a highly effective solvent. It is capable of dissolving grease and is also capable of stripping wax from hardwood floors. However, acetone is unsuitable for this purpose because it may not only damage the finish of your floors but will also discolor the wood as well.
  • Commercial Wax Removers: Special care must be taken when selecting products in this category since the wrong choice can turn out to be particularly harsh on your hardwood surfaces. As a result, you will need to ensure that the product you select has specifically been manufactured for hardwood floors and is approved by your manufacturer. 
  • Homemade Ammonia/Vinegar Solutions: Hot water solutions of ammonia and vinegar are highly popular homemade remedies for stripping floor wax. And while they may be efficient, it is worth noting that the extensive exposure of your floor to hot water will place it at risk of water damage. 

How to Remove Wax Buildup on Hardwood Floors

Things You’ll Need

  • A soft-bristled brush
  • Absorbent cloths
  • Mineral spirits
  • Steel wool
  • Rubber gloves
  • A face mask
  • Knee pads

1. Prepare the Room

Empty the room of all furniture and open every window and door. Using a soft-bristled brush or broom, sweep the floor clean of dust and debris.

2. Remove the Surplus Wax

This process is especially time-consuming and effort-intensive. You will need to apply the mineral spirits to the floor using a spray bottle and scrub it with the steel wool.

If your floor comes with bevels, you will also need to scrape them manually to get rid of the wax in the crevices.

As the wax is loosened you will need to wipe it off the surface and taking another cloth, wipe the floor clean.

3. Clean Any Left Over Residue 

Once you have finished cleaning each section, you will need to clean the floor with an additional application of mineral spirits to new clean cloths. This last step will ensure that no wax residue has been left behind.

Certain experts recommend carrying out this step twice. To ensure you have been thorough in removing all the wax, simply apply mineral spirits to another clean cloth and go over the section you have cleaned. 

The absence of any residue on the cloth will mean that every trace of wax has been removed. However, the presence of any coloration as noted above will mean that you will need to go over that part of the surface with a cloth and mineral spirits, once more.

What You Can Do Following Wax Buildup Removal 

Now, you know how to remove wax from hardwood floors. But what else will you be able to do following the procedure?

1. Apply a Fresh Coat of Wax

To protect your hardwood flooring from stains and conceal slight blemishes, you will have the option of applying a fresh coat of paste or liquid wax. You can take a look at our article on how to wax hardwood floors – it covers the procedure in detail and looks at the best products for your hardwood floors.

waxing hardwood floors

2. Repair Slight Water Damage

If you intend to get rid of white spots on your floor caused by water as referenced above, you will need to sand the affected area once you have removed the wax, and then wipe it repeatedly with an oxalic acid crystal solution until the stain is eliminated. Once you have done so you will be able to stain or seal it before refinishing it.

3. Eliminate Scratches and Scarring.

If your hardwood floor happens to be excessively damaged by scratches or scarring, you will be able to sand it. And once you are through you will be able to apply a brand new finish of your choice, restoring your floor’s original classic appeal.

Unless you’ve just returned from spending the past year and a half on another planet, you don’t need this or any other article to explain or emphasize the importance of taking precautions against the transmission of disease. The COVID-19 pandemic has taught us a lot.

The past forty years have given rise to infectious diseases that had previously been unheard of. But COVID-19 is the virus that changed the way the whole world thinks about disinfection. It changed our entire approach. For some of us, COVID-19 even became a partisan issue.

In this article, we’ll discuss combating the COVID-19 virus and other pathogens on a wood floor. The article will also answer some frequently asked questions about how to do this, and what to expect.

The following assumes that your hardwood floors are finished with a urethane type of sealant. As always, follow the manufacturer’s recommendations and directions.

Is There A Way To Disinfect Hardwood Floors Without Using a Bucket and Without Rinsing?

We’re not terribly high on the mop and bucket idea. This is mostly because we understand how damaging it can be to drench hardwood or expose it to more moisture than absolutely necessary. Mopping calls for this as part of the process and rinsing calls for the process to be repeated.

There is indeed an easier way to disinfect hardwood floors.

In fact, there are a few easier ways. Let’s discuss what you should know.

Sanitizing vs Disinfecting A Wood Floor: What’s the Difference?

According to The Centers For Disease Control and Prevention (CDC):

  • Cleaning is a process where soap and water is used to remove germs, dirt and impurities. By reducing the number of germs, cleaning reduces the risk of infection.
  • Disinfecting uses chemicals to kill germs. Disinfecting doesn’t necessarily target dirt and impurities. By killing germs, disinfection reduces the risk of infection.
  • Sanitizing lowers the number of germs on surfaces or objects to a safe level, as judged by public health standards or requirements. This process works by either cleaning OR disinfecting to lower the risk of spreading infection.

With these facts in mind, cleaning should precede disinfecting.

According to the U.S. Environmental Protection Agency:

EPA expects all products on List N (EPA’s list of approved disinfectants) to kill the coronavirus SARS-CoV-2 (COVID-​19) when used according to the label directions.

This means that no matter what organisms it kills, in order for a product to call itself a disinfectant, organisms that are COVID-19 pathogens must be included in the scope.

Using an Antibacterial Wood Floor Cleaner to Disinfect Hardwood Floors

cleaning products for hardwood floors

Antibacterials focus on reducing the number of bacteria whereas the focus of disinfectants is broader. Disinfectants (antimicrobials) reduce the number of bacteria, viruses, fungi, and certain types of insect vermin. All products labeled “disinfectant” kill COVID-19 microbes.

While many products reduce the number of many types of microbes, and meet the standards for categorization as a disinfectant by the EPA, some manufacturers choose to label their products as antibacterials instead. We can only assume that such decisions are driven by marketing strategies. But depending on the active ingredients, products labeled “antibacterial” can be used to disinfect. Product labels are key.

Although they seem to be few and far in between, there are a few disinfecting floor cleaners available on the market. Rejuvenate® makes an antibacterial wood floor cleaning product that’s also approved as a disinfectant by the EPA.

Rejuvenate® antibacterial wood floor cleaner still needs to be rinsed. But for bargain hunters and for those who prefer not to work any harder or longer than necessary, the term, “two-fer” (two for one/two in one) applies. For those who consider themselves to be devotees of both, you’ve hit paydirt.

Should You Use Bleach To Disinfect Hardwood Floors?

To be clear, bleach is a disinfectant. Clorox is the most popular brand of bleach.

Yet, Clorox manufactures disinfecting wet mopping cloths that do not contain bleach. Clorox also recommends its non-bleach wood floor cleaning product over bleach for cleaning wood floors. These two facts should tell you everything you need to know about using bleach to disinfect hardwood floors.

Undiluted bleach should never be applied to a wood floor unless removing the finish and/or the color is the goal. Applying a dilute form offers no relief from rinsing. So, let’s cross bleach off the list..

Should You Use A Steam Mop To Disinfect Hardwood Floors?

Try thinking of it this way; If it isn’t safe to transfer a product’s use as directed to the palm of your hand for a full five seconds, it probably isn’t a good idea to use on hardwood floors. Does that seem extreme? Then, check out your wood floor manufacturers’ recommendations. If the manufacturer recommends the use of a steam mop to disinfect your hardwood floors, raise your hand.

See what I mean?

Of course, the reason for not applying steam to hardwood floors might not be quite the same as the reason for not applying it to your skin. But by sticking with this rule of thumb, you’ll be giving your wood floor the gentle treatment it requires.

As a cleaning solution, antibacterial, antiviral, antimicrobial, boiled water, and steam are equally effective options. But applying a high-temperature solution to a wood floor will do more harm than good.

For floors installed with glue (floor adhesive), applying extremely hot water or steam is likely to cause the glue to lose its adhesive properties,

For wood floors installed with nails, a boiling hot solution would cause both the nails as well as the floorboards to expand considerably. The nails are more apt to rust and stain your hardwood floors before ultimately causing the floorboards to become less securely fastened.

This isn’t to say that steam can be applied to a floating wood floor without consequence either.

As it is, a hardwood floor’s exposure to moisture should be limited. Where wood floors are warped or have dark stains on them, moisture is the culprit. To expose a wood floor to moist heat or to do so on a routine basis doesn’t align with the effort that should be undertaken to limit the floor’s contact with moisture.

How to Disinfect Hardwood Floors without Damaging Them

Despite the best intentions, and sometimes, because of them, wood floors can be damaged. But this doesn’t need to happen. As long as exposure to water, harsh chemicals, and extreme measures is limited, the risk of damage is minimal. Hence, the rule of thumb as discussed earlier.

How to Disinfect Hardwood Floors Naturally

The terms “natural”, “naturally”, and “nature” conjure ethereal images of flowered meadows where the sun shines and breezes blow gently.

They might not be as pleasant as the scenario above, but chemicals, chemical bi-products, and chemical reactions are also natural.

The active ingredients usually contained in an EPA registered disinfectant are natural in that they are environmentally safe.

Of course, it would be nice to find a disinfectant that’s safe to use around children and pets as well. An inexpensive supermarket or drugstore product that doesn’t need to be rinsed would also be helpful.

There’s only one product that ticks all the boxes – hydrogen peroxide. Where the previously discussed “two fer” is analogous to paydirt, hydrogen peroxide is the motherlode.

Hydrogen peroxide is usually sold in concentrations of 3% or 6%. You can use the 3% concentration to disinfect your hardwood floor without first diluting it.

Hydrogen peroxide is sold in dark brown colored or opaque containers to protect it from light. Prolonged exposure to light and temperatures above 80F can cause the solution to become inert. It’s best used within a couple of months of purchase as it will expire in six months and will lose its effectiveness.

Use Hydrogen Peroxide To Disinfect Hardwood Floors

Transfer hydrogen peroxide from its original container to a clean spray bottle. Be sure to set the original aside so that you can transfer any remaining peroxide back into it when you’re done disinfecting your floors.

If you have a wet mop with a built-in cleaning solution container, you can bypass the spray bottle and pour hydrogen peroxide directly into the container instead.

You’ll also need several clean microfiber sleeves for your flat mop or untreated cleaning cloths for your Swiffer-style mop.

Working in sections:

  • Spray the hydrogen peroxide directly onto your hardwood floor.
  • Allow the floor to remain wet for 30-40 seconds.
  • Use a dry, microfiber mop head to wipe the peroxide from the floor.
  • Continue wiping the floor until it’s completely dry. Doing this will remove any haze that might remain. If the mop head becomes saturated, replace it with a clean, dry one.

Many people report that using hydrogen peroxide to clean and disinfect their hardwood floors also left them looking almost new. A pleasant side-effect.

How To Disinfect Hardwood Floors Without Lifting a Finger

Although you’ll still need to vacuum your wood floor to remove dust and other particles, the number of pathogens and insect vermin are very effectively reduced with the application of ultraviolet light. Many ultraviolet light fixtures designed with disinfection and elimination of insect vermin in mind are available for household use at reasonable prices.

Of course, because ultraviolet light isn’t the type of disinfecting medium evaluated by the EPA, it is neither approved nor rejected for categorization as a disinfectant. But ultraviolet lamps are frequently used in patient facilities where pathogens can be especially problematic if not immediately eliminated.

How To Prevent Pathogens From Contaminating Your Hardwood Floors

For the vast majority of the world population, it is customary to remove shoes before or immediately upon entering a home. Why this isn’t customary in the U.S. is not certain. Given the enormity of our science and technology community and all that we know about the spread of disease, there’s no excuse for not adopting this custom.

Shoes are dirty and should not be worn inside the home any more than they should be worn to bed. When shoes are worn outside, they pick up organisms that are present on sidewalks, streets, and gutters.

Naturally, these organisms will be transported from the street to locations inside the home if the shoes that transport them aren’t first removed. Removal of shoes also keeps dirt, mud, and sand from being tracked in and scratching your hardwood floors.

Ultraviolet light units are available in the form of hand-held wands. If shoes must be worn inside, passing a wand over the uppers and soles couldn’t hurt.